
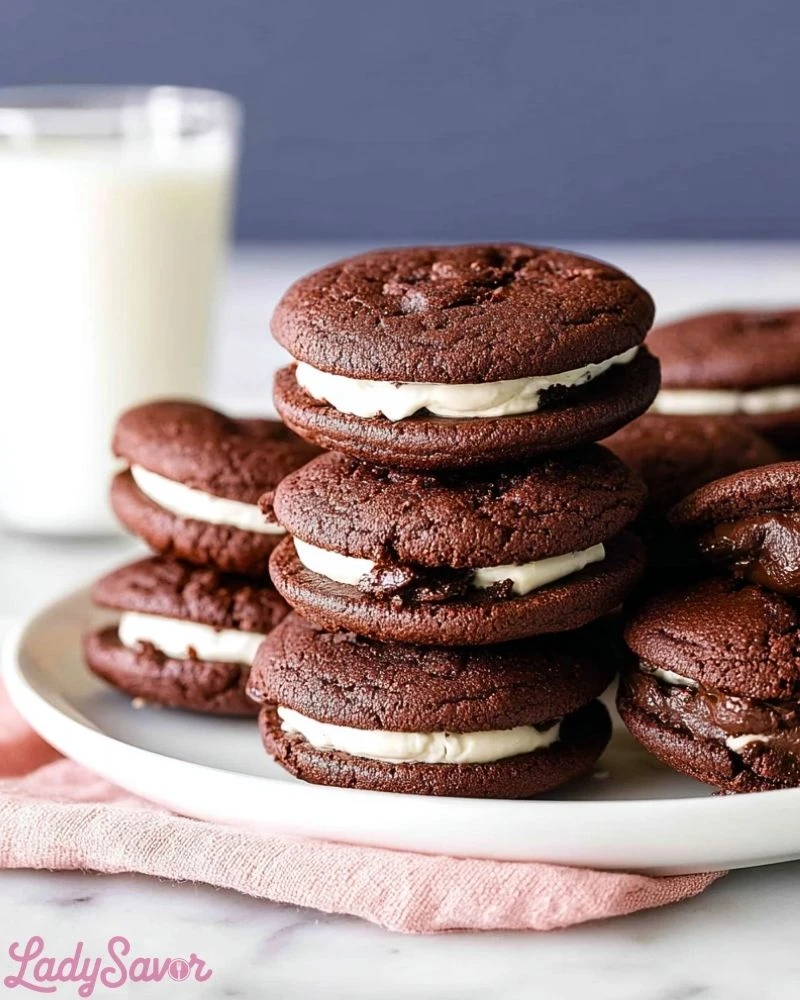
Soft, rich chocolate cookies hugging a creamy vanilla filling—these chocolate sandwich cookies are the kind of treat that instantly feels nostalgic yet indulgent. Each bite delivers a balance of deep cocoa flavor and smooth sweetness, making them perfect alongside a cold glass of milk or as a satisfying dessert any time of day.
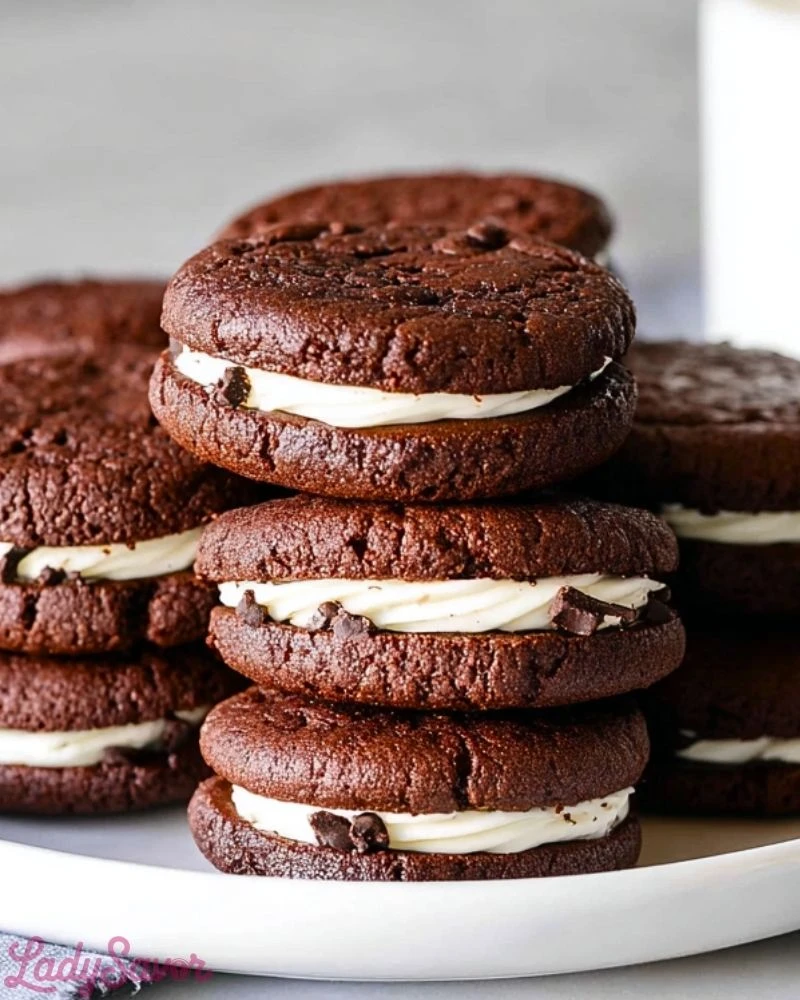
The beauty of this dessert lies in its simplicity and versatility. Whether you’re baking for a celebration, preparing a quick snack, or just craving something homemade, these cookies bring bakery-quality results right from your kitchen. The slightly crisp edges paired with a soft center create the perfect base for that luscious filling.
Why You’ll Love This Chocolate Sandwich Cookies
These cookies combine rich chocolate flavor with a smooth, creamy center, creating a perfect balance of textures. They’re easy to customize, fun to assemble, and ideal for both casual treats and special occasions. Plus, they store well, making them great for make-ahead desserts.
Preparation Phase & Tools to Use (Essential Tools and Equipment, and Their Importance)
To make Chocolate Sandwich Cookies successfully, having the right tools makes all the difference. A mixing bowl is essential for evenly combining ingredients, while a hand or stand mixer helps achieve a smooth, creamy dough and filling. Measuring cups and spoons ensure accuracy, which is key in baking. A baking sheet lined with parchment paper prevents sticking and promotes even baking. A cookie scoop helps create uniform cookies, ensuring consistent baking times. Lastly, a cooling rack allows cookies to cool properly without becoming soggy.
Preparation Tips
For best results, make sure all ingredients are at room temperature before starting, as this helps create a smooth and cohesive dough. Avoid overmixing, which can lead to dense cookies instead of soft and tender ones. Chilling the dough slightly can help control spreading during baking, especially if your kitchen is warm. When assembling, ensure cookies are completely cooled before adding the filling to prevent melting. Finally, use a consistent amount of filling for each sandwich to keep them uniform and visually appealing.
Ingredients for this Chocolate Sandwich Cookies
For the Chocolate Cookies:
- 1 cup (226g) unsalted butter, softened
- 1 cup (200g) granulated sugar
- 1/2 cup (100g) brown sugar, packed
- 2 large eggs, room temperature
- 2 teaspoons vanilla extract
- 2 cups (250g) all-purpose flour
- 3/4 cup (75g) unsweetened cocoa powder (high-quality for deeper flavor)
- 1 teaspoon baking soda
- 1/2 teaspoon baking powder
- 1/2 teaspoon salt
- 1 cup (170g) chocolate chips or chunks (optional but recommended for texture)
For the Cream Filling:
- 1/2 cup (113g) unsalted butter, softened
- 2 cups (240g) powdered sugar
- 1–2 tablespoons heavy cream or milk
- 1 1/2 teaspoons vanilla extract
- Pinch of salt
Optional Add-ins & Variations:
- Espresso powder (1 teaspoon) to intensify chocolate flavor
- Peanut butter or cream cheese for filling variation
- Crushed cookies or sprinkles for coating edges
Step 1: Prepare the Dough
In a large mixing bowl, cream together the softened butter, granulated sugar, and brown sugar using a hand or stand mixer. Beat until the mixture becomes light, fluffy, and pale in color (about 2–3 minutes). Add the eggs one at a time, mixing well after each addition, then blend in the vanilla extract.
Step 2: Combine Dry Ingredients
In a separate bowl, whisk together the flour, cocoa powder, baking soda, baking powder, and salt. This ensures even distribution and prevents clumps of cocoa or leavening agents.
Step 3: Form the Cookie Dough
Gradually add the dry mixture into the wet ingredients, mixing on low speed until just combined. Avoid overmixing to keep cookies tender. Fold in chocolate chips if using. The dough should be soft but not sticky.
Step 4: Chill the Dough (Recommended)
Cover the dough and refrigerate for 30–60 minutes. Chilling helps control spreading and enhances flavor by allowing ingredients to meld together.
Step 5: Preheat and Prepare Baking Sheets
Preheat your oven to 350°F (175°C). Line baking sheets with parchment paper or silicone baking mats to prevent sticking and ensure even baking.
Step 6: Shape the Cookies
Using a cookie scoop or tablespoon, portion the dough into equal balls (about 1–1.5 tablespoons each). Place them on the prepared baking sheet, spacing them about 2 inches apart. Slightly flatten each ball for even baking.
Step 7: Bake the Cookies
Bake in the preheated oven for 9–11 minutes. The edges should be set while the centers remain slightly soft. Do not overbake; cookies will firm up as they cool.
Step 8: Cool Completely
Allow cookies to cool on the baking sheet for 5 minutes before transferring them to a wire rack. Let them cool completely before assembling to avoid melting the filling.
Step 9: Prepare the Cream Filling
In a bowl, beat the softened butter until creamy. Gradually add powdered sugar, mixing on low speed to prevent a mess. Add vanilla extract, salt, and 1 tablespoon of cream. Beat until smooth and fluffy. Add more cream if needed to reach a spreadable consistency.
Step 10: Assemble the Sandwich Cookies
Pair cookies of similar size. Spread or pipe a generous layer of filling onto the flat side of one cookie, then gently press another cookie on top to create a sandwich. Avoid pressing too hard to prevent the filling from spilling out.
Step 11: Optional Finishing Touches
Roll the edges of the filling in sprinkles, crushed nuts, or mini chocolate chips for added texture and visual appeal. You can also drizzle melted chocolate over the tops for a decorative finish.
Step 12: Let Them Set
Allow assembled cookies to sit for about 15–20 minutes so the filling firms up slightly, making them easier to handle and enhancing the overall texture.
Notes
Achieving the perfect chocolate sandwich cookies comes down to balance and attention to detail. Using high-quality cocoa powder will significantly enhance the richness of the cookies, while properly creaming the butter and sugar ensures a light and tender texture. If you prefer a softer filling, add a touch more cream; for a firmer texture, increase the powdered sugar slightly. You can also experiment with different fillings like mint, peanut butter, or even chocolate ganache to customize the flavor profile.
Watch Out for These Mistakes While Cooking
One common mistake is overbaking the cookies, which can make them too crisp and difficult to sandwich. Another is skipping the chilling step, which often leads to cookies spreading too much and losing their shape. Be careful not to overmix the dough, as this can result in dense cookies. Using warm cookies when assembling will melt the filling, so always allow them to cool completely. Lastly, inaccurate measurements—especially with flour and cocoa powder—can affect texture and flavor.
Storage Instructions
Store chocolate sandwich cookies in an airtight container at room temperature for up to 3 days. If you prefer longer storage, refrigerate them for up to a week, but allow them to come to room temperature before serving for the best texture. These cookies can also be frozen (assembled or unassembled) for up to 2 months. When freezing, separate layers with parchment paper to prevent sticking, and thaw overnight in the refrigerator.
Estimated Nutrition
Per sandwich cookie (approximate):
- Calories: 280–320 kcal
- Carbohydrates: 38g
- Protein: 3g
- Fat: 14g
- Saturated Fat: 8g
- Sugar: 25g
- Fiber: 2g
- Sodium: 120mg
Frequently Asked Questions
1. Can I make these cookies ahead of time?
Yes, you can prepare the cookies and filling in advance and assemble them later. Store components separately for best freshness.
2. Can I freeze the cookie dough?
Absolutely. Scoop the dough into balls and freeze them. Bake directly from frozen, adding 1–2 extra minutes to the baking time.
3. What type of cocoa powder works best?
Unsweetened natural or Dutch-processed cocoa powder both work, but Dutch-processed will give a smoother, deeper flavor.
4. How do I keep the cookies soft?
Avoid overbaking and store them in an airtight container. Adding a slice of bread to the container can help retain moisture.
5. Can I make this recipe gluten-free?
Yes, substitute the all-purpose flour with a 1:1 gluten-free baking blend designed for cookies.
6. What other fillings can I use?
You can try cream cheese frosting, peanut butter filling, marshmallow fluff, or chocolate ganache for variety.
7. Why did my cookies spread too much?
This usually happens if the dough wasn’t chilled or if the butter was too soft. Chilling helps control spreading.
8. Can I make smaller or larger cookies?
Yes, just adjust the baking time accordingly. Smaller cookies bake faster, while larger ones need a bit more time.
Conclusion
Chocolate Sandwich Cookies are a delightful combination of rich cocoa flavor and creamy sweetness that never goes out of style. Whether you’re baking for a gathering or simply treating yourself, this recipe offers both reliability and room for creativity. With the right techniques and a little care, you’ll have a batch of irresistible cookies that everyone will love.

Chocolate Sandwich Cookies
- Total Time: 30 minutes
- Yield: 18 sandwich cookies 1x
- Diet: Vegetarian
Description
Indulge in these rich and creamy Chocolate Sandwich Cookies, a perfect easy dessert idea that combines soft cocoa cookies with a smooth vanilla filling. Whether you’re looking for a quick snack, easy dessert, or fun baking project, this recipe delivers bakery-style results at home. Ideal for parties, lunchbox treats, or satisfying your sweet cravings, these cookies are a must-try for any chocolate lover.
Ingredients
1 cup unsalted butter softened
1 cup granulated sugar
1/2 cup brown sugar packed
2 large eggs
2 teaspoons vanilla extract
2 cups all purpose flour
3/4 cup unsweetened cocoa powder
1 teaspoon baking soda
1/2 teaspoon baking powder
1/2 teaspoon salt
1 cup chocolate chips optional
1/2 cup unsalted butter softened
2 cups powdered sugar
1 to 2 tablespoons heavy cream
1 1/2 teaspoons vanilla extract
pinch salt
Instructions
1. Cream butter, granulated sugar, and brown sugar until light and fluffy
2. Add eggs one at a time, then mix in vanilla extract
3. Whisk flour, cocoa powder, baking soda, baking powder, and salt
4. Combine dry ingredients with wet mixture
5. Fold in chocolate chips
6. Chill dough for 30 to 60 minutes
7. Preheat oven to 350°F and prepare baking sheets
8. Shape dough into balls and flatten slightly
9. Bake for 9 to 11 minutes
10. Cool completely
11. Prepare filling by mixing butter, powdered sugar, vanilla, cream, and salt
12. Assemble cookies with filling
Notes
Use high-quality cocoa powder for a richer chocolate flavor
Chill the dough to prevent spreading
Cool cookies completely before filling
- Prep Time: 20 minutes
- Cook Time: 10 minutes
- Category: Dessert
- Method: Baking
- Cuisine: American
Nutrition
- Serving Size: 1 cookie
- Calories: 300
- Sugar: 25g
- Sodium: 120mg
- Fat: 14g
- Saturated Fat: 8g
- Unsaturated Fat: 5g
- Trans Fat: 0g
- Carbohydrates: 38g
- Fiber: 2g
- Protein: 3g
- Cholesterol: 35mg