

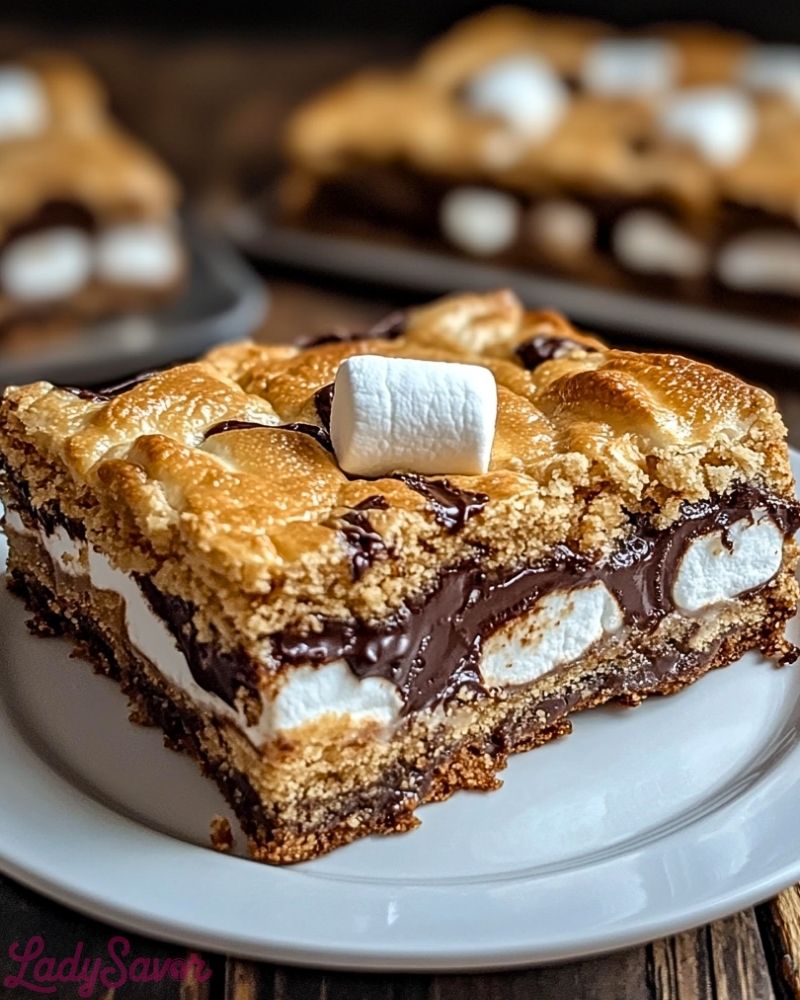
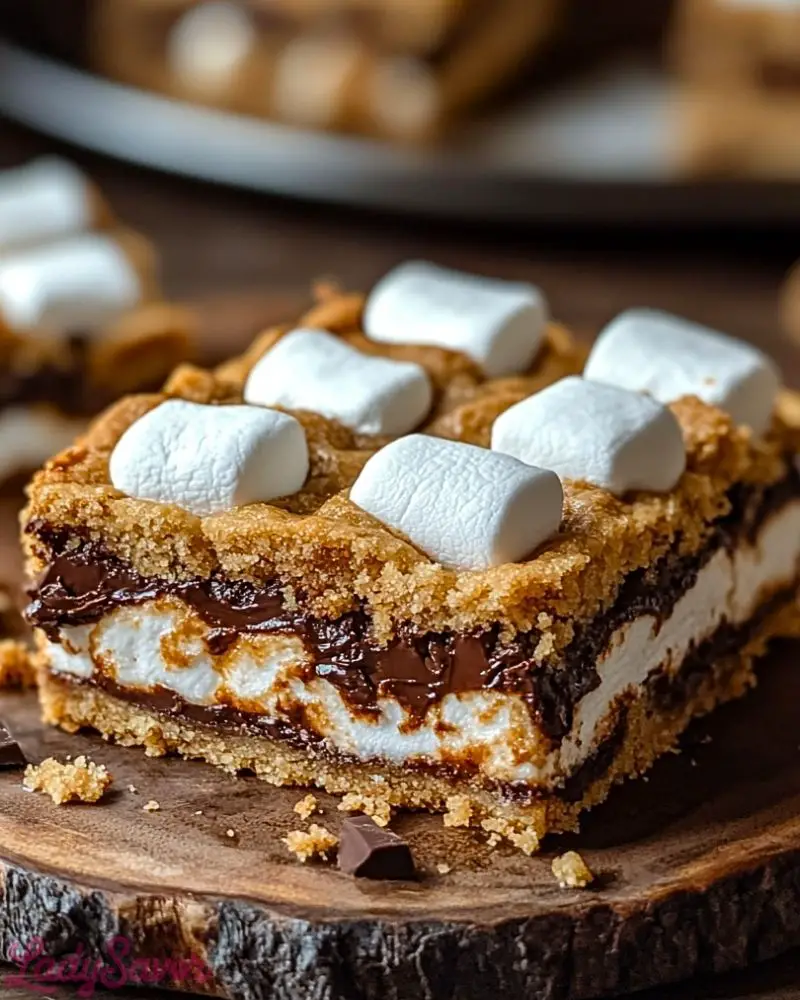
A blissful mash-up of gooey marshmallows, rich chocolate, and buttery cookie crust—these S’mores Cookie Bars bring campfire nostalgia straight into your kitchen. Each bite offers a satisfying contrast: crisp edges give way to a tender, chewy center studded with melted chocolate and soft marshmallow clouds. One taste and you’ll feel like you’re roasting treats over a fire, even on a rainy day.
Unlike traditional s’mores, which can be messy and fleeting, these bars are portable, stackable, and perfect for parties or lunchboxes. They bake up beautifully in a single pan and invite creative riffs—try swapping in peanut butter cups or using flavored marshmallows for a twist.
Why You’ll Love This S’mores Cookie Bars
Say goodbye to melting marshmallows between flimsy crackers—these bars give you a sturdy, buttery cookie base that beautifully contrasts with the soft marshmallow layer and decadent chocolate filling. They slice neatly and travel well, making them ideal for gatherings, potlucks, or a comforting snack any day. Plus, they deliver that classic summer flavor without fire or fuss.
Preparation Phase & Tools to Use (Essential Tools and Equipment, Importance of Each)
- 9×9-inch Baking Pan – Ensures even baking and ideal thickness for the layered bars.
- Parchment Paper or Nonstick Spray – Prevents sticking and helps with easy removal and clean‐up.
- Mixing Bowls (2) – One for preparing the cookie dough, another for combining melted butter, sugars, and eggs.
- Hand Mixer or Stand Mixer – Creams butter and sugar efficiently for a smooth, consistent dough.
- Rubber Spatula – Scrapes sides of bowls cleanly and folds ingredients gently.
- Offset or Bench Scraper – Helps spread the dough evenly in the pan, ensuring a uniform base and top layer.
- Measuring Cups & Spoons – Guarantee accurate measurements for consistent texture and flavor.
- Wire Cooling Rack – Supports the pan post‑bake so air can circulate, preventing sogginess.
Each tool plays a vital role: accurate measuring gives you that perfect chewiness; mixing tools save energy and speed up prep; and the right pan and release methods mean your bars come out in clean, portable squares.
Preparation Tips
- Room Temperature Butter & Eggs: Softened ingredients blend smoothly, improving texture and crumb.
- Chill the Dough Slightly (10–15 min): Makes spreading easier and prevents over‑spreading in the oven.
- Line the Pan with Overhang: Folding parchment over the edges lets you lift the bars out in one piece.
- Level Each Layer: Press each cookie layer firmly; use an offset spatula to smooth out marshmallows and chocolate so everything bakes evenly.
- Don’t Overbake: Look for lightly golden edges and a slightly soft center—carryover heat will finish the bake without drying them out.
Ingredients for this S’mores Cookie Bars
- 1 cup (2 sticks) unsalted butter, softened to room temperature
- 1 cup granulated sugar
- 1 cup packed brown sugar (light or dark)
- 2 large eggs, at room temperature
- 2 tsp vanilla extract
- 2 ½ cups all-purpose flour
- 1 tsp baking soda
- ½ tsp salt
- 1 ½ cups semi-sweet chocolate chips or chunks
- 1 ½ cups mini marshmallows (or chopped larger marshmallows)
- Optional topping: 12–15 milk chocolate or dark chocolate baking squares, slightly pressed into the top before baking
Step 1: Preheat & Prepare
Preheat your oven to 350 °F (175 °C). Line a 9×9-inch baking pan with parchment paper, leaving a 1–2 inch overhang on opposite sides. This overhang will help you lift the bars out easily once baked.
Step 2: Make the Cookie Base
- In a large bowl, cream together the softened butter, granulated sugar, and brown sugar using a hand mixer until the mixture is pale and fluffy.
- Beat in the eggs one at a time, followed by the vanilla extract, scraping the sides as needed.
Step 3: Combine Dry Ingredients
In a separate bowl, whisk together the all-purpose flour, baking soda, and salt. Gradually add this dry mixture into the wet ingredients, mixing just until combined. Be careful not to overmix—you’re aiming for a soft, cohesive dough.
Step 4: Form the Bottom Layer
Press about two-thirds of the cookie dough evenly into the prepared pan with clean fingers or an offset spatula, creating a sturdy base. The thickness should be around ⅓ inch.
Step 5: Add the S’mores Layers
- Sprinkle the chocolate chips (or chunks) evenly over the cookie base.
- Scatter the mini marshmallows in an even layer on top of the chocolate. Press them gently so they nestle into the dough.
Step 6: Top It Off
Crumble the remaining cookie dough roughly and drop pieces on top of the marshmallow layer. Press lightly to flatten gently. If you’d like, arrange the optional baking squares evenly on top, pressing them just slightly into the dough.
Step 7: Bake to Perfection
Bake in the preheated oven for 25–30 minutes, until the edges turn golden brown and the top looks set with little marshmallow peaks. The center should still look slightly soft—that’s perfect!
Step 8: Cool & Slice
Remove the pan to a wire rack and allow the bars to cool completely—about 1 hour. Use the parchment overhang to lift them out and slice into 9 or 12 squares. Serve once the chocolate has slightly firmed up.
Notes
- Texture tweak: For an extra chewy bite, swap ¼ cup of the all-purpose flour with brown rice flour or bread flour.
- Flavor add‑ins: A sprinkle of flaky sea salt on top before baking adds a gourmet touch and balances sweetness.
- Dough storage: You can refrigerate the dough (wrapped) up to 24 hours or freeze it up to 1 month—thaw before using.
- Marshmallow tip: If your mini marshmallows puff up too much, briefly press them down halfway through baking.
Watch Out for These Mistakes While Cooking
- Skipping parchment overlap: Without enough overhang, the bars can stick—making them hard to remove in neat squares.
- Overmixing after adding flour: This can develop excess gluten, leading to tough, dense bars. Mix just until no white streaks remain.
- Ignoring stage-specific layering: Nestling the marshmallows and chocolate into the base prevents them from floating to the top.
- Overbaking: A fully set center equals dry bars. Aim for just‑set edges and a tender center—the bars continue to firm up as they cool.
- Rushing the cool-down: Cutting too soon causes melty, messy slices. Let them rest until everything is set enough to slice cleanly.
What to Serve With S’mores Cookie Bars?
Here are eight tasty pairings that elevate your indoor campfire treat:
1. Cold Glass of Milk
Classic and refreshing—pairs perfectly with the cookies’ gooey chocolate and marshmallow richness.
2. Hot Cocoa or Mocha
Warm, creamy drinks echo the dessert’s flavors and keep your cozy vibe going strong.
3. Fresh Berries
A side of strawberries, raspberries, or blueberries adds bright fruitiness to balance the sweetness.
4. Vanilla Ice Cream
A scoop alongside a warm bar creates a delightful contrast in temperature and texture.
5. Espresso or Coffee
A bold cup of coffee cuts through the sugar, ideal for a mid‑day treat or after-dinner pick-me-up.
6. Espresso Brownie Bites
Double up the chocolate intensity—bite-sized brownies with a rich coffee kick are a decadent match.
7. Salted Caramel Drizzle
Serve bars lightly drizzled with salted caramel sauce—sweet and salty heaven.
8. Mint Leaves or Mint Ice Cream
Mint’s cool freshness is a crisp counterpoint to gooey, chocolatey indulgence.
Storage Instructions
- Room Temperature: Store cooled bars in an airtight container at room temperature for up to 3 days—line the container with parchment paper between layers to prevent sticking.
- Refrigeration: Keep bars in the fridge for up to 7 days. Bring to room temperature before serving to regain gooey marshmallow texture.
- Freezing: Wrap individual bars tightly in plastic wrap, then foil. Freeze for up to 3 months. Thaw overnight in the fridge or a few hours at room temperature.
Estimated Nutrition (per bar, based on 12 pieces)
- Calories: ~260 kcal
- Total Fat: 12 g (6 g saturated fat)
- Carbohydrates: 34 g (19 g sugar, 1.5 g fiber)
- Protein: 3 g
- Sodium: 120 mg
Nutritional values are estimates and can vary based on ingredients used.
Frequently Asked Questions
1. Can I use gluten-free flour?
Absolutely! Swap the all-purpose flour for a 1:1 gluten-free blend. The texture will be slightly more crumbly but just as delicious.
2. Can I make the dough ahead of time?
Yes—chill the dough in the refrigerator for up to 24 hours or freeze for up to a month. Thaw in the fridge overnight before layering and baking.
3. Can I use jumbo marshmallows instead of minis?
You can, but chop them into smaller pieces. Whole jumbo marshmallows will melt unevenly and create large pockets rather than that classic layered texture.
4. How do I avoid marshmallows burning on top?
Cover loosely with foil if they brown too quickly, and press them gently halfway through baking to ensure they don’t puff excessively.
5. Are these bars freezer-friendly after baking?
Yes. Freeze fully cooled bars wrapped tightly for up to 3 months. Thaw overnight in the fridge or at room temperature for a few hours before serving.
6. Can I make them dairy-free or vegan?
To veganize, use plant-based butter, egg replacer (like flax or commercial binders), and dairy-free chocolate. The flavor might be slightly different, but still satisfying.
7. What’s the best way to cut clean squares?
Chill the bars fully before slicing—this firms up the chocolate and marshmallow layers. Use a sharp knife wiped clean between cuts for neat lines.
8. Can I double the batch?
Yes—use a 9×13-inch pan and bake for 30–35 minutes. Watch for the same visual cues: golden edges and a set center.
Conclusion
These S’mores Cookie Bars capture all the nostalgia of campfire treats in a bar that’s easier to bake, serve, and transport. They’re adaptable, storage-friendly, and endlessly improvable—whether it’s adding sea salt, swapping chocolates, or making them vegan. Give them a try; you might just find your new go-to dessert for cozy nights in or gatherings with friends.
S’mores Cookie Bars
- Total Time: 40 minutes
- Yield: 9–12 bars 1x
Description
These S’mores Cookie Bars capture the nostalgia of classic campfire s’mores—with a buttery cookie base, melty chocolate, and gooey marshmallows—all baked into easy-to-cut bars that travel and stack beautifully.
Ingredients
- 1 cup (2 sticks) unsalted butter, softened
- 1 cup granulated sugar
- 1 cup packed brown sugar
- 2 large eggs
- 2 tsp vanilla extract
- 2 ½ cups all-purpose flour
- 1 tsp baking soda
- ½ tsp salt
- 1 ½ cups semi-sweet chocolate chips or chunks
- 1 ½ cups mini marshmallows
- Optional: 12–15 chocolate baking squares for topping
Instructions
-
Preheat oven to 350 °F (175 °C). Line a 9×9-inch pan with parchment, leaving overhang.
-
Cream butter and both sugars until light and fluffy.
-
Beat in eggs one at a time, then vanilla.
-
Whisk together flour, baking soda, and salt; mix into wet ingredients just until combined.
-
Press two-thirds of dough into the pan for the base.
-
Evenly layer chocolate chips and mini marshmallows on the base.
-
Drop remaining dough crumbs on top and press gently; optionally add chocolate squares.
-
Bake 25–30 minutes until edges are golden and center just set; marshmallows will puff.
-
Cool completely on a wire rack (about 1 hour), then lift out and cut into squares.
- Prep Time: 15 minutes
- Cook Time: 25 minutes