
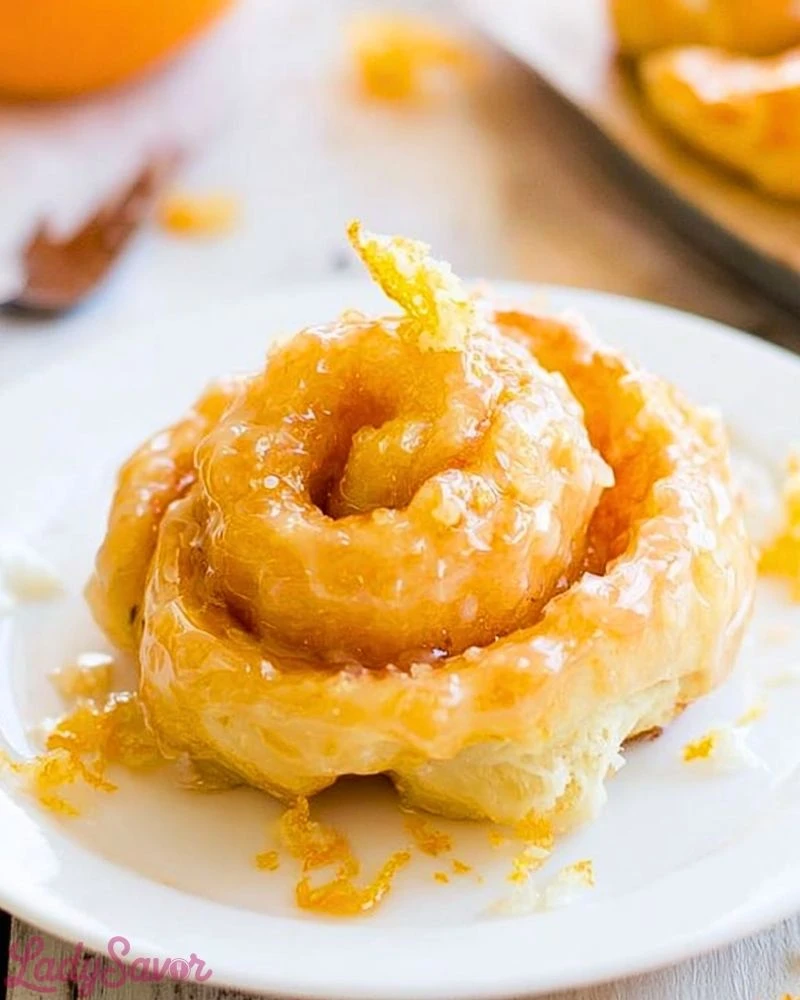
There’s something incredibly comforting about pulling a tray of warm Homemade Glazed Orange Rolls out of the oven. The soft, fluffy layers swirled with bright citrus flavor and topped with a sweet orange glaze create the perfect balance between cozy and refreshing. Every bite melts into a combination of buttery dough and vibrant orange sweetness that feels perfect for breakfast, brunch, or even dessert.
These orange rolls bring a bakery-style experience right into your kitchen while still feeling homemade and approachable. The aroma alone fills the house with notes of fresh citrus and warm yeast, making them especially inviting during holidays, weekend mornings, or whenever you want a special treat that looks as beautiful as it tastes.
Why You’ll Love This Homemade Glazed Orange Rolls Recipe
Homemade Glazed Orange Rolls are soft, gooey, and bursting with fresh orange flavor in every layer. Unlike traditional cinnamon rolls, these rolls have a lighter and brighter taste that makes them feel refreshing while still indulgent. The citrus glaze seeps into the warm rolls, creating a sticky, sweet finish that’s hard to resist.
Another reason to love this recipe is how versatile it can be. They work beautifully for holiday brunches, spring gatherings, breakfast spreads, or cozy family mornings. You can prepare them ahead of time, customize the glaze intensity, or even add extra orange zest for a stronger citrus punch. The recipe also creates bakery-quality rolls with simple pantry ingredients, making it perfect for both beginner and experienced bakers.
Preparation Phase & Tools to Use
Making Homemade Glazed Orange Rolls becomes much easier when you have the right kitchen tools ready before you begin. Proper preparation ensures the dough rises evenly, the filling spreads smoothly, and the glaze finishes beautifully.
Essential Tools and Equipment
-
Large Mixing Bowl
Needed for combining and proofing the dough. A spacious bowl gives the yeast enough room to expand properly. -
Stand Mixer with Dough Hook (Optional but Helpful)
Makes kneading easier and helps create a smooth, elastic dough without overworking it by hand. -
Rolling Pin
Essential for rolling the dough evenly so the orange filling distributes consistently throughout the rolls. -
Sharp Knife or Dental Floss
Helps cut clean, even rolls without squishing the dough. -
9×13 Baking Dish
Keeps the rolls close together while baking, allowing them to rise upward and stay soft. -
Microplane or Zester
Crucial for getting fine orange zest that blends perfectly into the filling and glaze. -
Pastry Brush
Useful for spreading melted butter evenly across the dough. -
Cooling Rack
Allows the rolls to cool slightly without becoming soggy on the bottom.
Each tool contributes to achieving soft, fluffy rolls with balanced texture and flavor. Using proper equipment also helps simplify the process and improves consistency.
Preparation Tips
For the best Homemade Glazed Orange Rolls, always use fresh oranges rather than bottled juice whenever possible. Fresh zest provides a vibrant citrus aroma that truly defines the flavor of the rolls. Make sure your milk is warm, not hot, when activating the yeast, as excessive heat can kill the yeast and prevent the dough from rising properly.
Allow enough time for the dough to rise fully since this creates the soft and airy texture that makes homemade rolls so irresistible. If your kitchen is cool, place the dough in a slightly warm oven (turned off) to encourage proofing. When rolling the dough, avoid adding too much flour to the surface because excess flour can make the rolls dense instead of tender.
For extra gooey rolls, pour the glaze over them while they are still slightly warm. This allows the icing to melt into the swirls and create that delicious bakery-style finish everyone loves.
Ingredients for this Homemade Glazed Orange Rolls Recipe
These ingredients create incredibly soft, fluffy orange rolls packed with bright citrus flavor and topped with a silky orange glaze. Using fresh oranges is highly recommended for the best aroma and taste.
For the Dough
- 4 cups all-purpose flour (plus extra for rolling)
- 1 packet active dry yeast (2 ¼ teaspoons)
- 1 cup warm milk (about 110°F)
- ⅓ cup granulated sugar
- ⅓ cup unsalted butter, melted
- 2 large eggs
- 1 teaspoon salt
- 1 tablespoon fresh orange zest
- 1 teaspoon vanilla extract
For the Orange Filling
- ½ cup unsalted butter, softened
- ¾ cup granulated sugar
- 2 tablespoons fresh orange zest
- 2 tablespoons fresh orange juice
- ½ teaspoon ground cinnamon (optional for warmth)
For the Orange Glaze
- 2 cups powdered sugar
- 3–4 tablespoons fresh orange juice
- 1 teaspoon orange zest
- 1 tablespoon melted butter
- ½ teaspoon vanilla extract
Step 1: Activate the Yeast
In a large mixing bowl, combine the warm milk, yeast, and 1 tablespoon of the sugar. Stir gently and let the mixture sit for 5–10 minutes until it becomes foamy on top. This step ensures the yeast is alive and ready to help the dough rise properly.
If the mixture does not foam, the yeast may be expired or the milk may have been too hot or too cold. Starting with active yeast is essential for achieving soft and fluffy rolls.
Step 2: Prepare the Dough
Add the remaining sugar, melted butter, eggs, orange zest, vanilla extract, and salt to the yeast mixture. Stir until combined.
Gradually add the flour one cup at a time while mixing continuously. Once the dough begins pulling away from the sides of the bowl, knead it for about 8–10 minutes until smooth and elastic.
You can knead by hand on a lightly floured surface or use a stand mixer fitted with a dough hook for easier mixing.
The dough should feel soft, slightly tacky, and stretchy without sticking heavily to your hands.
Step 3: First Rise
Transfer the dough into a lightly greased bowl and cover it with plastic wrap or a clean kitchen towel.
Place the bowl in a warm draft-free area and allow the dough to rise for about 1 to 1½ hours, or until doubled in size.
Proper rising develops both texture and flavor, creating those signature pillowy layers inside the orange rolls.
Step 4: Make the Orange Filling
While the dough rises, prepare the filling.
In a medium bowl, mix together the softened butter, sugar, orange zest, orange juice, and optional cinnamon until creamy and spreadable.
The orange zest is the star ingredient here, delivering bold citrus flavor throughout every swirl.
Step 5: Roll Out the Dough
Once the dough has doubled in size, punch it down gently to release excess air.
Transfer it onto a lightly floured surface and roll it into a large rectangle approximately 16×12 inches in size.
Try to keep the thickness even across the dough so the rolls bake uniformly.
Step 6: Spread the Filling
Using a spatula or pastry brush, spread the orange filling evenly across the dough, leaving about a ½-inch border around the edges.
Be sure to distribute the zest evenly to ensure every bite contains bright citrus flavor.
Step 7: Roll and Slice
Starting from the long edge, tightly roll the dough into a log shape.
Use a sharp knife or unflavored dental floss to cut the log into 12 equal rolls. Clean cuts help maintain the beautiful swirl pattern.
Arrange the rolls in a greased 9×13-inch baking dish, leaving a little space between each one.
Step 8: Second Rise
Cover the baking dish loosely and allow the rolls to rise again for 30–45 minutes until puffy.
This second proof gives the rolls their soft bakery-style texture and helps them bake evenly.
During this time, preheat your oven to 350°F (175°C).
Step 9: Bake the Orange Rolls
Place the rolls into the preheated oven and bake for 22–28 minutes, or until lightly golden brown on top.
Avoid overbaking, as this can dry out the rolls. The centers should remain soft and tender while the tops turn lightly golden.
Your kitchen will fill with the irresistible aroma of warm citrus and buttery dough during baking.
Step 10: Prepare the Orange Glaze
While the rolls bake, whisk together the powdered sugar, orange juice, orange zest, melted butter, and vanilla extract in a medium bowl.
Adjust the consistency by adding more orange juice for a thinner glaze or more powdered sugar for a thicker icing.
The glaze should be smooth, pourable, and rich with fresh orange flavor.
Step 11: Glaze the Warm Rolls
Allow the rolls to cool for about 5–10 minutes after baking.
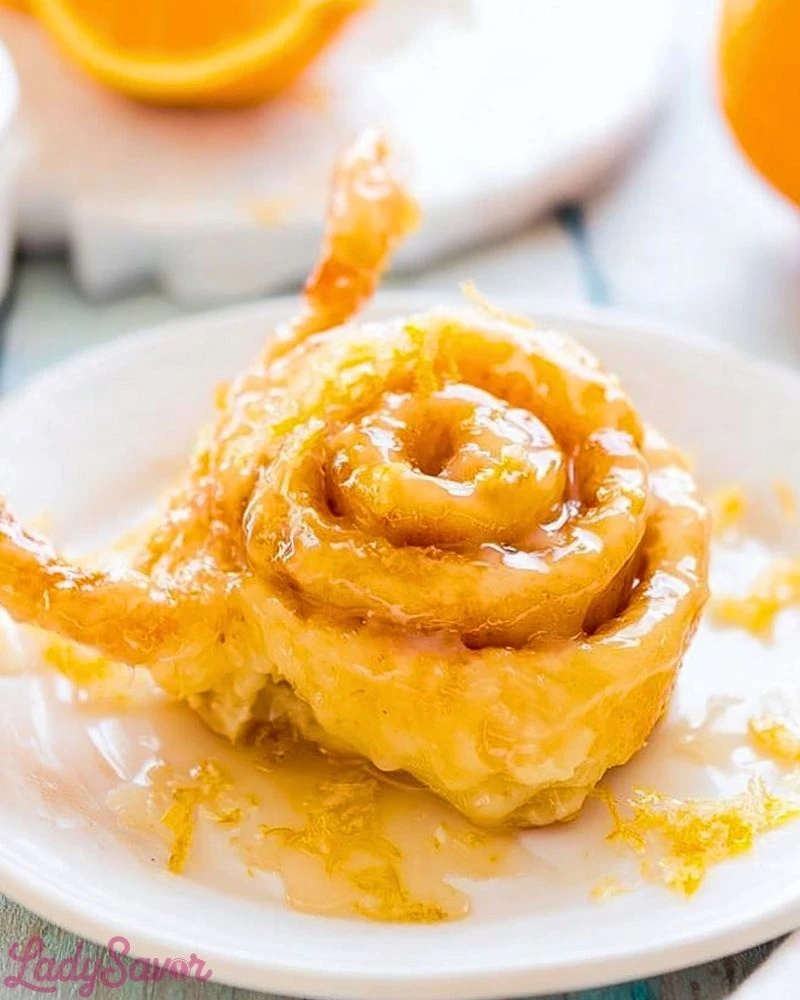
Pour the orange glaze generously over the warm rolls, letting it drip into the swirls and edges for maximum flavor and moisture.
For extra citrus brightness, sprinkle additional orange zest over the top before serving.
Step 12: Serve and Enjoy
Serve the Homemade Glazed Orange Rolls warm for the ultimate soft and gooey texture.
These rolls pair beautifully with coffee, tea, milk, or fresh fruit and make an unforgettable breakfast, brunch centerpiece, or sweet afternoon treat.
The combination of fluffy dough, buttery filling, and tangy orange glaze creates a bakery-quality pastry that feels both comforting and refreshing.
Notes
Homemade Glazed Orange Rolls are best enjoyed fresh and slightly warm when the glaze is still soft and melted into the swirls. The balance of buttery dough and bright citrus flavor makes these rolls feel lighter than traditional cinnamon rolls while still delivering the same comforting texture. For the richest orange flavor, always use freshly grated orange zest instead of bottled flavoring or extracts alone.
The dough should remain soft throughout the process, so avoid adding too much flour during kneading or rolling. A slightly sticky dough often produces the fluffiest rolls after baking. If you want even more citrus intensity, you can mix additional zest directly into the glaze or add a small amount of orange extract for a stronger aroma.
These rolls are also ideal for make-ahead preparation. You can assemble them the night before, refrigerate overnight, and bake fresh in the morning. This makes them especially convenient for holiday breakfasts, brunch parties, or special occasions when you want fresh baked pastries without early morning preparation.
Another great variation is adding cream cheese to the glaze for a tangy frosting-style topping. Chopped nuts such as pecans or walnuts can also be sprinkled over the filling for extra texture and richness.
Watch Out for These Mistakes While Cooking
Using Milk That Is Too Hot
Warm milk helps activate the yeast, but excessively hot milk can kill it completely. Aim for approximately 105–110°F for the best yeast activity.
Adding Too Much Flour
Over-flouring the dough is one of the most common mistakes. The dough should feel soft and slightly tacky, not dry or stiff.
Skipping the Second Rise
The second rise is essential for soft and fluffy rolls. Baking immediately after shaping can result in dense texture and uneven baking.
Overbaking the Rolls
Orange rolls continue cooking slightly after removal from the oven. Overbaking can dry them out quickly, so remove them once lightly golden on top.
Using Bottled Juice Only
Fresh orange zest provides the majority of the citrus flavor. Relying only on bottled juice can make the rolls taste flat.
Glazing Fully Cooled Rolls
Applying glaze while the rolls are slightly warm helps the icing melt beautifully into the layers instead of sitting stiffly on top.
Rolling the Dough Too Thin
Thin dough may tear or leak filling during baking. Keep the dough about ¼-inch thick for ideal structure and softness.
Cutting Uneven Rolls
Uneven slices bake inconsistently. Using dental floss or a very sharp knife helps create perfectly shaped rolls.
Storage Instructions
Homemade Glazed Orange Rolls can be stored at room temperature in an airtight container for up to 2 days. To maintain softness, keep them tightly covered so they do not dry out.
For longer storage, refrigerate the rolls for up to 5 days. Warm individual rolls in the microwave for about 15–20 seconds before serving to restore their soft texture and gooey glaze.
These rolls also freeze very well. You can freeze fully baked rolls or unbaked shaped rolls. For baked rolls, wrap them tightly in plastic wrap and foil before freezing for up to 2 months. Thaw overnight in the refrigerator and warm before serving.
If freezing unbaked rolls, allow them to thaw and complete the second rise before baking. Fresh glaze should always be added after reheating for the best flavor and texture.
Estimated Nutrition
Per Roll (Approximate Values)
- Calories: 340
- Carbohydrates: 48g
- Protein: 6g
- Fat: 13g
- Saturated Fat: 7g
- Cholesterol: 55mg
- Sodium: 220mg
- Sugar: 24g
- Fiber: 1g
Nutritional values may vary depending on ingredient brands, portion sizes, and glaze quantity used.
Frequently Asked Questions
Can I make Homemade Glazed Orange Rolls ahead of time?
Yes. You can prepare the rolls the night before, refrigerate them after shaping, and bake them fresh the next morning.
Can I freeze orange rolls?
Absolutely. Both baked and unbaked rolls freeze well for up to 2 months when properly wrapped.
Why didn’t my dough rise properly?
This usually happens if the yeast is expired or the milk temperature was too hot or too cold during activation.
Can I use instant yeast instead of active dry yeast?
Yes. Instant yeast can be substituted directly and may slightly reduce rising time.
What oranges work best for this recipe?
Navel oranges are excellent because they provide sweet juice and fragrant zest without bitterness.
How do I keep the rolls soft after baking?
Store them in an airtight container and avoid overbaking. Reheating slightly before serving also restores softness.
Can I add cinnamon to the filling?
Yes. A small amount of cinnamon pairs beautifully with orange flavor and adds warmth to the rolls.
Can I make these rolls without a stand mixer?
Definitely. The dough can easily be kneaded by hand for about 8–10 minutes until smooth and elastic.
Conclusion
Homemade Glazed Orange Rolls combine soft buttery dough, vibrant citrus flavor, and sweet orange glaze into one unforgettable baked treat. They are perfect for breakfast, brunch, holidays, or cozy weekend baking sessions when you want something both comforting and refreshing.
The fresh orange zest gives these rolls their signature brightness, while the fluffy layers and gooey glaze create the bakery-style texture everyone loves. Whether you are serving them for a family gathering or enjoying one with your morning coffee, these orange rolls bring warmth, sweetness, and homemade charm to every bite.
With simple ingredients, make-ahead flexibility, and irresistible flavor, this recipe is one you’ll want to bake again and again.

Homemade Glazed Orange Rolls
- Total Time: 2 hours 20 minutes
- Yield: 12 rolls 1x
- Diet: Vegetarian
Description
Soft, fluffy, and bursting with bright citrus flavor, these Homemade Glazed Orange Rolls are the perfect sweet treat for breakfast, brunch, or dessert. Each roll is filled with buttery orange sugar filling and topped with a rich homemade orange glaze that melts beautifully into every swirl. This easy recipe creates bakery-style orange rolls with a soft texture and refreshing flavor that makes them perfect for holiday mornings, weekend breakfast ideas, easy brunch spreads, and cozy homemade food ideas. Whether you need a quick breakfast centerpiece, a special holiday pastry, or an easy homemade dessert recipe, these glazed orange rolls deliver incredible flavor with simple pantry ingredients and fresh oranges.
Ingredients
4 cups all-purpose flour
2 1/4 teaspoons active dry yeast
1 cup warm milk
1/3 cup granulated sugar
1/3 cup unsalted butter, melted
2 large eggs
1 teaspoon salt
1 tablespoon fresh orange zest
1 teaspoon vanilla extract
1/2 cup unsalted butter, softened
3/4 cup granulated sugar
2 tablespoons fresh orange zest
2 tablespoons fresh orange juice
1/2 teaspoon ground cinnamon
2 cups powdered sugar
3 tablespoons fresh orange juice
1 teaspoon orange zest
1 tablespoon melted butter
1/2 teaspoon vanilla extract
Instructions
1. In a large mixing bowl, combine warm milk, yeast, and 1 tablespoon sugar. Let sit for 5–10 minutes until foamy.
2. Add remaining sugar, melted butter, eggs, orange zest, vanilla extract, and salt. Mix until combined.
3. Gradually add flour and knead for 8–10 minutes until smooth and elastic.
4. Place dough into a greased bowl, cover, and let rise for 1 to 1½ hours until doubled in size.
5. In a medium bowl, mix softened butter, sugar, orange zest, orange juice, and cinnamon to prepare the filling.
6. Roll dough into a 16×12-inch rectangle on a lightly floured surface.
7. Spread the orange filling evenly across the dough.
8. Roll dough tightly into a log and cut into 12 equal rolls.
9. Arrange rolls in a greased 9×13-inch baking dish.
10. Cover and let rise again for 30–45 minutes until puffy.
11. Preheat oven to 350°F (175°C).
12. Bake rolls for 22–28 minutes until lightly golden brown.
13. Whisk powdered sugar, orange juice, orange zest, melted butter, and vanilla extract together to create the glaze.
14. Let rolls cool slightly before pouring glaze generously over the top.
15. Serve warm and enjoy.
Notes
Use fresh orange zest for the brightest and most natural citrus flavor.
Avoid adding too much flour to the dough to keep the rolls soft and fluffy.
Pour the glaze over slightly warm rolls so it melts perfectly into the swirls.
- Prep Time: 25 minutes
- Cook Time: 25 minutes
- Category: Breakfast / Dessert
- Method: Baking
- Cuisine: American
Nutrition
- Serving Size: 1 roll
- Calories: 340
- Sugar: 24g
- Sodium: 220mg
- Fat: 13g
- Saturated Fat: 7g
- Unsaturated Fat: 5g
- Trans Fat: 0g
- Carbohydrates: 48g
- Fiber: 1g
- Protein: 6g
- Cholesterol: 55mg