
I still remember the first time I tried turning a classic cheesecake into something lighter, quicker, and packed with protein. I wanted a dessert that felt indulgent but didn’t leave me with that heavy, overly full feeling. That’s when these High-Protein Cheesecake Jars came to life—layered, creamy, and surprisingly satisfying.
What I love most about this recipe is how effortlessly it fits into everyday life. Whether I’m prepping a quick snack, a post-workout treat, or a simple dessert for guests, these jars always deliver that rich cheesecake flavor without the fuss of baking a full cake.
Why You’ll Love This High-Protein Cheesecake Jars
These cheesecake jars strike the perfect balance between indulgence and nutrition. They’re creamy, slightly tangy, and topped with a fresh fruit layer that adds brightness to every bite. Plus, they’re portioned individually, making them ideal for meal prep or grab-and-go treats.
Another reason I keep coming back to this recipe is how customizable it is. You can easily adjust the sweetness, swap toppings, or tweak the base to suit your preferences without losing that classic cheesecake feel.
What Makes These Cheesecake Jars High in Protein?
The secret lies in the ingredients. Instead of relying solely on traditional cream cheese, this recipe incorporates protein-rich elements like Greek yogurt or protein powder. These additions boost the protein content while keeping the texture smooth and luscious.
It’s a smart way to enjoy dessert while still supporting your nutritional goals, especially if you’re looking to increase your protein intake without sacrificing flavor.
Options for Substitutions
If you’re missing an ingredient or want to tailor the recipe to your dietary needs, there are plenty of easy swaps. Cottage cheese can replace part of the cream cheese for an even higher protein content, while dairy-free yogurt works well for a lactose-free version.
For the crust, you can use crushed graham crackers, digestive biscuits, or even a nut-based mixture for a gluten-free alternative. The topping is just as flexible—strawberries, blueberries, or even a sugar-free fruit compote all work beautifully.
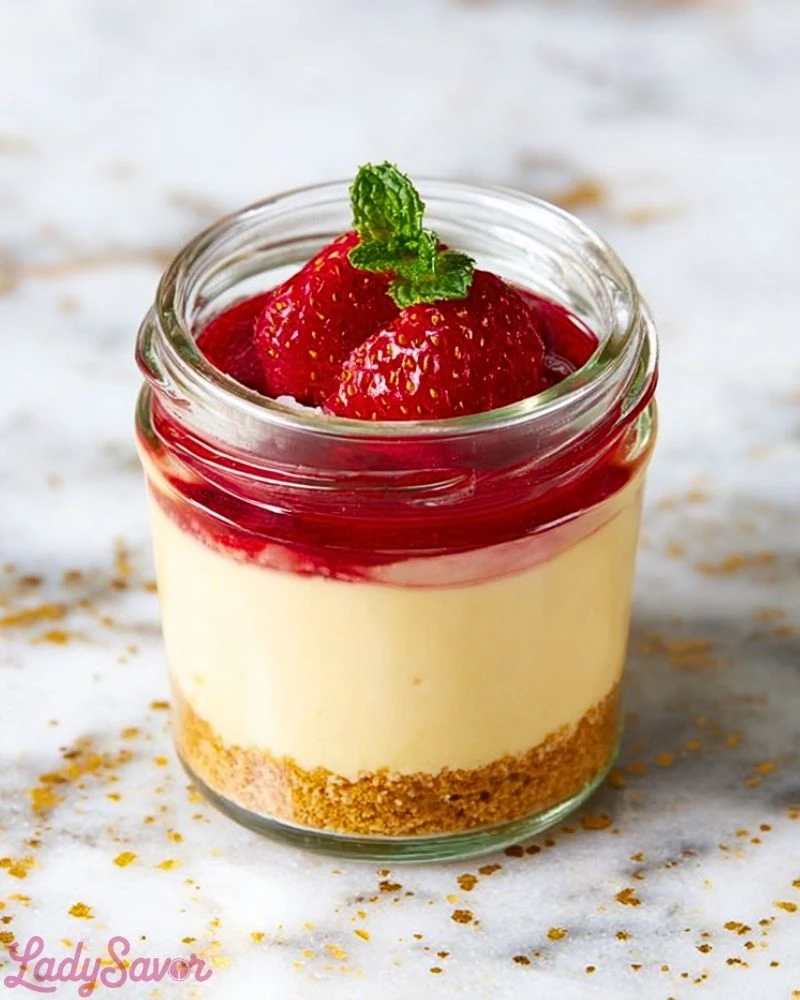
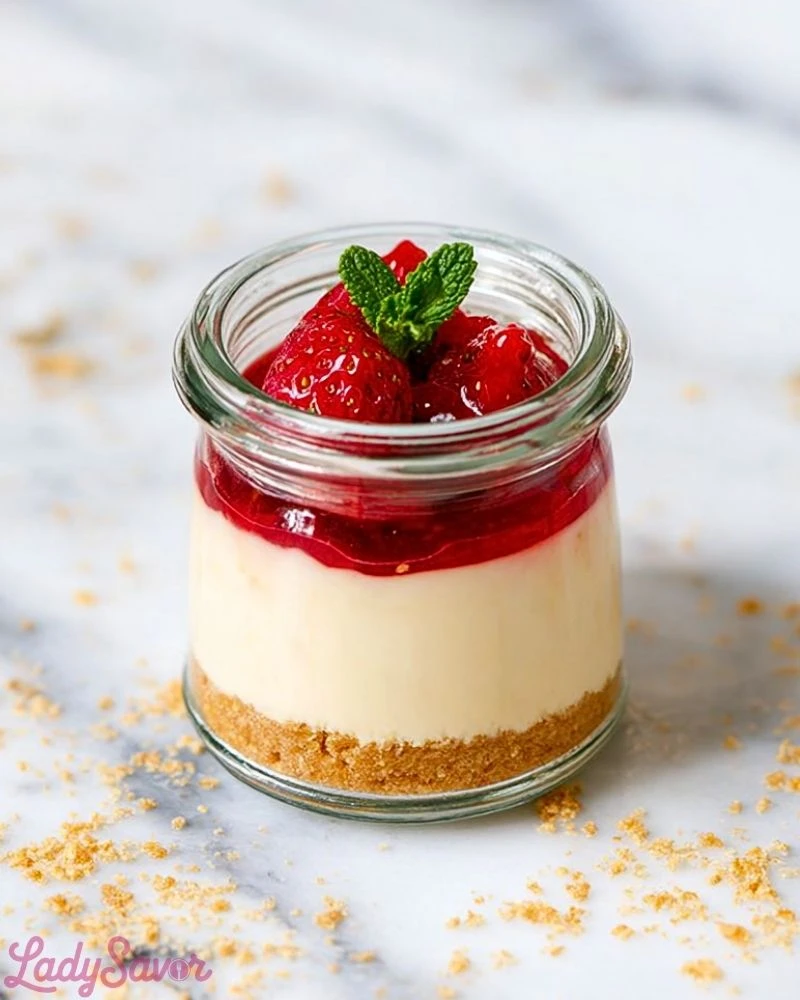
Ingredients for this High-Protein Cheesecake Jars
Graham Crackers or Digestive Biscuits
These form the base layer, giving the jars that classic cheesecake crust texture. Their slight sweetness and crumbly consistency create a perfect contrast to the creamy filling.
Butter
Melted butter binds the crushed biscuits together, helping the crust hold its shape while adding richness and flavor.
Cream Cheese
This is the heart of the cheesecake layer. It provides that signature tangy, smooth, and creamy texture that defines any good cheesecake.
Greek Yogurt
A key ingredient for boosting protein while keeping the mixture light and slightly tangy. It also helps balance the richness of the cream cheese.
Protein Powder (Vanilla or Unflavored)
This enhances the protein content without compromising the dessert-like quality. It blends seamlessly into the filling when mixed properly.
Honey or Maple Syrup
Used as a natural sweetener, it adds depth of flavor and keeps the mixture smooth without the graininess of some sugars.
Vanilla Extract
A small addition that elevates the entire flavor profile, giving the cheesecake its warm, dessert-like aroma.
Fresh Strawberries (or Other Fruits)
These create the vibrant topping layer. Their natural sweetness and slight acidity complement the creamy filling beautifully.
Lemon Juice
Just a splash brightens the fruit topping and enhances the overall flavor balance.
Cornstarch (Optional)
Used to slightly thicken the fruit topping if you prefer a more jam-like consistency.
Step 1: Prepare the Crust
Start by crushing the graham crackers or biscuits into fine crumbs. You can use a food processor for a uniform texture or place them in a sealed bag and crush them with a rolling pin. Once crushed, mix them thoroughly with melted butter until the texture resembles wet sand.
Spoon the mixture evenly into the bottom of each jar and press it down firmly using the back of a spoon. This creates a compact base that will hold together when you scoop into the dessert.
Step 2: Make the Cheesecake Filling
In a mixing bowl, combine the softened cream cheese and Greek yogurt. Beat them together until smooth and free of lumps. This step is important for achieving that silky cheesecake texture.
Add the protein powder, honey or maple syrup, and vanilla extract. Continue mixing until everything is fully incorporated and the mixture becomes thick, creamy, and slightly fluffy.
Step 3: Assemble the Layers
Carefully spoon or pipe the cheesecake filling over the prepared crust in each jar. Smooth out the top using a spatula or the back of a spoon to create an even layer.
Make sure to leave a little space at the top for the fruit layer. This helps keep the presentation neat and visually appealing.
Step 4: Prepare the Strawberry Topping
In a small saucepan, combine chopped strawberries with a bit of honey or maple syrup and a splash of lemon juice. Cook over medium heat, stirring occasionally, until the strawberries break down and release their juices.
If you prefer a thicker topping, mix a small amount of cornstarch with water and stir it into the mixture. Let it simmer until it thickens slightly, then remove from heat and allow it to cool completely.
Step 5: Add the Topping
Once the strawberry mixture has cooled, spoon it over the cheesecake layer in each jar. Spread it evenly so every bite gets that fruity burst of flavor.
You can also add a few fresh strawberry slices on top for extra texture and visual appeal.
Step 6: Chill Before Serving
Place the jars in the refrigerator for at least 2–3 hours. This allows the layers to set properly and helps the flavors meld together.
For the best texture and taste, letting them chill overnight will give you that firm, classic cheesecake consistency in every spoonful.
How Long to Prepare the High-Protein Cheesecake Jars
Preparing these cheesecake jars is surprisingly quick, especially compared to a traditional baked cheesecake. The active prep time usually takes about 20–25 minutes, which includes crushing the base, mixing the filling, and preparing the fruit topping. If you work efficiently or prep ingredients ahead of time, you might even finish sooner.
The chilling time, however, is where patience comes in. For the best texture, the jars should be refrigerated for at least 2–3 hours. If you can leave them overnight, the flavors deepen and the filling sets more firmly, giving you that classic cheesecake consistency in a no-bake format.
Tips for Perfect High-Protein Cheesecake Jars
Getting the texture right is key. Always use softened cream cheese to avoid lumps and ensure a smooth, creamy filling. Mixing thoroughly at each step helps create that luxurious consistency you’re aiming for.
Balance is everything in this recipe. Taste the filling before assembling and adjust sweetness or tanginess as needed. A little extra honey or a splash more lemon juice can completely transform the final flavor.
Layering neatly also makes a difference. Using a piping bag for the filling can give your jars a clean, professional look, especially if you’re serving guests.
Watch Out for These Mistakes While Cooking
One common mistake is overmixing after adding protein powder. This can make the filling too dense or slightly gritty. Mix just until combined for the best results.
Another issue is adding the fruit topping while it’s still warm. This can melt the cheesecake layer and ruin the clean separation between layers. Always let the topping cool completely.
Skipping the chill time is also tempting, but it’s essential. Without enough time in the fridge, the texture won’t fully set, and the dessert may feel too soft.
What to Serve With High-Protein Cheesecake Jars?
Fresh Fruit Salad
A light fruit salad pairs beautifully, adding freshness and balancing the richness of the cheesecake.
Espresso or Black Coffee
The slight bitterness of coffee complements the sweetness and creaminess perfectly.
Dark Chocolate Shavings
Sprinkling a bit of dark chocolate on top or serving it on the side enhances the dessert’s indulgence.
Granola or Nut Mix
A crunchy side like granola or toasted nuts adds texture contrast and extra nutrients.
Herbal Tea
A calming herbal tea, such as mint or chamomile, rounds out the dessert experience in a soothing way.
Storage Instructions
These cheesecake jars store exceptionally well, making them perfect for meal prep. Cover each jar tightly with a lid or plastic wrap and keep them refrigerated. They will stay fresh for up to 4–5 days without losing their texture or flavor.
If you plan to store them longer, it’s best to keep the fruit topping separate and add it just before serving. This prevents excess moisture from seeping into the cheesecake layer.
Freezing is also an option. You can freeze the jars (without the topping) for up to one month. When ready to enjoy, thaw them overnight in the refrigerator and add fresh topping before serving.
Estimated Nutrition
Each jar is designed to be a balanced treat. On average, one serving contains a good amount of protein thanks to the Greek yogurt and protein powder, moderate healthy fats from the cream cheese, and controlled sugars depending on your sweetener choice.
While exact values will vary based on ingredients used, these jars are generally lower in sugar and higher in protein than traditional cheesecake, making them a smarter dessert option.
Frequently Asked Questions
Can I make these cheesecake jars without protein powder?
Yes, you can simply omit the protein powder and still get a delicious result. The texture will remain creamy, though the protein content will be slightly lower.
Can I use frozen strawberries for the topping?
Absolutely. Just thaw them first and cook them the same way as fresh strawberries. They may release more liquid, so you might need a bit more thickener.
Are these cheesecake jars suitable for meal prep?
They’re perfect for it. You can prepare several jars in advance and store them in the fridge for easy snacks or desserts throughout the week.
Can I make this recipe dairy-free?
Yes, substitute dairy-free cream cheese and yogurt alternatives. The texture may vary slightly, but it will still be tasty.
How can I increase the protein even more?
You can add a bit more protein powder or incorporate cottage cheese into the filling. Blending it well will keep the texture smooth.
Conclusion
High-Protein Cheesecake Jars bring together convenience, flavor, and nutrition in a way that feels almost too good to be true. They’re easy to prepare, endlessly customizable, and perfect for everything from casual snacks to elegant desserts.
Once you try them, they quickly become a staple—something you can rely on whenever you want a satisfying treat without the heaviness of traditional cheesecake.
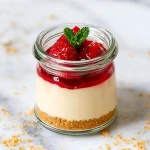
High-Protein Cheesecake Jars
- Total Time: 35 minutes + chilling
- Yield: 4 jars 1x
- Diet: High-Protein
Description
Craving a creamy, indulgent dessert that also fits into your healthy lifestyle? These High-Protein Cheesecake Jars are the perfect solution. With a buttery biscuit base, a smooth and tangy protein-packed cheesecake layer, and a fresh strawberry topping, this no-bake treat is ideal for a quick breakfast, easy dinner dessert, or healthy snack. Whether you’re looking for breakfast ideas, dinner ideas, or an easy recipe, this dish delivers.
Ingredients
1 cup graham cracker crumbs
4 tbsp melted butter
1 cup cream cheese
1 cup Greek yogurt
1 scoop vanilla protein powder
3 tbsp honey or maple syrup
1 tsp vanilla extract
1 1/2 cups fresh strawberries
1 tbsp lemon juice
1 tsp cornstarch (optional)
Instructions
1. Crush the graham crackers into fine crumbs and mix with melted butter until the texture resembles wet sand.
2. Spoon the mixture into jars and press firmly to form the base layer.
3. In a bowl, mix softened cream cheese and Greek yogurt until smooth.
4. Add protein powder, honey, and vanilla extract, then mix until creamy and well combined.
5. Spoon or pipe the cheesecake filling over the crust and smooth the top.
6. In a saucepan, cook strawberries with honey and lemon juice until softened and slightly thickened.
7. Add cornstarch slurry if a thicker texture is desired, then let the mixture cool completely.
8. Spoon the cooled strawberry topping over the cheesecake layer.
9. Refrigerate for at least 2–3 hours or overnight before serving.
Notes
Always use softened cream cheese to achieve a smooth, lump-free filling.
Let the strawberry topping cool completely before layering to maintain clean layers.
Chill overnight for the best texture and flavor development.
- Prep Time: 25 minutes
- Cook Time: 10 minutes
- Category: Dessert
- Method: No-bake
- Cuisine: American
Nutrition
- Serving Size: 1 jar
- Calories: 320
- Sugar: 14g
- Sodium: 180mg
- Fat: 18g
- Saturated Fat: 10g
- Unsaturated Fat: 6g
- Trans Fat: 0g
- Carbohydrates: 26g
- Fiber: 2g
- Protein: 15g
- Cholesterol: 45mg