
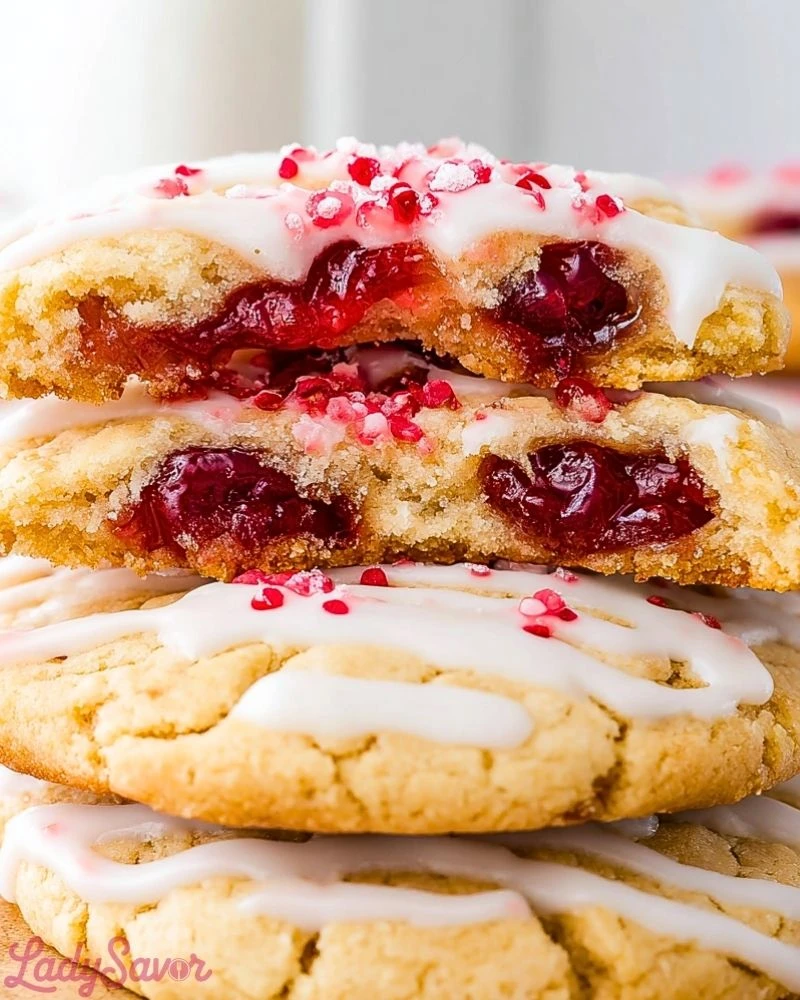
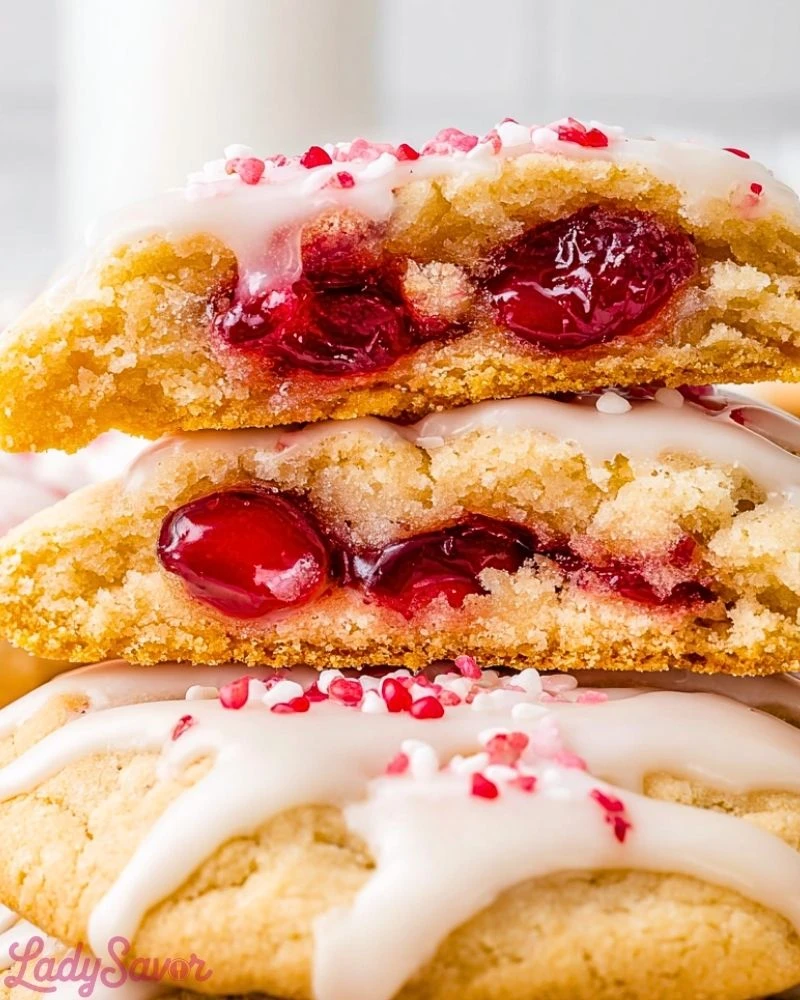
Soft, buttery cookies filled with sweet cherry pie filling and topped with a smooth vanilla glaze create a dessert that feels both nostalgic and bakery-worthy. Every bite delivers a delicious contrast between the tender cookie exterior and the rich, fruity center bursting with cherry flavor. Finished with festive pink and red sprinkles, these cookies are as beautiful as they are irresistible.
Perfect for holidays, Valentine’s Day celebrations, cookie exchanges, or simply satisfying a sweet craving, Easy Glazed Stuffed Cherry Pie Cookies combine the comforting taste of classic sugar cookies with the indulgent surprise of cherry pie filling. They are easy enough for beginner bakers while still impressive enough to serve at special gatherings.
Why You’ll Love This Easy Glazed Stuffed Cherry Pie Cookies Recipe
These cookies bring together everything people love about homemade desserts: soft texture, fruity filling, and a sweet glaze that melts into every bite. The cherry filling adds a vibrant flavor that balances perfectly with the buttery cookie dough, creating a bakery-style treat without complicated techniques.
Another reason these cookies stand out is their versatility. They can be decorated for holidays, birthdays, bridal showers, or romantic celebrations with different sprinkles and glaze colors. Since the dough is easy to work with and the filling comes together quickly, they are ideal for both casual baking days and festive dessert tables.
Preparation Phase & Tools to Use
Having the right tools ready before baking makes the entire process smoother and helps ensure perfectly stuffed cookies every time.
- Mixing Bowls: Essential for combining wet and dry ingredients separately without overmixing the dough.
- Electric Mixer or Stand Mixer: Helps cream the butter and sugar properly, creating a light and fluffy texture.
- Measuring Cups and Spoons: Accurate measurements are important for maintaining the soft cookie consistency.
- Baking Sheets: Provide even heat distribution so the cookies bake uniformly.
- Parchment Paper: Prevents sticking and makes cleanup easier while helping the bottoms bake evenly.
- Cookie Scoop: Keeps cookie sizes consistent for even baking.
- Cooling Rack: Allows the cookies to cool properly so the glaze sets beautifully.
- Small Spoon or Scoop: Useful for placing the cherry filling neatly into the cookie centers.
Each of these tools contributes to creating cookies with the ideal balance of softness, structure, and presentation.
Preparation Tips
For the best texture, make sure the butter is softened to room temperature before mixing the dough. Cold butter will not cream properly, while overly melted butter can cause the cookies to spread too much during baking. Chilling the dough for 20 to 30 minutes before stuffing can also make it easier to handle and help the cookies maintain their shape.
When adding the cherry filling, avoid overfilling the centers because too much filling can leak during baking. Pat the cherries slightly dry if the pie filling seems extra syrupy. To achieve a smooth glaze, whisk the powdered sugar thoroughly to remove lumps before adding liquid ingredients. Finally, allow the cookies to cool completely before glazing so the icing stays glossy and sets perfectly.
Ingredients for Easy Glazed Stuffed Cherry Pie Cookies
For the Cookie Dough
- 2 ¾ cups all-purpose flour
- 1 teaspoon baking powder
- ½ teaspoon baking soda
- ½ teaspoon salt
- 1 cup unsalted butter, softened
- 1 ¼ cups granulated sugar
- 1 large egg
- 1 tablespoon vanilla extract
- 2 tablespoons sour cream or Greek yogurt
- 2 tablespoons milk if needed for consistency
For the Cherry Filling
- 1 cup cherry pie filling
- ½ teaspoon almond extract (optional for deeper cherry flavor)
- 1 teaspoon cornstarch if filling is too thin
For the Vanilla Glaze
- 1 ½ cups powdered sugar
- 2 to 3 tablespoons milk
- ½ teaspoon vanilla extract
- Pinch of salt
Optional Toppings
- Valentine sprinkles
- Pink sanding sugar
- White chocolate drizzle
- Crushed freeze-dried cherries
Step 1: Prepare the Baking Area
Preheat the oven to 350°F (175°C). Line two baking sheets with parchment paper or silicone baking mats. Organizing the ingredients and tools before mixing helps streamline the process and prevents overmixing later.
Allow the butter, egg, and sour cream to sit at room temperature for about 20 minutes. Room-temperature ingredients blend more evenly and create a softer cookie texture.
Step 2: Mix the Dry Ingredients
In a medium mixing bowl, whisk together the flour, baking powder, baking soda, and salt. Whisking distributes the leavening agents evenly throughout the flour so every cookie bakes consistently.
Set the bowl aside while preparing the wet ingredients.
Step 3: Cream the Butter and Sugar
In a large mixing bowl, use an electric mixer to beat the softened butter and granulated sugar together for about 2 to 3 minutes. The mixture should become pale, fluffy, and airy.
Proper creaming is essential because it incorporates air into the dough, helping the cookies bake up soft and tender rather than dense.
Step 4: Add the Wet Ingredients
Mix the egg into the butter mixture until fully combined. Add the vanilla extract and sour cream, then continue mixing until smooth.
The sour cream adds moisture and richness while helping create a softer cookie crumb. If the dough appears too thick after adding the flour later, a tablespoon or two of milk can help loosen it slightly.
Step 5: Combine the Dough
Gradually add the dry ingredients into the wet ingredients while mixing on low speed. Stir only until the flour disappears. Overmixing at this stage can develop excess gluten and make the cookies tough.
The dough should feel soft but manageable. If it becomes sticky, chill it in the refrigerator for 20 to 30 minutes before shaping.
Step 6: Prepare the Cherry Filling
Chop larger cherries from the pie filling into smaller pieces to make stuffing easier and prevent the cookies from breaking open while baking.
If the filling seems overly runny, stir in the cornstarch to help thicken it slightly. Add almond extract if desired for a bakery-style cherry flavor.
Step 7: Portion the Cookie Dough
Use a cookie scoop or tablespoon to portion equal amounts of dough. Flatten each portion gently in your hand or on parchment paper.
Keeping the dough portions consistent ensures all cookies bake evenly and finish at the same time.
Step 8: Stuff the Cookies
Place about 1 teaspoon of cherry filling into the center of half of the flattened dough rounds. Cover each filled portion with another flattened dough piece.
Carefully pinch and seal the edges completely so the filling stays enclosed during baking. Roll gently into smooth balls if needed.
Avoid overstuffing because excessive filling may leak out while the cookies spread in the oven.
Step 9: Arrange on Baking Sheets
Place the stuffed cookie dough balls about 2 inches apart on the prepared baking sheets.
Slightly flatten the tops with your hand for a more even baking shape. If desired, chill the assembled cookies for 10 minutes before baking to reduce spreading.
Step 10: Bake the Cookies
Bake for 12 to 15 minutes or until the edges are lightly golden while the centers remain pale and soft.
Do not overbake. The cookies continue cooking slightly from residual heat after they leave the oven, helping maintain a soft texture.
Rotate the baking trays halfway through baking if your oven heats unevenly.
Step 11: Cool Completely
Allow the cookies to cool on the baking sheet for 5 minutes before transferring them to a wire cooling rack.
Cooling the cookies fully before glazing prevents the icing from melting and becoming too thin.
Step 12: Prepare the Vanilla Glaze
In a medium bowl, whisk together powdered sugar, vanilla extract, salt, and milk until smooth.
Add milk gradually until the glaze reaches a pourable consistency. The glaze should slowly drip from a spoon without being watery.
For a thicker bakery-style topping, use less milk.
Step 13: Glaze the Cookies
Spoon or drizzle the glaze over the cooled cookies. Let the glaze flow naturally down the sides for a homemade bakery appearance.
Immediately decorate with sprinkles or sanding sugar before the glaze sets.
Step 14: Let the Glaze Set
Allow the cookies to rest at room temperature for 20 to 30 minutes so the glaze can firm up.
Once set, the cookies become easier to stack, store, and transport without smudging the icing.
Step 15: Serve and Enjoy
Serve the Easy Glazed Stuffed Cherry Pie Cookies with coffee, tea, milk, or hot chocolate for a comforting dessert experience.
These cookies taste incredible slightly chilled or at room temperature, making them perfect for parties, holidays, bake sales, dessert platters, or late-night sweet cravings.
Easy Glazed Stuffed Cherry Pie Cookies
Notes
Easy Glazed Stuffed Cherry Pie Cookies are best enjoyed fresh on the day they are baked, but their flavor becomes even richer after a few hours as the cherry filling settles into the soft cookie layers. The combination of buttery dough, sweet glaze, and fruity filling creates a dessert that tastes like a cross between a sugar cookie and a mini cherry pie.
If you want a more homemade fruit flavor, you can replace canned cherry pie filling with thick homemade cherry compote. Make sure any homemade filling is cooled completely before using it inside the cookies to avoid softening the dough excessively.
For a more festive appearance, experiment with seasonal sprinkle combinations or drizzle white chocolate over the glaze. These cookies also pair beautifully with vanilla ice cream, whipped cream, or even a dusting of powdered sugar for an elegant dessert platter.
The dough can be prepared in advance and refrigerated overnight, making these cookies convenient for holiday baking schedules or party preparation. Chilled dough is also easier to shape and stuff without sticking.
Watch Out for These Mistakes While Cooking
Overfilling the Cookies
Adding too much cherry filling is one of the most common mistakes. Excess filling can burst through the dough during baking and create messy cookies. Stick to about 1 teaspoon of filling per cookie for the best results.
Not Sealing the Edges Properly
If the dough is not sealed completely around the filling, the cherry mixture may leak out while baking. Press the edges firmly and gently roll the dough into a smooth ball to keep everything enclosed.
Using Warm Cookies for Glazing
Applying glaze before the cookies cool fully can cause the icing to melt and slide off. Always allow the cookies to cool completely on a wire rack before decorating.
Overmixing the Dough
Too much mixing after adding flour can create dense and tough cookies. Mix only until the ingredients are combined for a softer texture.
Overbaking
The cookies should remain pale with lightly golden edges. Overbaking dries them out and reduces the soft bakery-style consistency.
Skipping Dough Chilling
If the dough feels sticky or too soft, chilling it helps maintain the cookie shape and prevents excessive spreading in the oven.
Thin Filling Consistency
Watery cherry filling can seep through the dough and create soggy cookies. Thickening the filling slightly with cornstarch can help maintain structure.
Storage Instructions
Store the glazed cookies in an airtight container at room temperature for up to 3 days. Place parchment paper between layers to prevent the glaze from sticking.
For longer freshness, refrigerate the cookies for up to 1 week. Chilling slightly enhances the cherry flavor and gives the filling a thicker, richer consistency.
These cookies also freeze surprisingly well. Arrange them in a single layer until frozen solid, then transfer to a freezer-safe container or zip-top bag. Freeze for up to 2 months. Thaw at room temperature before serving.
If freezing unglazed cookies, add the glaze fresh after thawing for the best appearance and texture.
Estimated Nutrition
Per Cookie (Approximate)
- Calories: 240
- Carbohydrates: 34g
- Protein: 2g
- Fat: 11g
- Saturated Fat: 6g
- Cholesterol: 28mg
- Sodium: 95mg
- Sugar: 20g
- Fiber: 1g
Nutritional values may vary depending on portion size, type of cherry filling used, and glaze thickness.
Frequently Asked Questions
Can I use homemade cherry filling instead of canned pie filling?
Yes, homemade cherry filling works wonderfully as long as it is thick enough to stay inside the cookies during baking.
Can I freeze the cookie dough?
Absolutely. You can freeze the stuffed cookie dough balls before baking for up to 2 months. Bake directly from frozen and add a few extra minutes to the baking time.
What other fillings can I use?
These cookies are versatile and work well with strawberry, blueberry, raspberry, apple, or even chocolate fillings.
Why did my cookies spread too much?
Overly soft butter or warm dough can cause spreading. Chilling the dough before baking usually solves this issue.
Can I make these cookies ahead of time?
Yes, the cookies can be baked a day or two in advance and stored in an airtight container until ready to serve.
How do I keep the glaze thick and smooth?
Add milk gradually while whisking until the glaze reaches the desired consistency. Using sifted powdered sugar also helps prevent lumps.
Can I make these cookies without glaze?
Yes, although the glaze adds sweetness and bakery-style presentation, the cookies are still delicious without it.
What is the best way to serve these cookies?
They taste wonderful with coffee, tea, milk, or vanilla ice cream and make an excellent addition to dessert platters.
Conclusion
Easy Glazed Stuffed Cherry Pie Cookies combine the comforting texture of soft homemade cookies with the fruity richness of cherry pie filling in every bite. Their elegant appearance, vibrant flavor, and soft bakery-style texture make them ideal for holidays, celebrations, gifting, or everyday dessert cravings.
With simple ingredients, beginner-friendly steps, and endless decorating possibilities, these cookies are guaranteed to become a favorite in any dessert collection. Whether served fresh with coffee or packed into holiday cookie tins, they deliver a delicious balance of sweetness, softness, and fruity indulgence that keeps everyone reaching for another.
Easy Glazed Stuffed Cherry Pie Cookies
- Total Time: 45 minutes
- Yield: 18 cookies 1x
- Diet: Vegetarian
Description
These Easy Glazed Stuffed Cherry Pie Cookies are soft, buttery, and filled with sweet cherry pie filling for the ultimate bakery-style dessert. Finished with a smooth vanilla glaze and festive sprinkles, they are perfect for holiday baking, Valentine’s Day treats, dessert platters, cookie exchanges, or whenever you need easy dessert ideas everyone will love. This easy recipe combines the comforting flavor of homemade sugar cookies with fruity cherry pie goodness in every bite.
Ingredients
2 ¾ cups all-purpose flour
1 teaspoon baking powder
½ teaspoon baking soda
½ teaspoon salt
1 cup unsalted butter, softened
1 ¼ cups granulated sugar
1 large egg
1 tablespoon vanilla extract
2 tablespoons sour cream
1 cup cherry pie filling
½ teaspoon almond extract
1 teaspoon cornstarch
1 ½ cups powdered sugar
2 to 3 tablespoons milk
Pinch salt
Valentine sprinkles for topping
Instructions
1. Preheat the oven to 350°F and line baking sheets with parchment paper.
2. Whisk together the flour, baking powder, baking soda, and salt.
3. Beat the butter and sugar until light and fluffy.
4. Add the egg, vanilla extract, and sour cream, mixing until smooth.
5. Gradually mix the dry ingredients into the wet ingredients until a soft dough forms.
6. Chill the dough for 20 minutes if sticky.
7. Mix almond extract into the cherry filling and thicken with cornstarch if needed.
8. Flatten portions of dough and add cherry filling to the center.
9. Seal the cookies with another dough layer.
10. Arrange on baking sheets and bake for 12 to 15 minutes.
11. Cool the cookies completely on a wire rack.
12. Whisk together powdered sugar, milk, vanilla extract, and salt to make the glaze.
13. Drizzle glaze over cooled cookies.
14. Top with sprinkles and allow glaze to set before serving.
Notes
Do not overfill the cookies or the cherry filling may leak during baking.
Chilling the dough helps prevent spreading and makes stuffing easier.
Allow the cookies to cool completely before glazing for the best finish.
- Prep Time: 30 minutes
- Cook Time: 15 minutes
- Category: Dessert
- Method: Baking
- Cuisine: American
Nutrition
- Serving Size: 1 cookie
- Calories: 240
- Sugar: 20g
- Sodium: 95mg
- Fat: 11g
- Saturated Fat: 6g
- Unsaturated Fat: 4g
- Trans Fat: 0g
- Carbohydrates: 34g
- Fiber: 1g
- Protein: 2g
- Cholesterol: 28mg