
Few desserts hit the comfort zone quite like a velvety Chocolate Pudding. This luscious treat is the epitome of indulgence — rich, smooth, and intensely chocolaty. Whether you’re winding down after a long day or celebrating a special moment, chocolate pudding satisfies that craving for something sweet, familiar, and utterly delicious.
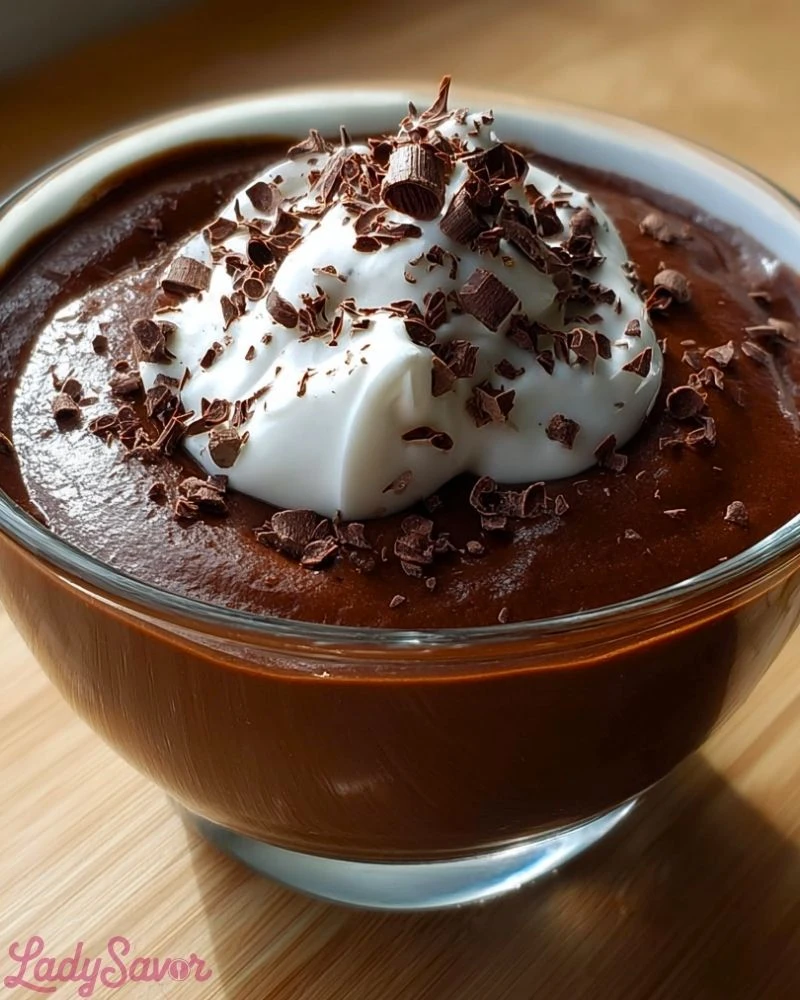
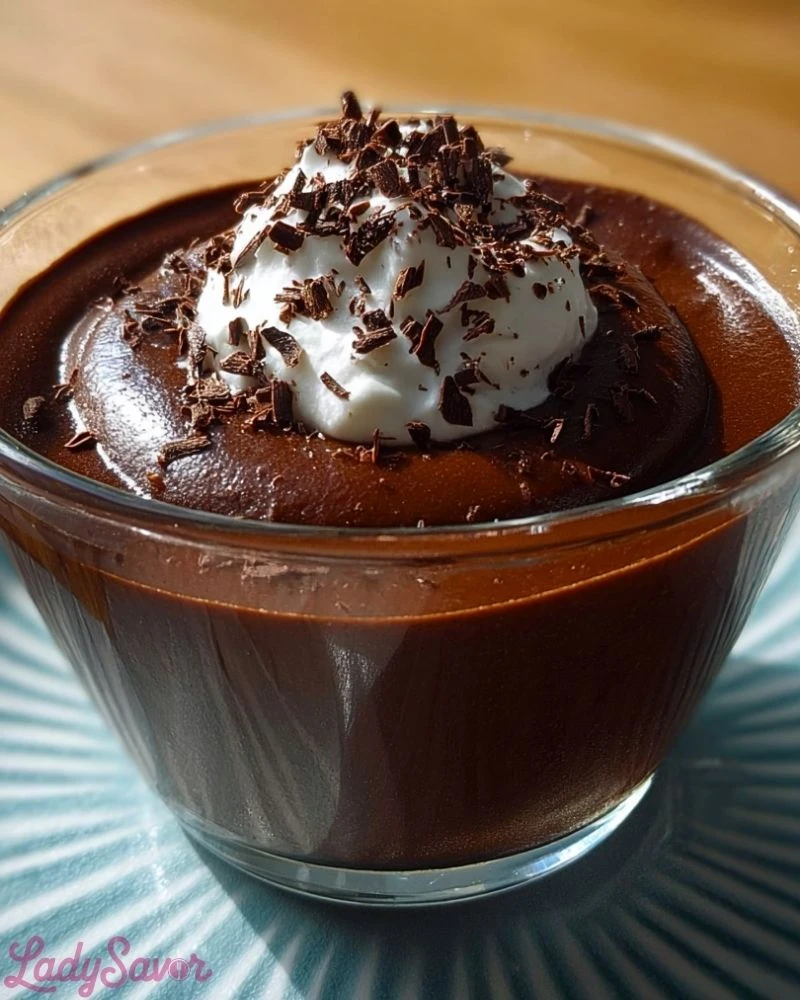
The beauty of this classic dessert lies in its simplicity. It doesn’t need fancy presentation or complex steps to steal the spotlight. A bowl of warm (or chilled) chocolate pudding, topped with whipped cream and shavings of dark chocolate, speaks for itself — timeless, cozy, and endlessly satisfying.
Why You’ll Love This Chocolate Pudding
- It’s decadently rich and ultra-smooth.
- Made from scratch with simple ingredients.
- Can be served warm or chilled.
- Perfect for everyday cravings or elegant dinner parties.
- Gluten-free and easily adaptable for dairy-free diets.
Preparation Phase & Tools to Use (Essential Tools and Equipment)
To make chocolate pudding, you don’t need much, but each tool plays a critical role:
- Medium Saucepan: For heating and blending ingredients evenly.
- Whisk: Ensures a lump-free mixture and smooth consistency.
- Rubber Spatula: Ideal for scraping down the sides and stirring without sticking.
- Fine Mesh Sieve (optional): For the silkiest pudding texture.
- Heatproof Bowls or Ramekins: For chilling and serving.
Preparation Tips
Start by prepping all your ingredients — this dessert comes together quickly once the heat is on. Use high-quality cocoa powder and real chocolate if possible, as they greatly influence the final flavor. Constant whisking while cooking is essential to prevent lumps and to achieve that silky texture. For extra smoothness, strain the pudding through a sieve before pouring into bowls. Lastly, cover the surface with plastic wrap if chilling to avoid a skin forming on top. Enjoy it warm for instant comfort or chilled for a firmer, mousse-like finish.
Ingredients for this Chocolate Pudding
- 2 ¾ cups whole milk
- ½ cup granulated sugar
- ¼ cup unsweetened cocoa powder (Dutch-processed preferred)
- 3 tablespoons cornstarch
- ¼ teaspoon salt
- 3 large egg yolks
- ½ cup semi-sweet or bittersweet chocolate (finely chopped or chips)
- 1 tablespoon unsalted butter
- 1 teaspoon pure vanilla extract
- Whipped cream and chocolate shavings (for garnish, optional)
Step 1: Whisk Dry Ingredients
In a medium saucepan (off heat), whisk together sugar, cocoa powder, cornstarch, and salt. This step ensures all dry ingredients are evenly combined and eliminates any clumps in the cocoa or starch.
Step 2: Add Milk and Yolks
Gradually whisk in the milk until smooth and lump-free. Add egg yolks and whisk again until fully incorporated. This slow integration prevents any curdling and creates a custard base.
Step 3: Heat and Stir Constantly
Place the saucepan over medium heat and cook, whisking constantly. The mixture will begin to thicken after 5-8 minutes. Do not walk away — keep stirring to avoid scorching or forming lumps. The pudding should come to a gentle boil.
Step 4: Cook Until Thickened
Once bubbles appear and the pudding has thickened to a creamy consistency, continue cooking for 1 minute more while whisking. This ensures the cornstarch is fully activated and the pudding won’t taste starchy.
Step 5: Add Chocolate and Butter
Remove from heat. Immediately stir in the chopped chocolate and butter until both are fully melted and the mixture is silky smooth. The heat of the pudding will melt everything quickly.
Step 6: Finish with Vanilla
Stir in the vanilla extract for a final touch of warmth and depth. Taste and adjust sweetness if needed.
Step 7: Strain for Extra Smoothness (Optional)
For the smoothest result, pour the pudding through a fine mesh sieve into a large bowl. This step removes any overcooked bits or unmixed egg.
Step 8: Portion and Chill (or Serve Warm)
Pour the pudding into individual bowls or ramekins. For chilled pudding, press plastic wrap directly onto the surface of each portion to prevent skin from forming. Refrigerate for at least 2 hours.
Step 9: Garnish and Serve
Top with a generous dollop of whipped cream and a sprinkle of chocolate shavings before serving. Best enjoyed the day it’s made, but it will keep in the fridge for up to 3 days.
Notes
Chocolate pudding is a dessert that rewards patience and attention. Stirring constantly during cooking is non-negotiable; it guarantees a creamy, lump-free finish. If you’re in a rush, you can serve it warm, but chilling deepens the flavor and improves the texture. Using high-quality chocolate really makes a difference here, so don’t skimp — the better the chocolate, the better the pudding. Also, consider the flavor of your vanilla extract. Real vanilla brings depth that artificial versions just can’t match.
Watch Out for These Mistakes While Cooking
- Skipping constant whisking: Leads to lumpy or scorched pudding.
- Overcooking: Cooking too long or at high heat can break the custard texture.
- Adding chocolate too early: Chocolate can burn if added while the pot is still on heat.
- Not straining: Skipping the sieve step may leave bits of scrambled egg or clumped starch.
- Forgetting the plastic wrap on chilled pudding: This causes an unappealing skin to form on top.
Storage Instructions
To store chocolate pudding, let it cool completely, then cover with plastic wrap pressed directly on the surface to prevent a skin from forming. Refrigerate for up to 3 days. Do not freeze — the texture will become grainy. If you’re prepping ahead for a party, pudding can be made the night before and stored in individual ramekins for easy serving. For best results, garnish just before serving.
Estimated Nutrition
(Per serving, assuming 6 servings total)
- Calories: ~280
- Total Fat: 14g
- Saturated Fat: 8g
- Cholesterol: 90mg
- Sodium: 140mg
- Carbohydrates: 35g
- Fiber: 2g
- Sugars: 24g
- Protein: 5g
Frequently Asked Questions
Can I make this pudding dairy-free?
Yes! Use almond, oat, or coconut milk and a plant-based butter alternative. Just ensure it’s unsweetened to control sugar content.
Can I use chocolate chips instead of chopped chocolate?
Definitely. Just make sure they’re good quality and melt easily.
How long does it take for the pudding to set?
It typically sets in about 2 hours in the refrigerator. Overnight is even better for maximum firmness.
Is it okay to skip the eggs?
You can, but the texture will be more gelatinous and less creamy. Increase cornstarch slightly to compensate.
Can I double the recipe?
Absolutely, just be sure to use a larger pot and stir diligently to avoid hot spots.
What if I don’t have cornstarch?
You can substitute arrowroot or tapioca starch, but avoid flour — it will make the pudding gritty.
Can I reheat leftover pudding?
Yes, gently reheat on the stove or in the microwave. Stir frequently and add a splash of milk if too thick.
Why is my pudding grainy?
This can happen if the eggs curdle due to high heat or if the chocolate wasn’t fully melted in.
Conclusion
Homemade chocolate pudding is pure nostalgic bliss, easy enough for a weekday indulgence and elegant enough for entertaining. With just a handful of ingredients and a bit of technique, you can whip up a dessert that’s far superior to any boxed mix. Smooth, rich, and deeply satisfying — this is the chocolate dessert everyone deserves to master. Whether enjoyed warm or cold, it delivers that perfect spoonful of comfort every time.
Chocolate Pudding
- Total Time: 15 minutes
- Yield: 6 servings 1x
- Diet: Vegetarian
Description
Indulgent, rich, and impossibly smooth, this homemade Chocolate Pudding is the comforting dessert you didn’t know you needed. Whether you’re craving a quick dessert, looking for easy food ideas, or needing a make-ahead treat for guests, this pudding ticks all the boxes. With pantry staples and a few simple tools, you’ll have a decadent and silky pudding that’s far superior to store-bought. This easy recipe is ideal for anyone looking for breakfast ideas, dinner ideas, or a healthy-ish snack to treat themselves — gluten-free and adaptable to fit your lifestyle.
Ingredients
2 ¾ cups whole milk
½ cup granulated sugar
¼ cup unsweetened cocoa powder
3 tablespoons cornstarch
¼ teaspoon salt
3 large egg yolks
½ cup semi-sweet or bittersweet chocolate, finely chopped
1 tablespoon unsalted butter
1 teaspoon pure vanilla extract
Whipped cream and chocolate shavings, for garnish (optional)
Instructions
1. In a medium saucepan (off heat), whisk together sugar, cocoa powder, cornstarch, and salt until combined.
2. Slowly whisk in milk until smooth, then add egg yolks and whisk again.
3. Place over medium heat, whisking constantly, until the mixture thickens and starts to bubble (about 5–8 minutes).
4. Cook for 1 additional minute while whisking to fully activate the cornstarch.
5. Remove from heat and stir in chopped chocolate and butter until completely melted and smooth.
6. Add vanilla extract and stir until incorporated.
7. For an ultra-smooth texture, strain through a fine mesh sieve into a bowl.
8. Divide into bowls or ramekins. Cover with plastic wrap directly touching the surface.
9. Chill at least 2 hours or serve warm with whipped cream and chocolate shavings.
Notes
Constant whisking during heating prevents clumping and creates a silky texture.
Always use high-quality chocolate for the deepest flavor.
Straining the pudding makes it ultra-smooth, especially if any egg has scrambled.
- Prep Time: 5 minutes
- Cook Time: 10 minutes
- Category: Dessert
- Method: Stovetop
- Cuisine: American
Nutrition
- Serving Size: 1 bowl
- Calories: 280
- Sugar: 24g
- Sodium: 140mg
- Fat: 14g
- Saturated Fat: 8g
- Unsaturated Fat: 4g
- Trans Fat: 0g
- Carbohydrates: 35g
- Fiber: 2g
- Protein: 5g
- Cholesterol: 90mg