

Golden, juicy corn on the cob takes on a whole new life when smothered in melted cheese, savory garlic butter, and a sprinkle of fresh herbs. This Cheesy Garlic Butter Corn recipe is the perfect blend of comfort and indulgence — a side dish that demands center stage. It’s the kind of recipe that leaves guests asking for seconds (and the recipe) before they’ve finished their first bite.
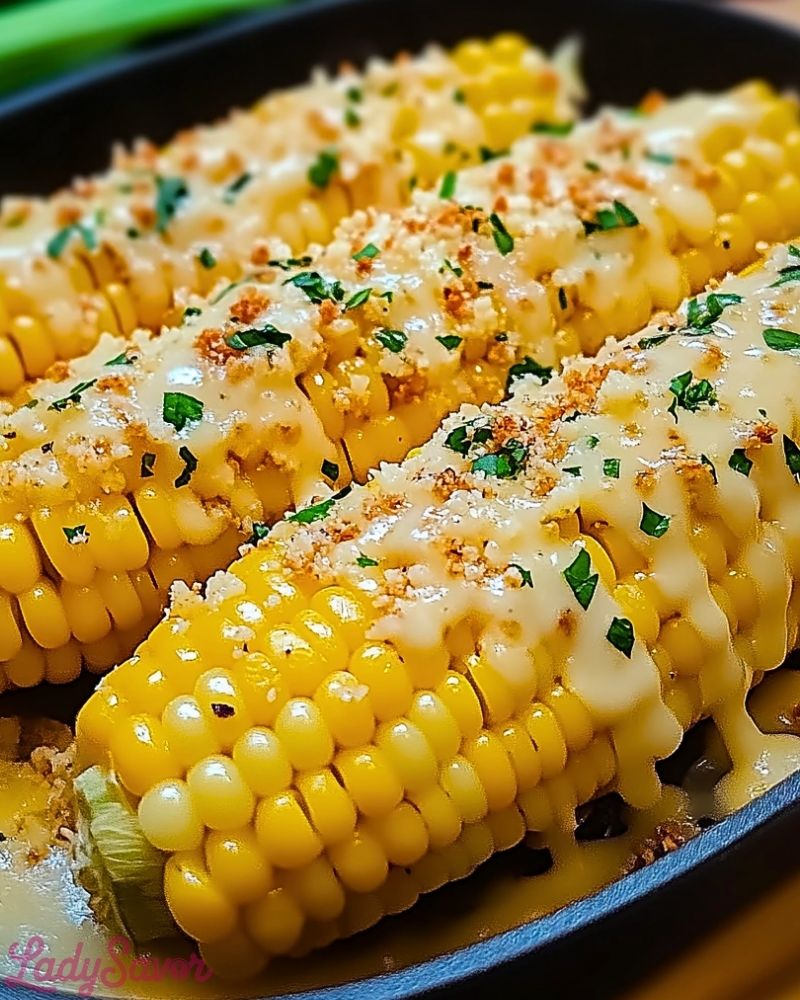
The creamy richness of the cheese, the kick of garlic, and the natural sweetness of fresh corn create a mouthwatering trio that’s both rustic and sophisticated. Whether you’re serving it at a summer barbecue, a cozy weeknight dinner, or a festive gathering, this recipe always delivers with its delicious aroma and crowd-pleasing flavor.
Why You’ll Love This Cheesy Garlic Butter Corn Recipe
- Packed with flavor: A buttery garlic sauce paired with gooey melted cheese creates a flavor bomb in every bite.
- Fast and simple: Minimal prep and quick cooking make this perfect for busy weeknights or spontaneous dinners.
- Versatile side dish: Pairs beautifully with grilled meats, hearty soups, and even vegetarian mains.
- Kid-approved: The creamy, cheesy goodness is irresistible to even the pickiest eaters.
- Customizable: Add spices, swap cheeses, or sprinkle with bacon for your own twist.
Preparation Phase & Tools to Use (Essential Tools and Their Importance)
Before diving into the cooking, having the right tools on hand can make all the difference in both efficiency and final flavor. Here’s what you’ll need for this Cheesy Garlic Butter Corn recipe:
- Large Skillet or Grill Pan: A heavy-bottomed skillet or grill pan helps evenly cook the corn, letting it char slightly for a smoky touch while holding the butter and cheese toppings without mess.
- Basting Brush: Crucial for spreading the garlic butter evenly over the corn. It ensures every kernel gets coated for full flavor coverage.
- Mixing Bowl: Used to combine your melted butter with minced garlic, herbs, and optional spices before brushing.
- Tongs: For flipping the corn safely and evenly while cooking, especially over high heat.
- Cheese Grater: Freshly grated cheese melts more smoothly and tastes better than pre-shredded varieties.
- Oven-safe Dish or Baking Sheet (optional): If you prefer to finish the corn in the oven to melt the cheese thoroughly, this is a must.
These tools simplify the process, reduce cleanup time, and most importantly, help lock in every bit of that cheesy, garlicky goodness.
Preparation Tips
- Pre-cook the corn: If you’re using fresh corn, consider boiling it for 4–5 minutes before grilling or pan-searing. This softens the kernels and shortens overall cook time.
- Use room-temperature butter: Softened butter mixes better with garlic and herbs, and spreads more evenly.
- Don’t skimp on the garlic: Use freshly minced garlic instead of powder for a deeper, more aromatic flavor.
- Cheese selection matters: Mozzarella melts beautifully, but mixing in some sharp cheddar or parmesan can add depth and a slight tang.
- Watch the heat: Cook over medium to medium-high heat. Too hot, and you risk burning the garlic or drying the corn.
Ingredients for This Cheesy Garlic Butter Corn Recipe
Here’s everything you need to make this irresistibly savory corn dish. The ingredients are simple but powerful when combined — each one bringing bold character to every bite.
Main Ingredients:
- 6 ears of fresh corn on the cob, husked and cleaned
- 3 tablespoons unsalted butter, softened
- 3 cloves garlic, finely minced
- 1 tablespoon olive oil (for searing or grilling)
- Salt and black pepper, to taste
Cheesy Topping:
- 1 ½ cups shredded mozzarella cheese
- ¼ cup grated Parmesan cheese (optional, for added richness and saltiness)
- 2 tablespoons fresh parsley, finely chopped (for garnish)
- 1 teaspoon smoked paprika or chili flakes (optional, for a little kick)
Optional Add-Ins:
- Juice of ½ a lime (adds a bright, zesty note)
- Crumbled bacon or chorizo for extra savory crunch
- Chopped cilantro as an alternative to parsley for a bold, herbal twist
These ingredients can be easily adjusted based on your taste or dietary needs. The combination of buttery garlic and melty cheese is the star here, so feel free to get creative with toppings!
Step-by-Step Instructions for Cheesy Garlic Butter Corn
Follow these easy steps to bring this savory, cheesy delight to life. From prep to plating, this process is straightforward but incredibly rewarding.
Step 1: Pre-Cook the Corn (Optional but Recommended)
If using fresh corn, bring a large pot of salted water to a boil. Add the corn and boil for 4–5 minutes until just tender. Drain and set aside.
Why? This softens the kernels slightly and speeds up the final cooking process.
Step 2: Make the Garlic Butter
In a small bowl, combine the softened butter, minced garlic, salt, pepper, and parsley. Mix until smooth.
Tip: For deeper flavor, let it sit for 5–10 minutes to let the garlic infuse into the butter.
Step 3: Sear or Grill the Corn
Heat olive oil in a large skillet or grill pan over medium-high heat. Add the corn and cook for 6–8 minutes, turning every 1–2 minutes to get even browning and light char on all sides.
Step 4: Baste the Corn
Brush the hot corn generously with the garlic butter mixture while it’s still in the pan. Let the butter sizzle and seep into every kernel.
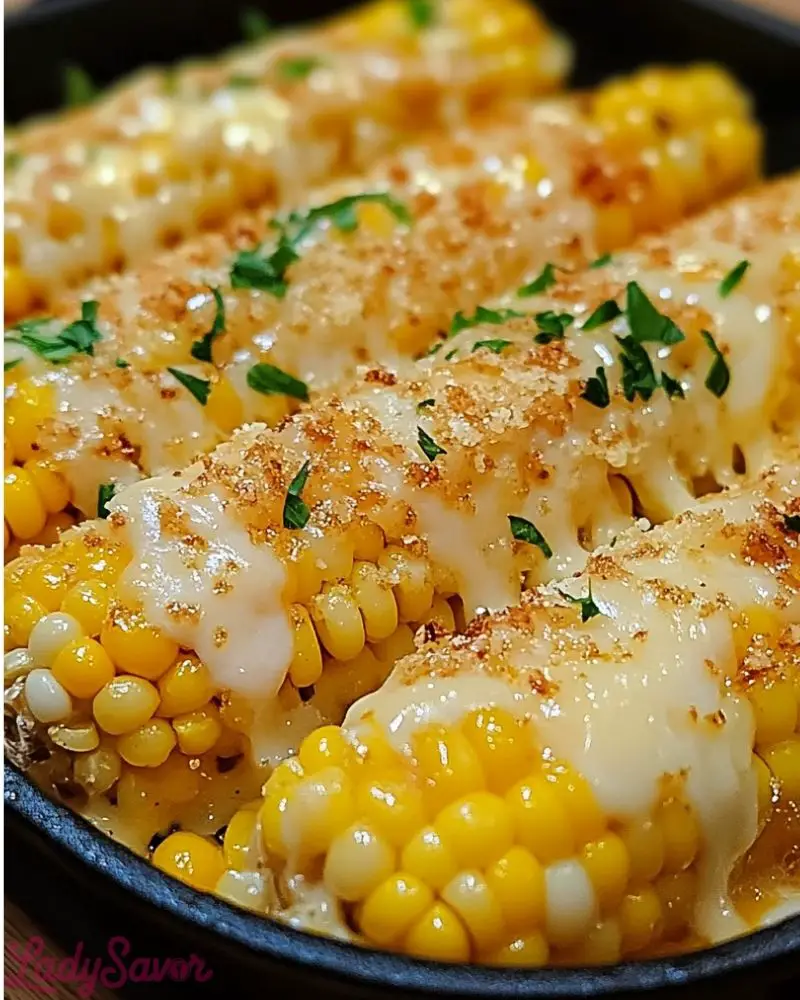
Step 5: Add Cheese
Lower the heat slightly. Sprinkle shredded mozzarella over each cob. Cover the pan with a lid or foil and let the cheese melt for 2–3 minutes. For extra richness, add a sprinkle of Parmesan at this stage.
Step 6: Garnish and Serve
Remove from heat. Sprinkle with chopped parsley and smoked paprika or chili flakes if using. Optionally, drizzle with lime juice for a zesty finish.
Notes
- Corn Variety: While fresh corn is ideal for this recipe, you can also use frozen or canned corn as a substitute. If using frozen corn, ensure it’s fully thawed before cooking. For canned corn, consider briefly grilling it to bring out a little extra flavor.
- Butter Options: Feel free to experiment with different types of butter. For example, garlic-infused butter or compound butter can add an extra layer of flavor.
- Cheese Choices: If mozzarella isn’t available, try using cheddar for a sharper flavor or a mix of both for the ultimate cheesy experience. Gruyère or fontina also melts beautifully and adds a sophisticated touch.
Watch Out for These Mistakes While Cooking
- Burning the Garlic: Garlic can burn quickly, turning bitter. Always cook it over medium heat and be sure to monitor it closely while the butter melts on the corn. If the garlic turns brown too quickly, reduce the heat or remove the pan from the heat for a moment.
- Overcooking the Corn: Corn can become mushy if overcooked. Aim for a tender, but still firm texture. If you’re grilling, watch for slight charring around the kernels for that perfect balance of flavor.
- Not Enough Butter: Garlic butter is key to bringing out the flavor. Don’t skimp on this ingredient! If the corn feels too dry after cooking, brush on more butter for an extra decadent finish.
- Skipping the Resting Time: After cooking, let the corn rest for a minute before serving. This allows the melted cheese to set slightly, making it less likely to slide off the corn when you’re digging in.
- Incorrect Heat Level: If the heat is too high, the cheese will melt too quickly and may not have a chance to meld with the butter. Medium heat is your best friend for a perfect, slow melt.
What to Serve with Cheesy Garlic Butter Corn?
This Cheesy Garlic Butter Corn is a standout side dish that pairs wonderfully with a variety of main courses, adding a rich and savory flavor to your meal. Here are a few ideas for what to serve alongside this creamy, cheesy treat:
8 Delicious Pairing Recommendations:
-
Grilled Chicken
The smoky, savory flavors of grilled chicken complement the rich, buttery corn perfectly. Try serving it with a tangy lemon herb grilled chicken for a fresh contrast. -
Steak
Whether it’s a juicy ribeye, tender filet mignon, or grilled flank steak, the corn’s creamy richness and slight char elevate the steak’s natural flavors. -
BBQ Ribs
The sweet and smoky flavors of BBQ ribs pair beautifully with the indulgence of cheesy garlic corn. The sweetness from the barbecue sauce balances the richness of the corn. -
Roasted Salmon
The buttery texture of the corn enhances the delicate flavors of roasted salmon, making it a perfect pairing for a light, yet satisfying meal. -
Pulled Pork Sandwiches
The savory, slow-cooked pork and tangy sauce contrast wonderfully with the creamy, garlicky corn. This makes for an ideal summer meal, especially for BBQ gatherings. -
Vegetarian Tacos
For a vegetarian option, pair the corn with crispy, spiced veggie tacos. The flavors of the grilled vegetables and the cheese corn create a flavorful contrast. -
Grilled Shrimp
The sweetness of grilled shrimp or prawns combined with the garlicky richness of the corn makes for a fantastic coastal-inspired meal. -
Pasta Salad
A light, refreshing pasta salad with a tangy vinaigrette adds a cool contrast to the warm, cheesy corn. Opt for one with roasted vegetables or feta for extra flavor.
Storage Instructions
If you have leftovers, don’t worry! Cheesy Garlic Butter Corn stores well, making it easy to enjoy the next day.
How to Store:
- Refrigeration: Let the corn cool down to room temperature, then place it in an airtight container. It will last for 3–4 days in the fridge.
- Freezing: While fresh corn on the cob can be frozen, the cheese and butter topping may not maintain its original texture. If you plan to freeze the corn, remove the cheese and butter before freezing the corn itself. Once ready to eat, reheat and add fresh cheese and butter.
How to Reheat:
- In the Microwave: Cover the corn with a damp paper towel to prevent it from drying out, and microwave for 1–2 minutes until heated through. Add a little extra butter for a fresher taste.
- On the Stovetop: Warm it in a skillet over low heat. Add a splash of water or broth to avoid burning, and cover the pan to help it reheat evenly.
- In the Oven: Preheat your oven to 350°F (175°C). Wrap the corn in foil and bake for 10–15 minutes or until heated through. You can also sprinkle additional cheese on top for a melty, fresh topping.
Estimated Nutrition
This recipe provides a delicious, indulgent treat, so here’s an approximate nutritional breakdown per serving (based on 1 corn cob with cheese topping):
- Calories: 220–250 kcal
- Protein: 6g
-
Fat: 18g
- Saturated Fat: 10g
-
Carbohydrates: 18g
- Fiber: 2g
- Sugars: 6g
- Sodium: 300–400mg
- Cholesterol: 30mg
- Calcium: 15–20% of your daily recommended intake
- Vitamin A: 10–15% of your daily recommended intake
This dish is a rich, flavorful option, so it’s best enjoyed in moderation, especially if you’re looking to balance calories and fat intake.
Frequently Asked Questions
Here are some common questions about Cheesy Garlic Butter Corn and their answers. This will help you perfect the dish and troubleshoot any uncertainties.
1. Can I use frozen corn instead of fresh?
Yes, you can use frozen corn! Just make sure to thaw it fully before cooking. Frozen corn may not have the same texture as fresh corn, but it will still taste great when prepared with the garlic butter and cheese.
2. Can I make this recipe ahead of time?
You can prepare the garlic butter and even grill or boil the corn in advance. However, it’s best to add the cheese and finish cooking the corn just before serving to ensure the cheese melts perfectly.
3. How can I make this dish spicier?
Add chili flakes, cayenne pepper, or a dash of hot sauce to the garlic butter mixture. You can also top it with fresh diced jalapeños or serve it with a side of spicy salsa.
4. Can I use other types of cheese?
Absolutely! You can experiment with different cheeses like cheddar, gouda, or a combination. Parmesan adds a lovely salty flavor, while mozzarella provides that gooey melt.
5. Can I grill the corn instead of using a skillet?
Yes, grilling the corn is a fantastic way to add a smoky char. Simply brush the corn with the garlic butter before grilling, and finish with melted cheese once it’s cooked.
6. What’s the best way to serve this at a party or BBQ?
For a party or BBQ, you can prepare the corn and cheese topping separately, then serve the corn on a platter with a choice of toppings. This way, guests can help themselves to the cheese and butter, customizing each ear of corn.
7. Can I make this recipe dairy-free?
To make this dish dairy-free, swap the butter for a plant-based butter alternative and use a dairy-free cheese. While the texture and flavor might be slightly different, it will still be a delicious, dairy-free side.
8. How do I know when the corn is fully cooked?
Corn is done when it’s tender but still firm. If you’re grilling or pan-searing, you should see slight charring on the kernels, which adds flavor without overcooking the corn. Test with a fork to ensure it’s soft but not mushy.
Conclusion
This Cheesy Garlic Butter Corn recipe is the ultimate side dish to impress guests, make family dinners a hit, or elevate any outdoor cookout. With just a few ingredients and simple steps, you’ll be able to create a mouthwatering, cheesy, and garlicky treat that’s sure to be a favorite. From its savory richness to the delightful cheesy topping, it’s a dish that satisfies everyone at the table.
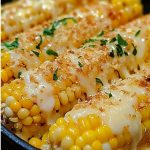
Cheesy Garlic Butter Corn
- Total Time: 20 minutes
- Yield: 6 servings 1x
Description
Get ready to fall in love with this bold, savory side dish! Cheesy Garlic Butter Corn is the ultimate comfort food — sweet, juicy corn brushed with rich garlic butter and covered in gooey melted cheese. Whether you’re looking for easy dinner ideas, BBQ side dishes, or quick food ideas, this one hits all the right notes. It’s a guaranteed crowd-pleaser at cookouts, family dinners, or as a crave-worthy healthy snack with a twist. The combination of butter, garlic, cheese, and herbs creates an aroma and flavor so irresistible, it turns a simple ear of corn into a star dish. Perfect for those who want easy recipes that taste gourmet with minimal effort.
Ingredients
- 6 ears fresh corn on the cob, husked
- 3 tablespoons unsalted butter, softened
- 3 cloves garlic, finely minced
- 1 tablespoon olive oil
- Salt and black pepper, to taste
- 1 ½ cups shredded mozzarella cheese
- ¼ cup grated Parmesan cheese (optional)
- 2 tablespoons chopped fresh parsley
- 1 teaspoon smoked paprika or chili flakes (optional)
- Juice of ½ a lime (optional)
- Crumbled bacon or chopped cilantro (optional add-ins)
Instructions
- Pre-cook the corn (optional): Boil for 4–5 minutes in salted water to soften slightly.
- Make garlic butter: Mix softened butter, garlic, salt, pepper, and parsley in a small bowl.
- Grill or sear corn: Heat olive oil in a skillet or grill pan. Cook corn over medium-high heat for 6–8 minutes, turning to get light char on all sides.
- Brush with garlic butter: Coat each ear of corn generously while still hot.
- Add cheese: Sprinkle mozzarella (and Parmesan if using) over corn. Cover pan and cook for 2–3 minutes until cheese is melted.
- Garnish: Add parsley, paprika or chili flakes, and a squeeze of lime if desired.
- Serve hot: Enjoy immediately while cheesy and melty.
- Prep Time: 10 minutes
- Cook Time: 10 minutes