
I’ll be honest—there’s something deeply comforting about a big spoonful of cheesy funeral potatoes. It’s the kind of dish that doesn’t try too hard, yet still manages to steal the show at potlucks, holiday dinners, or casual family gatherings. I’ve made these countless times, and every batch disappears faster than I can blink. They’re creamy, golden, and bubbling with cheese—the ultimate comfort food, really.
What I love most is how simple they are to make with just a few pantry staples. The crispy top layer, gooey middle, and that rich cheesy flavor make it irresistible. Whether you’re cooking for a crowd or looking to add a side to your weeknight dinner, this recipe never disappoints.
Why You’ll Love This Cheesy Funeral Potatoes Recipe
This is the side dish that brings people back for seconds. It’s incredibly easy to prepare, doesn’t require any fancy ingredients, and delivers a rich, cheesy, and creamy flavor that pairs well with nearly anything. Plus, the crunchy topping adds the perfect texture contrast. From busy weeknights to family celebrations, this dish fits right in.
What Kind of Potatoes Should I Use?
Frozen hash browns are the go-to choice here, specifically the shredded or cubed kind—either works great. They save time and bake up beautifully without needing any peeling or dicing. If you want to go all in, you can use freshly cooked and diced potatoes, but the frozen kind makes this recipe so much more convenient.
Options for Substitutions
Want to switch things up? You definitely can:
- Swap sour cream for Greek yogurt if you’re looking for a lighter option.
- Use cream of mushroom or cream of chicken soup based on your preference.
- Add diced ham or bacon to turn it into a full meal.
- Try Monterey Jack or mozzarella if you want a different cheesy flavor.
- Gluten-free? Just make sure your soup and toppings are compliant.
Ingredients for This Cheesy Funeral Potatoes Recipe
Each ingredient here plays a crucial role in creating that rich, creamy, cheesy magic:
- Frozen hash brown potatoes – The base of the dish; use cubed or shredded depending on your texture preference. They’re convenient and hold up beautifully during baking.
- Cream of chicken soup – Adds depth and creaminess to the mix; you can also use cream of mushroom for a vegetarian option.
- Sour cream – Provides tang and creaminess, creating a luscious sauce.
- Shredded cheddar cheese – The star of the show. Go with sharp cheddar for bold flavor.
- Butter – Adds richness and helps with binding the topping if you’re using one.
- Chopped onion – Gives a savory balance to the rich cheese and cream.
- Salt & pepper – Just enough to enhance all the other flavors.
- Optional: Cornflakes or crushed potato chips – Used for the crispy topping for texture contrast.

Step 1: Preheat and Prepare
Start by preheating your oven to 350°F (175°C). Grease a 9×13 inch baking dish with butter or nonstick spray to keep things from sticking.
Step 2: Mix the Base Ingredients
In a large mixing bowl, combine the frozen hash browns, cream of chicken soup, sour cream, chopped onions, half of the shredded cheddar cheese, melted butter, and a pinch of salt and pepper. Mix until everything is evenly coated and creamy.
Step 3: Transfer to Baking Dish
Spoon the mixture into your greased baking dish and spread it out evenly with a spatula. It doesn’t have to be perfect—just make sure it’s level so it bakes uniformly.
Step 4: Add More Cheese and Optional Topping
Sprinkle the remaining cheddar cheese generously over the top. If you’re going for that classic crispy topping, now’s the time to add crushed cornflakes or chips mixed with a bit of melted butter.
Step 5: Bake Until Bubbly and Golden
Place the dish in the oven and bake for 45–50 minutes, or until the cheese is bubbly and the edges start to turn golden brown. If your topping starts to brown too quickly, you can cover the dish with foil partway through.
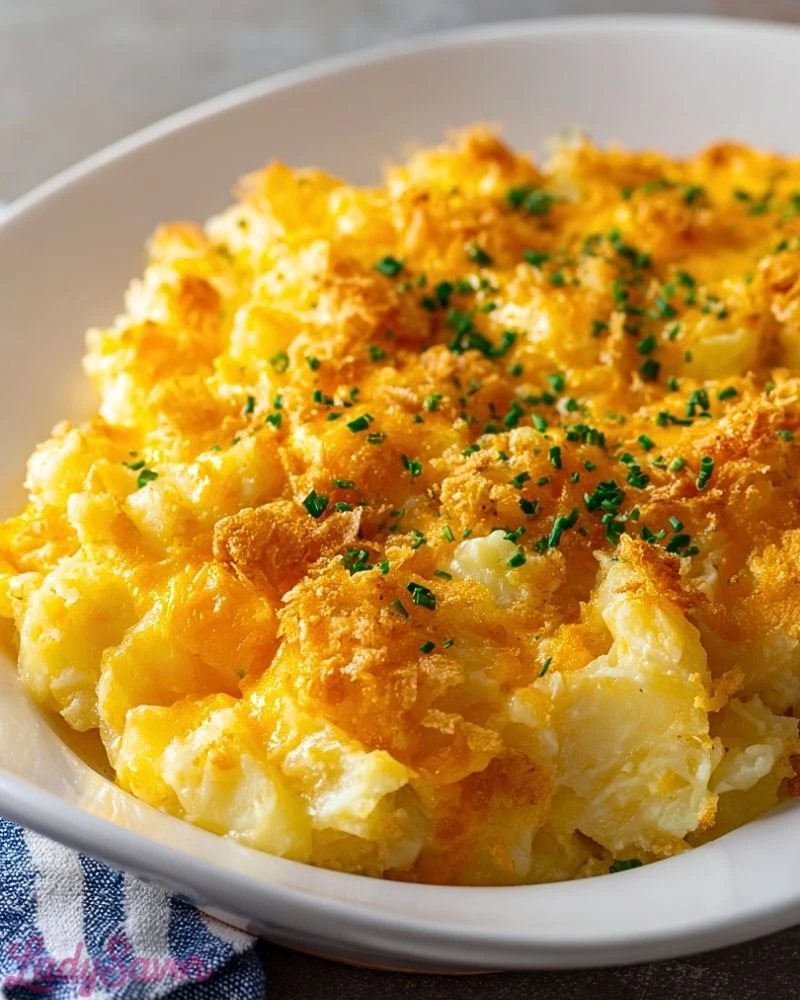
Step 6: Garnish and Serve
Let it cool for about 5 minutes before serving. Garnish with chopped chives or parsley for a pop of color and fresh flavor.
How Long to Prepare Cheesy Funeral Potatoes
Preparation is a breeze for this dish, and that’s one of its biggest advantages. The hands-on prep time is about 15 minutes, mostly spent mixing the ingredients together. There’s no need to thaw the frozen hash browns, which saves even more time.
Once it’s in the oven, it bakes for 45–50 minutes. During this time, the cheese melts and forms that irresistible golden crust on top. So in under an hour, you’ve got a bubbling hot side dish ready to go.
Tips for Perfect Cheesy Funeral Potatoes
- Use sharp cheddar for a stronger cheesy flavor that stands out.
- Let the dish rest for 5–10 minutes after baking so it sets up and slices cleanly.
- Don’t overmix the hash browns or they’ll break down and lose texture.
- For a crispy top, always toss your cornflake topping with melted butter before sprinkling.
- If adding proteins like ham or bacon, cook them separately first to avoid excess moisture.
Watch Out for These Mistakes While Cooking
- Using low-fat sour cream – it can curdle or water down the mixture.
- Skipping seasoning – without a little salt and pepper, the flavors can fall flat.
- Overbaking – this can dry out the dish; check around the 45-minute mark.
- Adding cheese all at once – layer it for a better melt and texture.
- Thawing hash browns – it’s not necessary and may lead to mushy potatoes.
What to Serve With Cheesy Funeral Potatoes?
1. Glazed Ham
The creamy, cheesy richness pairs beautifully with the sweet-salty notes of a glazed ham.
2. Grilled Chicken
A simple grilled chicken breast balances the hearty potatoes and makes it a full meal.
3. Meatloaf
Classic meatloaf and these potatoes are a nostalgic, homey match made in heaven.
4. Roasted Vegetables
Add color and freshness with a side of roasted Brussels sprouts, carrots, or broccoli.
5. Green Salad
A crisp green salad with a light vinaigrette brings balance to the richness of the dish.
Storage Instructions
Refrigerator: Store any leftovers in an airtight container in the fridge for up to 4 days. Reheat in the oven or microwave until hot.
Freezer: This dish freezes well! Assemble the casserole (without topping), wrap tightly in foil and plastic, and freeze for up to 2 months. When ready to cook, thaw in the fridge overnight, add topping, and bake as directed.
Reheating: For best texture, reheat in a 350°F oven until heated through. The microwave works too, but the topping won’t stay crispy.
Estimated Nutrition
(Per serving, assuming 8 servings)
- Calories: ~320 kcal
- Protein: 8g
- Carbohydrates: 24g
- Fat: 22g
- Saturated Fat: 12g
- Sodium: 550mg
- Fiber: 2g
- Sugar: 2g
Frequently Asked Questions
Can I make this ahead of time?
Absolutely! Assemble it up to 2 days in advance and refrigerate. Just add the topping before baking.
Can I use fresh potatoes instead of frozen?
Yes, just peel, boil, and cube them before mixing in. It adds prep time but works fine.
How do I make it vegetarian?
Use cream of mushroom soup and skip the meat. The flavor is still fantastic.
What can I use instead of cornflakes for the topping?
Crushed Ritz crackers, panko breadcrumbs, or even potato chips work great.
Can I halve the recipe?
Definitely. Just use an 8×8 baking dish and reduce the baking time slightly.
Conclusion
Cheesy Funeral Potatoes are the ultimate comfort side dish—easy to make, endlessly customizable, and always a crowd-pleaser. Whether you’re serving it at a holiday dinner, potluck, or just with weeknight meatloaf, it’s bound to be the first thing to disappear from the table. Creamy, crispy, and cheesy in all the right ways, this is the kind of dish you’ll come back to again and again.

Cheesy Funeral Potatoes
- Total Time: 1 hour 5 minutes
- Yield: 8 servings 1x
Description
Warm, rich, and irresistibly cheesy, these Cheesy Funeral Potatoes are the ultimate comfort food side dish. Perfect for potlucks, holiday meals, or weeknight dinners, this easy recipe features frozen hash browns, creamy soup, sour cream, and plenty of cheddar cheese for a gooey, golden, bubbling bake. It’s a quick breakfast idea when paired with eggs, a reliable easy dinner side, or a satisfying snack that keeps well. If you’re looking for food ideas that are easy, hearty, and always a hit—this is it.
Ingredients
1 (32-ounce) bag frozen hash brown potatoes
1 (10.5-ounce) can cream of chicken soup
1 cup sour cream
2 cups shredded cheddar cheese, divided
1/2 cup unsalted butter, melted
1/2 cup finely chopped onion
1/2 teaspoon salt
1/4 teaspoon black pepper
1 1/2 cups crushed cornflakes or potato chips (optional topping)
2 tablespoons melted butter (for topping)
2 tablespoons chopped chives or parsley (for garnish, optional)
Instructions
1. Preheat oven to 350°F (175°C). Grease a 9×13-inch baking dish with nonstick spray or butter.
2. In a large mixing bowl, stir together frozen hash browns, cream of chicken soup, sour cream, chopped onion, 1 cup of cheddar cheese, melted butter, salt, and pepper until well combined.
3. Spread the potato mixture evenly into the prepared baking dish.
4. Sprinkle the remaining 1 cup of cheddar cheese evenly over the top.
5. (Optional) If using a topping, mix the crushed cornflakes or chips with 2 tablespoons of melted butter and spread them over the cheese layer.
6. Bake uncovered for 45–50 minutes, or until bubbly and golden brown around the edges.
7. Remove from oven and let rest for 5–10 minutes. Garnish with chopped chives or parsley if desired.
8. Serve warm and enjoy.
Notes
Don’t thaw your frozen hash browns—using them straight from the freezer helps maintain texture.
For extra richness, swap part of the sour cream with cream cheese or heavy cream.
This recipe can be made ahead and refrigerated for up to 2 days before baking—perfect for holidays.
- Prep Time: 15 minutes
- Cook Time: 50 minutes
- Category: Side Dish
- Method: Baking
- Cuisine: American
Nutrition
- Serving Size: 1 serving
- Calories: 320
- Sugar: 2g
- Sodium: 550mg
- Fat: 22g
- Saturated Fat: 12g
- Unsaturated Fat: 8g
- Trans Fat: 0g
- Carbohydrates: 24g
- Fiber: 2g
- Protein: 8g
- Cholesterol: 45mg