
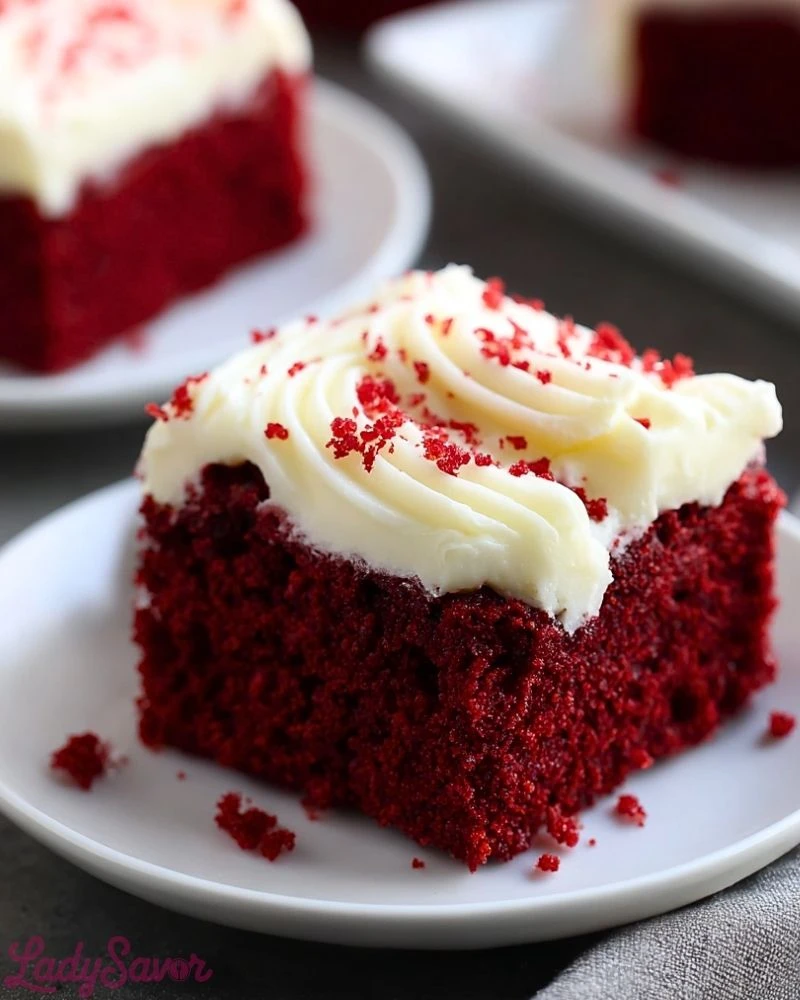
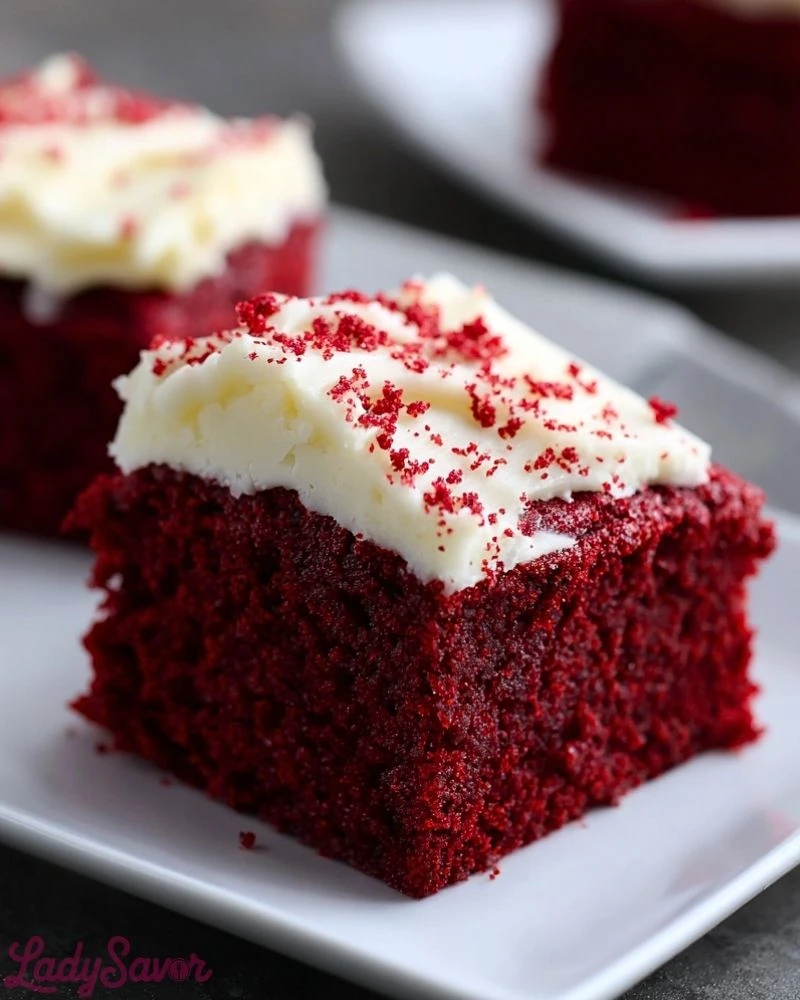
Moist, tender, and perfectly sweet—The Best Red Velvet Snack Cake is a rich and elegant treat that delivers big flavor in a simple, snackable form. With its deep crimson hue and creamy, tangy cream cheese frosting, each bite is a dreamy balance of cocoa-kissed cake and velvety smooth topping. This is the kind of cake that instantly turns an ordinary afternoon into something special.
Unlike the traditional multi-layered red velvet cake, this version is scaled down for convenience but not in flavor. It’s easy to make, requires no complicated techniques, and is baked in a single pan—making it perfect for quick gatherings, lunchbox surprises, or a sweet personal indulgence. It’s everything you love about red velvet, just more approachable and instantly gratifying.
Why You’ll Love This Red Velvet Snack Cake
- Incredibly moist and tender crumb
- Luscious cream cheese frosting with just the right amount of tang
- Bakes in a single pan for fuss-free cleanup
- Perfect size for everyday snacking or sharing
- No mixer required if you’re going manual
- A classic favorite with a simplified twist
Preparation Phase & Tools to Use
To prepare this cake, you’ll need a few essential tools to get the texture and presentation just right:
- Mixing Bowls: Use one large and one medium bowl to keep dry and wet ingredients separate until ready to combine. Helps prevent overmixing.
- Whisk & Rubber Spatula: A whisk helps blend ingredients evenly, while a spatula is perfect for folding and scraping every bit of batter into the pan.
- 8×8-inch Baking Pan: This size gives you the perfect thickness for snack cake slices. Be sure to grease or line with parchment for easy removal.
- Measuring Cups & Spoons: Precision matters in baking, especially for the cocoa and vinegar ratios in red velvet.
- Cooling Rack: Prevents the bottom from becoming soggy after baking.
Each tool plays a role in ensuring even baking, balanced flavor, and a finished cake that’s both easy to handle and delightful to eat.
Preparation Tips
Room temperature ingredients are your best friend in this recipe. Make sure your eggs, butter, and buttermilk aren’t cold straight from the fridge to achieve a smoother batter and a more uniform rise. When adding the red food coloring, remember: a little goes a long way, but don’t be shy if you want that classic deep red tone. Mix the batter just until everything is combined to avoid a dense cake. For the frosting, whip the cream cheese and butter until ultra smooth before adding the sugar—this ensures no lumps and a silky finish. Lastly, let the cake cool completely before frosting or the topping will melt into the cake.
Ingredients for The Best Red Velvet Snack Cake
For the Cake:
- 1 and 1/4 cups (160g) all-purpose flour
- 1 cup (200g) granulated sugar
- 1 tablespoon unsweetened cocoa powder
- 1/2 teaspoon baking soda
- 1/4 teaspoon salt
- 1/2 cup (120ml) vegetable oil
- 1/2 cup (120ml) buttermilk, at room temperature
- 1 large egg, at room temperature
- 1 tablespoon red liquid food coloring (or more for a deeper red)
- 1/2 teaspoon white vinegar
- 1 teaspoon vanilla extract
For the Cream Cheese Frosting:
- 8 oz (226g) cream cheese, softened
- 1/4 cup (57g) unsalted butter, softened
- 1 and 1/2 cups (180g) powdered sugar
- 1/2 teaspoon vanilla extract
Step 1: Preheat and Prep
Preheat your oven to 350°F (177°C). Grease an 8×8-inch square baking pan or line it with parchment paper, leaving a slight overhang on the sides for easy removal.
Step 2: Mix the Dry Ingredients
In a medium bowl, whisk together the flour, sugar, cocoa powder, baking soda, and salt. Make sure the cocoa is evenly distributed and there are no lumps.
Step 3: Combine the Wet Ingredients
In a large bowl, whisk together the oil, buttermilk, egg, red food coloring, vinegar, and vanilla extract until smooth and fully combined. The mixture should be vibrant and slightly thick.
Step 4: Combine Wet and Dry Mixtures
Gradually add the dry ingredients to the wet mixture, stirring gently with a spatula or wooden spoon just until combined. Do not overmix—stop once the batter is smooth with no visible streaks of flour.
Step 5: Bake the Cake
Pour the batter into the prepared baking pan and spread it evenly. Tap the pan on the counter to release any air bubbles. Bake for 28–32 minutes or until a toothpick inserted in the center comes out clean or with just a few moist crumbs.
Step 6: Cool Completely
Place the pan on a wire rack and allow the cake to cool completely in the pan before frosting. This prevents the frosting from melting or becoming runny.
Step 7: Make the Cream Cheese Frosting
In a medium bowl, beat the softened cream cheese and butter together until smooth and creamy. Add powdered sugar gradually and continue beating until fluffy. Mix in the vanilla extract. Taste and adjust sweetness as desired.
Step 8: Frost and Serve
Once the cake is completely cool, spread the frosting evenly over the top using a spatula or offset knife. For a decorative touch, use the back of a spoon to create swirls. Slice into squares and serve.
Notes
This red velvet snack cake is a simplified version of the classic layer cake, but it doesn’t compromise on taste or texture. Using buttermilk and vinegar is essential to achieve that traditional red velvet tang and soft crumb. The single-layer approach makes it easier to bake and frost, ideal for beginner bakers or anyone short on time. You can double the recipe and use a 9×13-inch pan if serving a crowd.
Watch Out for These Mistakes While Cooking
- Skipping the Vinegar: It’s vital for activating the baking soda and contributing to the cake’s unique texture and flavor.
- Using Cold Ingredients: Cold eggs or buttermilk can lead to an uneven batter and poor rise.
- Overmixing the Batter: This can make the cake dense and tough. Mix until just combined.
- Not Measuring Flour Properly: Too much flour leads to a dry cake. Use the spoon-and-level method for accuracy.
- Frosting a Warm Cake: Always allow the cake to cool fully before frosting to prevent a melted mess.
Storage Instructions
Once frosted, this cake should be stored in the refrigerator due to the cream cheese in the frosting. Cover tightly with plastic wrap or transfer slices to an airtight container. It will keep well in the fridge for up to 5 days. You can also freeze the unfrosted cake layer for up to 2 months—wrap it in plastic wrap and foil, then thaw at room temperature before frosting.
Estimated Nutrition
Per slice (based on 9 slices):
- Calories: ~360 kcal
- Total Fat: 20g
- Saturated Fat: 8g
- Cholesterol: 55mg
- Sodium: 210mg
- Carbohydrates: 43g
- Fiber: 1g
- Sugar: 29g
- Protein: 4g
Frequently Asked Questions
What makes red velvet cake different from chocolate cake?
Red velvet has a hint of cocoa, but it’s not as rich or intense as chocolate cake. The addition of buttermilk and vinegar gives it a unique flavor and texture.
Can I use natural food coloring instead of artificial red?
Yes, beetroot powder or juice can be used, though the final color may be more muted.
Can I use a different size pan?
Absolutely. You can use a 9-inch round pan or double the recipe for a 9×13-inch pan, adjusting the baking time as needed.
Is it possible to make this gluten-free?
Yes, simply substitute the all-purpose flour with a 1:1 gluten-free flour blend designed for baking.
Can I use oil substitutes like applesauce?
You can replace half the oil with unsweetened applesauce to reduce fat, but the cake may be slightly less tender.
Why do I need both vinegar and buttermilk?
Together, they react with baking soda and enhance the cake’s softness and signature tang.
Can I make this cake in advance?
Yes! Bake and store the cake layer unfrosted for up to two days at room temperature, or frost and refrigerate for up to five days.
What if I don’t have cream cheese?
You can substitute with a buttercream frosting, though it will be sweeter and lack the tangy contrast.
Conclusion
The Best Red Velvet Snack Cake is everything you love about red velvet, in a more convenient and approachable form. It’s a cake that delivers nostalgia, richness, and indulgence without the fuss. Perfect for casual afternoons, birthdays, or any time you crave a quick and classic dessert with a wow factor. Once you try it, this recipe is sure to become a go-to in your collection.
The Best Red Velvet Snack Cake
- Total Time: 45 minutes
- Yield: 9 slices 1x
Description
If you’re looking for a quick dessert that’s effortlessly elegant, this Red Velvet Snack Cake delivers everything you love about the classic in a fast, fuss-free format. With a vibrant, soft crumb and luscious cream cheese frosting, it’s the perfect addition to your list of easy recipes, whether you’re hunting for quick breakfast options, simple dessert ideas, or just an indulgent treat. This is one of those food ideas that fits every craving — from weeknight baking to birthday surprises. It’s one of the best breakfast ideas turned dessert, and it absolutely deserves a spot in your collection of go-to easy dinner finales or healthy snack treats (in moderation, of course!).
Ingredients
1 1/4 cups all-purpose flour
1 cup granulated sugar
1 tablespoon unsweetened cocoa powder
1/2 teaspoon baking soda
1/4 teaspoon salt
1/2 cup vegetable oil
1/2 cup buttermilk, at room temperature
1 large egg, at room temperature
1 tablespoon red liquid food coloring
1/2 teaspoon white vinegar
1 teaspoon vanilla extract
8 oz cream cheese, softened
1/4 cup unsalted butter, softened
1 1/2 cups powdered sugar
1/2 teaspoon vanilla extract
Instructions
1. Preheat oven to 350°F (177°C). Grease or line an 8×8-inch square baking pan.
2. In a medium bowl, whisk together flour, sugar, cocoa powder, baking soda, and salt.
3. In a separate large bowl, whisk oil, buttermilk, egg, food coloring, vinegar, and vanilla until well combined.
4. Add the dry ingredients to the wet, mixing just until combined without overmixing.
5. Pour the batter into the prepared pan and smooth the top.
6. Bake for 28–32 minutes, or until a toothpick inserted in the center comes out clean.
7. Cool the cake completely in the pan on a wire rack.
8. Beat cream cheese and butter together until smooth. Add powdered sugar gradually, then vanilla, and mix until fluffy.
9. Spread frosting over cooled cake, creating decorative swirls if desired.
10. Slice into squares and serve.
Notes
Let all your ingredients come to room temperature before baking for the smoothest batter and frosting.
Don’t skip the vinegar—it’s essential for proper lift and the signature red velvet flavor.
Always wait until the cake is fully cooled before frosting to prevent the cream cheese topping from melting.
- Prep Time: 15 minutes
- Cook Time: 30 minutes
- Category: Dessert
- Method: Baking
- Cuisine: American
Nutrition
- Serving Size: 1 slice
- Calories: 360
- Sugar: 29g
- Sodium: 210mg
- Fat: 20g
- Saturated Fat: 8g
- Unsaturated Fat: 10g
- Trans Fat: 0g
- Carbohydrates: 43g
- Fiber: 1g
- Protein: 4g
- Cholesterol: 55mg