
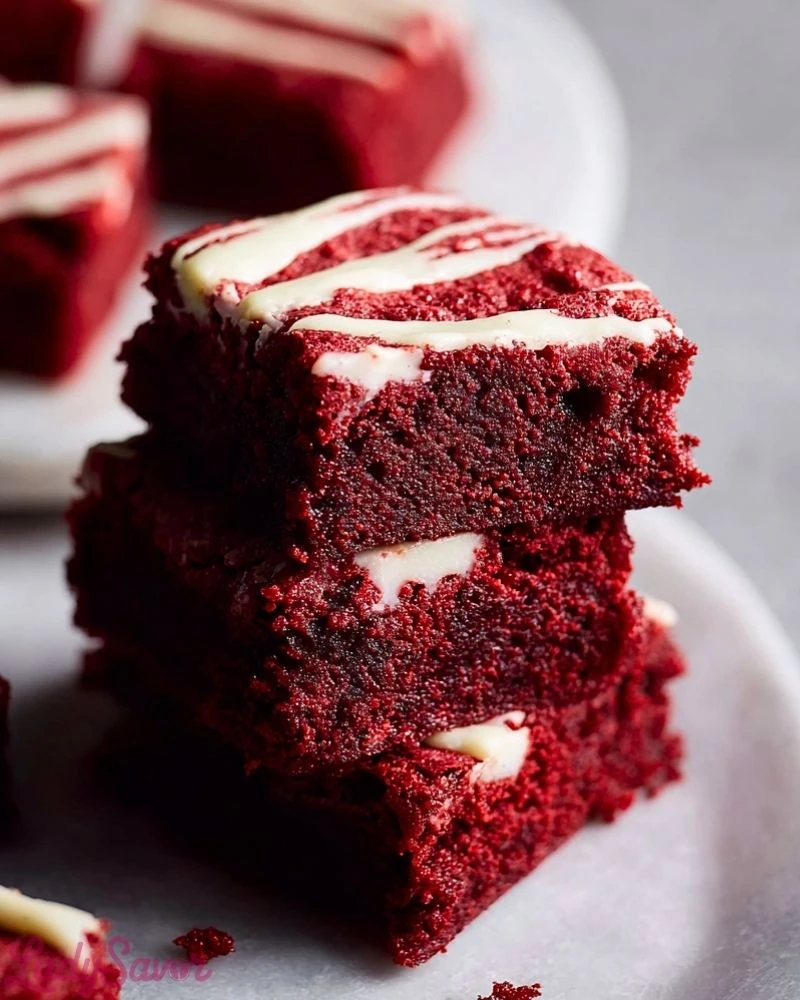
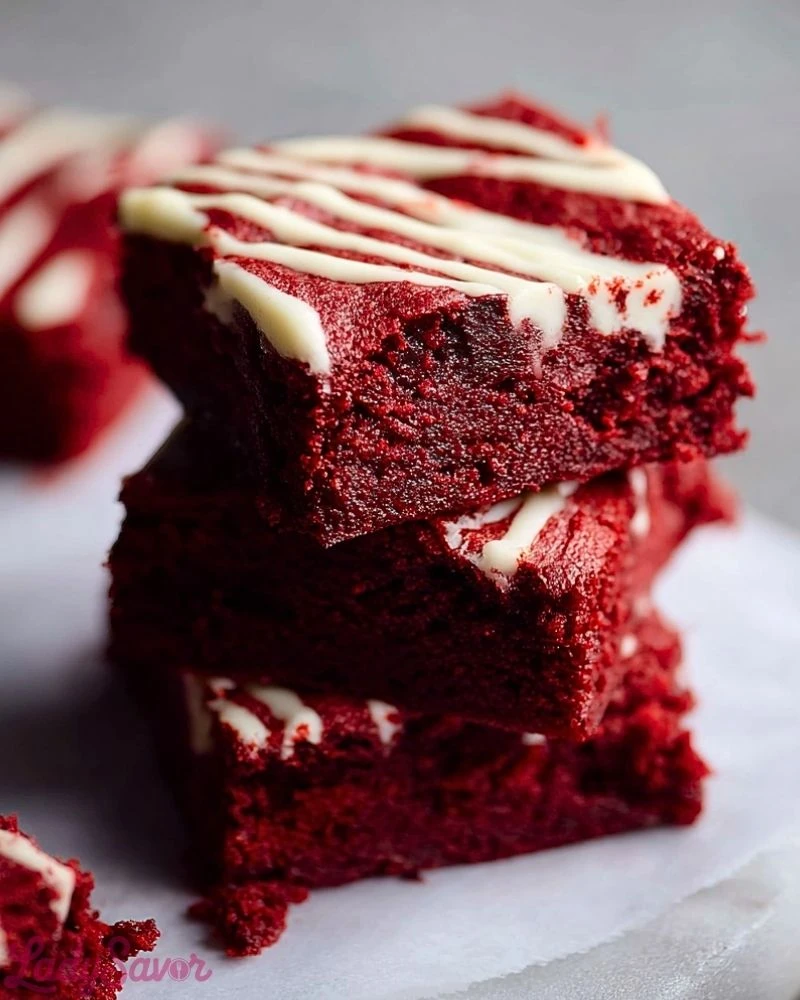
Rich, chewy, and irresistibly decadent—these fudgy red velvet brownies are a chocolate lover’s dream with a crimson twist. Each bite delivers the signature cocoa-kissed flavor of red velvet with a dense, brownie-like texture that melts in your mouth. The striking red hue and elegant drizzle of white chocolate make these brownies not just a treat for the taste buds, but a feast for the eyes too.
Whether you’re baking for a festive occasion, a romantic dessert spread, or just craving something uniquely indulgent, these brownies strike the perfect balance between flavor and visual wow factor. Their dense crumb, slight chew, and creamy finish give them a bakery-quality feel that’s surprisingly easy to achieve at home.
Why You’ll Love This Red Velvet Brownies Recipe
- Combines the richness of brownies with the elegance of red velvet.
- Perfect for holidays, Valentine’s Day, or any dessert table.
- Dense and fudgy with a crackly top and soft center.
- Quick to make with simple ingredients.
- Visually stunning with a white chocolate drizzle finish.
Preparation Phase & Tools to Use
To create the best fudgy red velvet brownies, a few kitchen essentials are key:
- Mixing Bowls: You’ll need at least two—one for dry ingredients and one for wet. Glass or stainless steel bowls work best.
- Electric Mixer or Whisk: A hand mixer makes creaming butter and sugar easier, but a sturdy whisk will work in a pinch.
- Rubber Spatula: Perfect for folding the batter and scraping down the sides without overmixing.
- 8×8-inch Baking Pan: This size helps achieve the right thickness and fudgy texture.
- Parchment Paper: Helps lift the brownies out easily without sticking.
- Wire Rack: Essential for cooling to maintain texture.
Each of these tools helps ensure that your brownies bake evenly, mix smoothly, and are easy to handle from oven to plate.
Preparation Tips
Bring your eggs and butter to room temperature before mixing—this helps create a smooth, cohesive batter and improves the final texture. When adding the food coloring, gel-based types give a more vibrant red without thinning the batter. Be careful not to overmix once you add the flour; this can lead to cakey rather than fudgy brownies. Bake just until the center is set but still slightly soft to the touch—they will continue to cook slightly as they cool. Let them cool fully before slicing for clean, sharp edges and the best flavor development.
Ingredients for This Red Velvet Brownies Recipe
- 1/2 cup (1 stick) unsalted butter, melted
- 1 cup granulated sugar
- 2 large eggs, at room temperature
- 1 tsp vanilla extract
- 1 tbsp red food coloring (preferably gel-based)
- 1/4 cup unsweetened cocoa powder
- 3/4 cup all-purpose flour
- 1/4 tsp salt
- 1/2 tsp white vinegar
- 1/3 cup white chocolate chips (for drizzle or folding in, optional)
- Additional white chocolate or cream cheese glaze for topping (optional)
Step 1: Preheat and Prep
Preheat your oven to 350°F (175°C). Line an 8×8-inch baking pan with parchment paper, leaving some overhang on the sides for easy removal. Lightly grease the paper to prevent sticking.
Step 2: Mix Wet Ingredients
In a large mixing bowl, whisk together the melted butter and sugar until glossy and well combined. Add the eggs, one at a time, beating well after each. Stir in vanilla extract, red food coloring, and white vinegar until fully incorporated.
Step 3: Combine Dry Ingredients
In a separate bowl, sift together the flour, cocoa powder, and salt. This ensures an even distribution and prevents clumps in your batter.
Step 4: Make the Batter
Gradually fold the dry ingredients into the wet mixture using a rubber spatula. Mix until just combined—do not overmix. If you’re adding white chocolate chips, fold them in now.
Step 5: Pour and Smooth
Pour the batter into your prepared pan. Use a spatula to spread it evenly into the corners and smooth the top.
Step 6: Bake
Bake in the preheated oven for 25–30 minutes, or until a toothpick inserted in the center comes out with a few moist crumbs (not wet batter). The top should look set and slightly crackled.
Step 7: Cool Completely
Place the pan on a wire rack and allow the brownies to cool completely in the pan. Once cooled, lift them out using the parchment paper overhang.
Step 8: Drizzle or Frost (Optional)
Drizzle with melted white chocolate or add a swirl of cream cheese glaze across the top. Allow the topping to set before slicing.
Step 9: Slice and Serve
Cut into 9 or 12 squares, depending on your preferred serving size. Wipe your knife between cuts for clean edges.
Notes
These brownies are best enjoyed the day after baking, once the flavors have had time to settle and the texture becomes even fudgier. The red food coloring not only gives them their signature color but also enhances the visual appeal, so don’t be afraid to go bold with the hue. If you prefer a tangier bite, consider topping with a cream cheese swirl or frosting.
Watch Out for These Mistakes While Cooking
- Overmixing the batter: This can lead to cakey, tough brownies. Mix until just combined.
- Using cold eggs or butter: These can prevent the ingredients from emulsifying properly, affecting texture.
- Overbaking: Brownies should be set around the edges but slightly soft in the center. They’ll continue to firm up as they cool.
- Skipping the parchment paper: This makes removing the brownies from the pan much more difficult and can affect presentation.
- Using liquid food coloring: Gel coloring offers more vibrant results without thinning the batter.
Storage Instructions
Store leftover red velvet brownies in an airtight container at room temperature for up to 3 days. If you’ve topped them with cream cheese frosting or glaze, refrigerate them to maintain freshness—just bring to room temp before serving to restore their soft texture. You can also freeze unglazed brownies for up to 2 months; wrap tightly in plastic wrap and foil before freezing.
Estimated Nutrition (Per Serving – based on 12 servings)
- Calories: 210 kcal
- Carbohydrates: 27g
- Sugar: 19g
- Fat: 10g
- Saturated Fat: 6g
- Unsaturated Fat: 3g
- Trans Fat: 0g
- Cholesterol: 45mg
- Sodium: 90mg
- Fiber: 1g
- Protein: 2g
Frequently Asked Questions
How do I make these brownies more chocolatey?
Add 1/4 cup melted semi-sweet chocolate or increase the cocoa powder slightly for a deeper chocolate flavor.
Can I use oil instead of butter?
Butter adds richness and flavor. You can substitute with oil, but the texture may be less dense and the flavor slightly altered.
Can I skip the food coloring?
Yes, but the red velvet visual appeal will be lost. The taste will remain delicious, more like a light chocolate brownie.
How do I know when the brownies are done?
The edges should be set and a toothpick inserted in the center should come out with moist crumbs, not wet batter.
Can I double the recipe?
Absolutely. Use a 9×13-inch pan and increase the baking time slightly to 35–40 minutes. Watch closely toward the end.
What’s the best way to cut these without crumbling?
Use a sharp knife and wipe it clean between each slice. For best results, refrigerate the brownies for 30 minutes before slicing.
Can I add nuts or chocolate chips?
Yes! Fold in 1/2 cup of chopped pecans, walnuts, or chocolate chips just before pouring into the pan.
Are these brownies gluten-free?
Not as written, but you can use a 1:1 gluten-free flour blend in place of all-purpose flour.
Conclusion
The Best Fudgy Red Velvet Brownies are a show-stopping dessert with rich flavor, bold color, and irresistibly chewy texture. Whether served plain, drizzled, or frosted, they offer a beautiful twist on the classic brownie and are sure to impress any crowd. Keep this recipe in your rotation for holidays, celebrations, or whenever your sweet tooth demands something extra special.

The Best Fudgy Red Velvet Brownies
- Total Time: 35 minutes
- Yield: 9–12 brownies 1x
- Diet: Vegetarian
Description
Sink your teeth into the ultimate dessert indulgence with these Fudgy Red Velvet Brownies—a gorgeous twist on the classic brownie that blends rich cocoa flavor, a soft chewy center, and a bold red hue. This easy recipe is perfect for holidays, romantic dinners, or anytime you want an eye-catching sweet treat. Whether you’re looking for quick desserts, easy baking ideas, or a unique party snack, these brownies deliver both beauty and bold flavor. Their creamy white chocolate drizzle or optional cream cheese topping takes them to bakery-level perfection.
Ingredients
1/2 cup unsalted butter, melted
1 cup granulated sugar
2 large eggs, at room temperature
1 teaspoon vanilla extract
1 tablespoon red food coloring (gel preferred)
1/4 cup unsweetened cocoa powder
3/4 cup all-purpose flour
1/4 teaspoon salt
1/2 teaspoon white vinegar
1/3 cup white chocolate chips (optional)
White chocolate or cream cheese glaze for topping (optional)
Instructions
1. Preheat oven to 350°F (175°C). Line an 8×8-inch baking pan with parchment paper and lightly grease it.
2. Whisk melted butter and sugar until glossy.
3. Add eggs one at a time, then mix in vanilla, food coloring, and vinegar.
4. Sift flour, cocoa powder, and salt together.
5. Fold dry ingredients into wet mixture.
6. Fold in white chocolate chips if using.
7. Spread batter evenly into pan.
8. Bake for 25–30 minutes until center has moist crumbs.
9. Cool completely before removing.
10. Drizzle topping if desired.
11. Slice and serve.
Notes
Let brownies cool completely before slicing for best texture.
Use gel food coloring for a vibrant red color.
Chill for 30 minutes before cutting for clean edges.
- Prep Time: 10 minutes
- Cook Time: 25 minutes
- Category: Dessert
- Method: Baking
- Cuisine: American
Nutrition
- Serving Size: 1 brownie
- Calories: 210
- Sugar: 19g
- Sodium: 90mg
- Fat: 10g
- Saturated Fat: 6g
- Unsaturated Fat: 3g
- Trans Fat: 0g
- Carbohydrates: 27g
- Fiber: 1g
- Protein: 2g
- Cholesterol: 45mg