
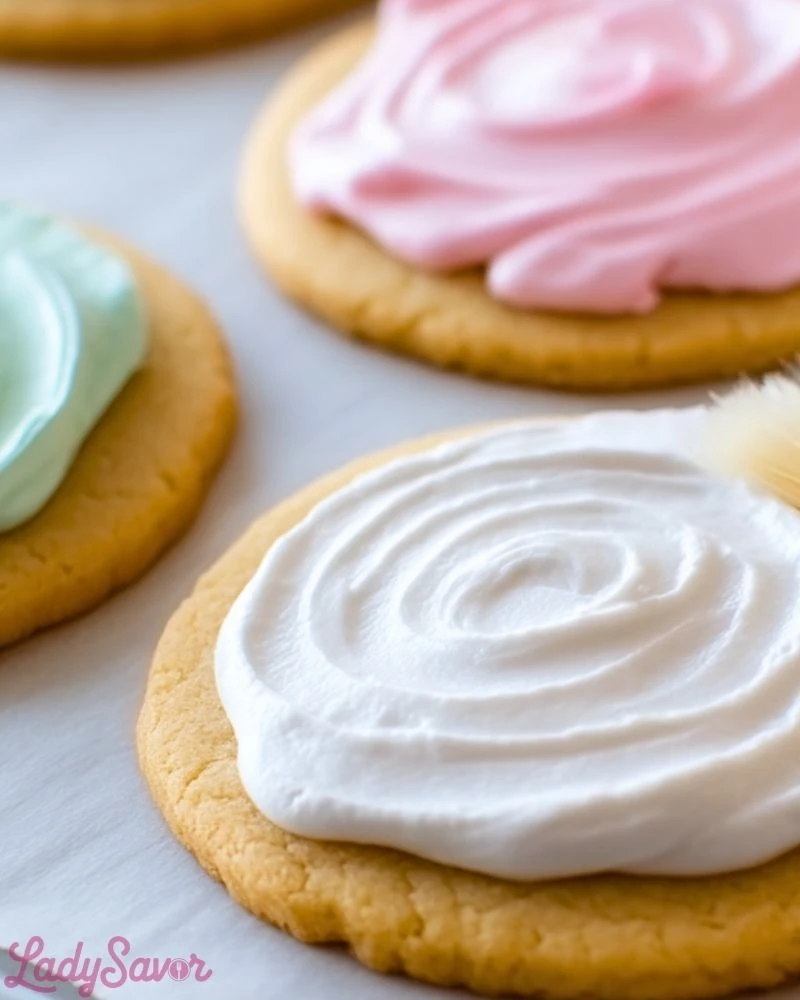
Nothing completes a classic sugar cookie like a glossy, picture-perfect icing that sets beautifully. This sugar cookie icing that hardens is smooth, easy to work with, and ideal for decorating cookies that need to stack, store, or travel without a mess. It’s made with simple ingredients and dries to a firm finish with a lovely sheen, making it perfect for holiday cut-outs, birthday treats, or party favors.
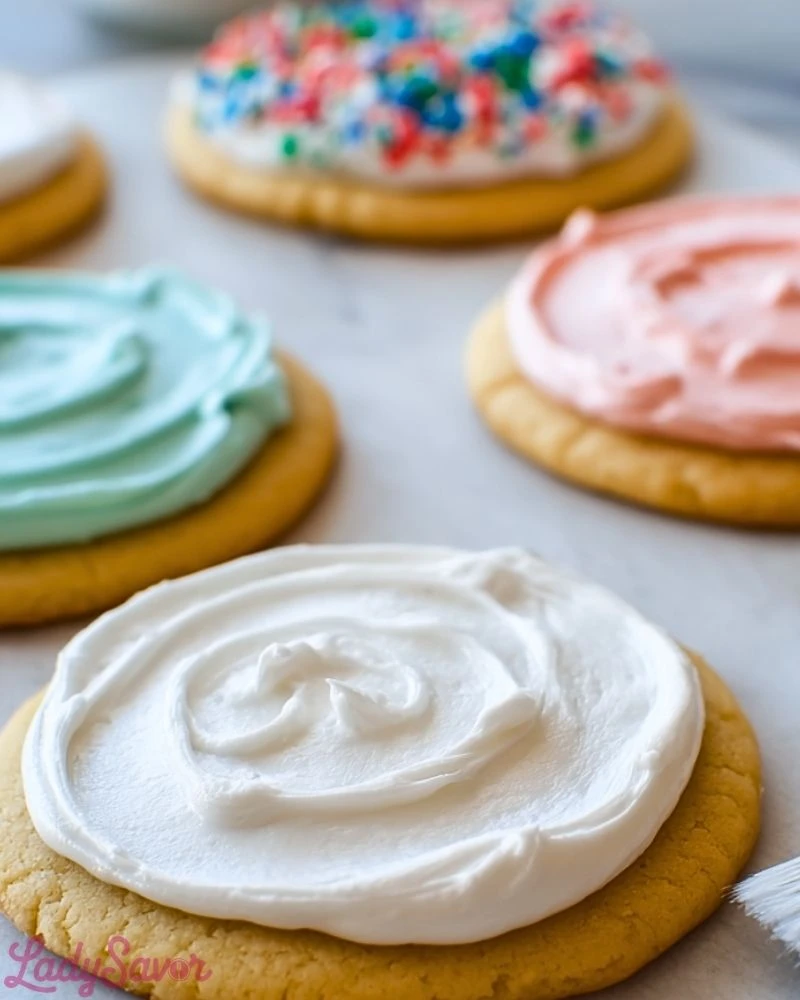
The best part? This icing is completely beginner-friendly and doesn’t require any special piping skills. It spreads effortlessly and sets within hours—giving your cookies a professional bakery look with minimal effort. Whether you’re baking with kids or prepping dozens for an event, this icing turns basic cookies into edible art.
Why You’ll Love This Sugar Cookie Icing That Hardens
- It dries to a firm finish, perfect for stacking or packaging.
- You only need a few pantry staples to make it.
- It has a smooth, glossy finish that looks beautiful plain or with decorations.
- The flavor is subtly sweet and complements sugar cookies perfectly.
- It’s kid-friendly and great for decorating parties.
Preparation Phase & Tools to Use
To make the icing successfully, a few simple tools will help you get the best texture and consistency. A medium mixing bowl is essential for combining ingredients evenly. A whisk or electric hand mixer ensures the icing becomes silky smooth without lumps. Spoons or piping bags help with application, depending on whether you want to flood or detail the cookies. Lastly, having parchment paper or a wire rack is important for allowing the cookies to dry without sticking.
Each tool plays a key role: the whisk or mixer gives the icing its flawless texture, the bowl makes it easy to blend and adjust consistency, and the drying rack or parchment ensures a clean, professional finish.
Preparation Tips
Make sure your sugar cookies are completely cooled before applying the icing—any warmth can cause it to slide off. If you’re using food coloring, gel works better than liquid as it won’t thin out the icing. Add small amounts of liquid (water or milk) at a time when adjusting consistency; it goes from thick to runny quickly. For a firmer outline, use a slightly thicker batch of icing, and for flooding, thin it just enough to spread but not drip. Allow decorated cookies to dry uncovered at room temperature for 6 to 12 hours depending on humidity.
Ingredients for Sugar Cookie Icing That Hardens
- 2 cups powdered sugar (sifted for smoothness)
- 2–3 tablespoons milk or water (adjust for desired consistency)
- 1 tablespoon light corn syrup (adds shine and helps it harden)
- 1/2 teaspoon vanilla extract (optional, for flavor)
- Gel food coloring (optional, use sparingly)
This small list of ingredients comes together in minutes. The corn syrup is what helps the icing firm up with a glossy finish, while powdered sugar gives it structure. Adjusting the milk controls the thickness of the icing, depending on whether you’re outlining or flooding.
Step 1: Sift the Powdered Sugar
Begin by sifting 2 cups of powdered sugar into a medium mixing bowl. Sifting helps remove any clumps and creates a silky-smooth base for your icing.
Step 2: Mix in Liquid Ingredients
Add 2 tablespoons of milk or water, 1 tablespoon of light corn syrup, and 1/2 teaspoon of vanilla extract. Use a whisk or hand mixer to combine everything into a thick but smooth icing. If it seems too thick, add more milk/water a teaspoon at a time. If it’s too runny, sift in a little more powdered sugar.
Step 3: Adjust for Coloring and Consistency
Once your base icing is smooth, divide it into separate bowls if you want multiple colors. Add gel food coloring a drop at a time, stirring after each addition until the desired shade is achieved. Be careful—a little gel goes a long way and won’t thin your icing like liquid colorants.
Step 4: Choose Your Application Method
For outlining cookies, the icing should be thick enough to hold its shape when piped. Use a piping bag with a small round tip or a resealable bag with the corner snipped. For flooding (filling the inside of outlines), thin the icing slightly by adding a bit more milk. Spoon or pipe it into the center of the outlined cookie and spread it gently with a toothpick or icing spatula.
Step 5: Let the Icing Dry Completely
Place iced cookies on a parchment-lined tray or a wire rack. Allow them to dry completely at room temperature, uncovered. Depending on the thickness of the icing and room humidity, this can take anywhere from 6 to 12 hours. Avoid stacking or storing until fully hardened to prevent smudging or sticking.
Step 6: Store Any Extra Icing
If you have leftover icing, store it in an airtight container in the refrigerator for up to 1 week. Stir it well before reusing and adjust with a few drops of water if it has thickened.
Notes
This sugar cookie icing that hardens is a dream for decorators. It’s not only easy to make, but also incredibly forgiving. You can tailor the consistency to your needs—thicker for piping and outlining, thinner for flooding. While it dries hard enough to stack, it doesn’t become brittle or chalky, maintaining a pleasant bite. You can experiment with extracts like almond or lemon for added flavor variety, and it takes color beautifully with gel-based dyes.
Watch Out for These Mistakes While Cooking
- Adding too much liquid: It’s easy to over-thin the icing. Always add liquid gradually, one teaspoon at a time.
- Using liquid food coloring: This can throw off the consistency. Stick to gel colors for vibrant hues without diluting.
- Not sifting the powdered sugar: Skipping this step can result in lumpy icing that’s difficult to smooth.
- Icing warm cookies: Always allow cookies to cool completely before icing, or it will melt and slide off.
- Storing too early: Don’t rush the drying time. Let cookies sit uncovered until the icing sets completely.
Storage Instructions
Once the icing has dried completely on the cookies, store them in an airtight container at room temperature. To avoid smudging, layer cookies between sheets of parchment or wax paper. They will stay fresh and beautiful for up to 5 days. If you have leftover icing, refrigerate it in an airtight container for up to a week. Re-stir before using, and adjust consistency with a drop or two of water if needed.
Estimated Nutrition
Per cookie (based on 1 tablespoon of icing):
- Calories: 65
- Total Fat: 0g
- Saturated Fat: 0g
- Cholesterol: 0mg
- Sodium: 1mg
- Total Carbohydrates: 17g
- Sugar: 16g
- Fiber: 0g
- Protein: 0g
Frequently Asked Questions
How long does this icing take to harden?
It typically takes 6–12 hours at room temperature. Humid environments may require a longer drying time.
Can I make this icing ahead of time?
Yes! Store it in an airtight container in the refrigerator for up to a week. Stir and adjust the consistency before using.
Can I use this icing on other types of cookies?
Absolutely. It works great on shortbread, gingerbread, or any cookie with a flat surface.
Is this icing safe for mailing cookies?
Yes, once fully dried, the icing hardens enough for cookies to be shipped or stacked.
Does the icing taste too sweet?
It is sweet, but not overwhelmingly so. The vanilla or other extracts can help balance the flavor.
Can I use lemon juice instead of milk?
You can, especially if you want a citrusy tang. Just note that it may slightly alter the flavor.
Will it work without corn syrup?
Corn syrup is what gives the icing shine and helps it harden. You can omit it, but the finish won’t be as glossy or firm.
Can I freeze cookies with this icing?
Yes, once the icing is fully set, you can freeze the cookies. Just separate layers with parchment and thaw uncovered to avoid condensation.
Conclusion
This sugar cookie icing that hardens is a foolproof favorite for both beginner bakers and seasoned pros. With its smooth texture, quick setup, and glossy finish, it transforms simple sugar cookies into delightful treats perfect for any celebration. Whether you’re prepping for a holiday, party, or just a fun kitchen day with the kids, this icing is your go-to for sweet, sturdy, and stylish cookie decorating.

Sugar Cookie Icing That Hardens
- Total Time: 10 minutes
- Yield: Icing for about 24 cookies
- Diet: Vegetarian
Description
Looking for the perfect cookie icing that sets firm with a glossy finish? This sugar cookie icing that hardens is a game-changer. It’s smooth, easy to apply, and ideal for decorating cookies for holidays, parties, or gift boxes. Whether you’re after quick breakfast treats or creative food ideas with the kids, this easy recipe is a go-to for everything from festive baking to everyday dessert fun. Plus, it uses simple ingredients you probably already have in your pantry—making it a budget-friendly favorite for sweet snack solutions and decorating fun.
Ingredients
2 cups powdered sugar (sifted)
2 to 3 tablespoons milk or water
1 tablespoon light corn syrup
1/2 teaspoon vanilla extract
Gel food coloring (optional)
Instructions
1. Sift the powdered sugar into a medium bowl to remove clumps.
2. Add 2 tablespoons of milk or water, corn syrup, and vanilla extract. Whisk until smooth.
3. Adjust thickness with more milk or powdered sugar as needed.
4. Divide and tint with gel food coloring if desired.
5. Use thick icing for outlines and thinner icing for flooding.
6. Decorate cookies using piping bags or spoons.
7. Let cookies dry completely at room temperature for 6 to 12 hours.
8. Store leftover icing in an airtight container in the refrigerator for up to a week.
9. Stir and rehydrate icing before reuse.
10. Enjoy your beautifully decorated, stackable cookies!
Notes
Always let cookies cool fully before decorating.
Use gel food coloring for vivid colors without thinning the icing.
Sift powdered sugar for the smoothest results.
- Prep Time: 10 minutes
- Cook Time: 0 minutes
- Category: Dessert / Decorating Icing
- Method: No-bake
- Cuisine: American
Nutrition
- Serving Size: 1 tablespoon
- Calories: 65
- Sugar: 16g
- Sodium: 1mg
- Fat: 0g
- Saturated Fat: 0g
- Unsaturated Fat: 0g
- Trans Fat: 0g
- Carbohydrates: 17g
- Fiber: 0g
- Protein: 0g
- Cholesterol: 0mg