
Baking your own loaf of sandwich bread might seem like a commitment, but once I nailed this recipe, I never looked back. There’s something deeply satisfying about slicing into a fresh, warm loaf you’ve made with your own hands — and this Simply Sandwich Bread is everything you want in a classic homemade loaf. It’s soft yet sturdy, with a beautifully golden crust and a tender crumb that makes every sandwich or slice of toast taste better than anything store-bought.
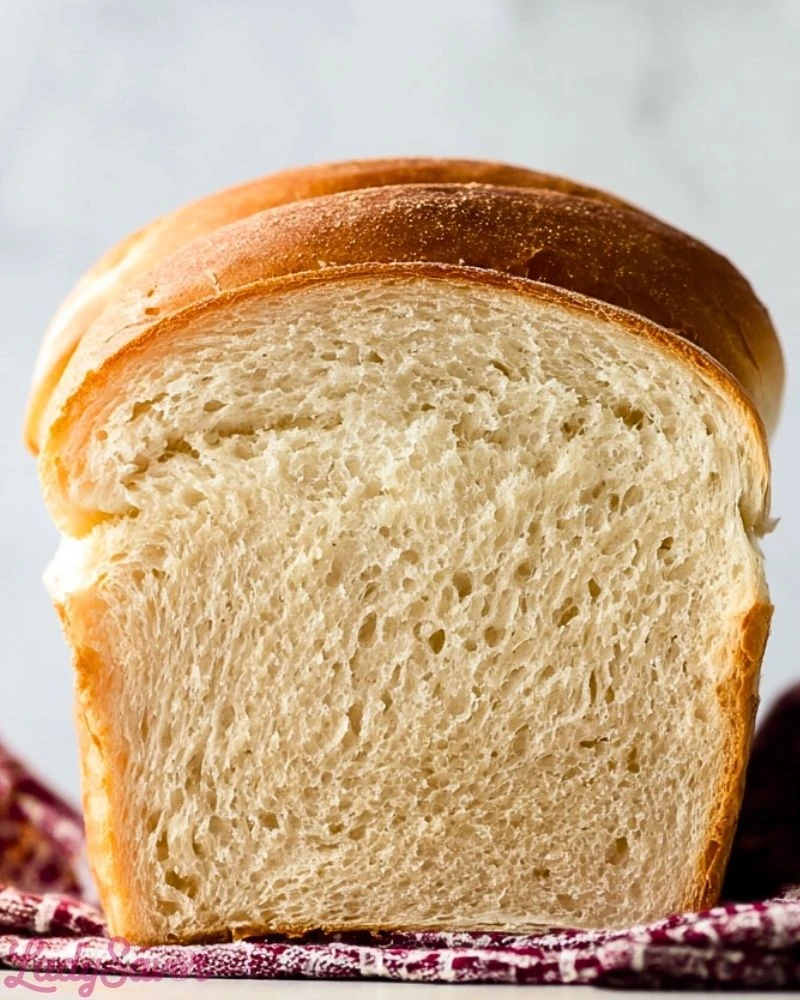
I created this bread to be foolproof for beginners and rewarding for experienced bakers. Whether you’re slathering it with peanut butter, building a BLT, or enjoying a buttered slice straight out of the toaster, this bread delivers a rich, slightly sweet flavor and a perfect texture every time. It’s now a staple in my kitchen — and I’m betting it’ll become one in yours too.
Why You’ll Love This Simply Sandwich Bread
This bread is the definition of everyday comfort. It’s easy to make, requires basic pantry staples, and stays fresh for days. Unlike many artisanal loaves, it’s designed to be soft and neutral — the ideal canvas for both savory and sweet toppings. The dough is simple to work with, and the rise times are forgiving. Plus, your kitchen will smell absolutely amazing while it bakes.
What Kind of Flour Should I Use?
For the best texture and structure, I recommend using bread flour. It has a higher protein content than all-purpose flour, which helps the bread develop that springy, chewy interior without being too dense. That said, all-purpose flour can work just fine if that’s what you have on hand — your loaf will be slightly less structured but still deliciously soft.
Options for Substitutions
- Milk: Whole milk adds richness, but you can use 2% or a non-dairy milk like oat or almond if you prefer. Even water can work in a pinch — just expect a slightly less tender crumb.
- Butter: Unsalted butter gives the bread a soft texture and rich flavor. Feel free to substitute with margarine or a neutral oil like canola.
- Honey: This adds a hint of sweetness and helps with browning. You can swap it with maple syrup or granulated sugar if needed.
- Yeast: Active dry yeast is my go-to, but instant yeast works too — just adjust the rising time slightly.
Ingredients for this Simply Sandwich Bread
- Bread Flour: Provides the protein necessary for strong gluten development, giving the loaf structure and chew.
- Whole Milk: Adds richness, tenderness, and a slightly sweet flavor to the crumb.
- Unsalted Butter: Gives the bread a soft, moist texture and enriches the flavor.
- Honey: Sweetens the dough naturally and helps create a beautiful golden crust.
- Active Dry Yeast: Acts as the leavening agent, allowing the bread to rise and become light and airy.
- Salt: Enhances the flavor and helps control yeast activity.
- Warm Water: Helps activate the yeast and bring the dough together.
Step 1: Bloom the Yeast
In a small bowl, combine the warm water (about 110°F/43°C), honey, and active dry yeast. Stir gently and let it sit for 5-10 minutes until the surface becomes foamy. This signals that the yeast is activated and ready to go.
Step 2: Combine Wet and Dry Ingredients
In a large mixing bowl, add the bloomed yeast mixture, warm milk, and softened butter. Stir until combined. Gradually add in the bread flour and salt, mixing with a wooden spoon or dough hook until a rough dough forms.
Step 3: Knead the Dough
Turn the dough out onto a lightly floured surface and knead for 8-10 minutes by hand, or about 6 minutes with a stand mixer on medium speed. The dough should be smooth, elastic, and just slightly tacky.
Step 4: First Rise
Place the dough in a greased bowl, turning it once to coat all sides. Cover with a clean kitchen towel or plastic wrap and let it rise in a warm spot for 1.5 to 2 hours, or until doubled in size.
Step 5: Shape the Dough
Punch down the risen dough to release excess air. Turn it out onto a lightly floured surface and shape it into a rectangle. Roll it tightly into a log and tuck the ends under to fit snugly into a greased 9×5-inch loaf pan.
Step 6: Second Rise
Cover the loaf with a kitchen towel and let it rise again for 45-60 minutes, or until it has risen about 1 inch above the rim of the pan.
Step 7: Bake
Preheat the oven to 350°F (177°C). Bake the loaf for 30-35 minutes, or until golden brown and hollow-sounding when tapped. If the top is browning too quickly, tent it with foil in the last 10 minutes.
Step 8: Cool Completely
Remove the bread from the oven and allow it to cool in the pan for 10 minutes. Then transfer it to a wire rack to cool completely before slicing. This prevents the crumb from becoming gummy.
How Long to Prepare the Simply Sandwich Bread
Prep Time: The entire prep process takes about 25 minutes — this includes mixing, kneading, and shaping the dough. The dough is very manageable and doesn’t require any special techniques, making it perfect for bakers of all skill levels.
Rise & Bake Time: The bread needs two rises. The first rise takes about 1.5 to 2 hours, depending on your kitchen’s warmth. The second rise is shorter — around 45 to 60 minutes. Baking takes 30–35 minutes, and cooling time is another 1 hour if you want the cleanest slices.
Tips for Perfect Simply Sandwich Bread
- Use a thermometer to check your liquid temperature — 110°F is ideal for activating yeast.
- Don’t skip the second rise; it ensures the loaf is tall and fluffy.
- Lightly oil your hands and work surface if the dough gets too sticky during kneading.
- For a softer crust, brush the top of the loaf with melted butter right after baking.
- Always let the bread cool fully before slicing to avoid a gummy texture.
Watch Out for These Mistakes While Cooking
- Water too hot or too cold: Hot water kills yeast, cold water won’t activate it.
- Under-kneading: This leads to a dense loaf that won’t rise well.
- Over-flouring: Adding too much flour during kneading can result in dry, tough bread.
- Rushing the rise: Yeast needs time to do its job. A warm, draft-free space helps.
- Cutting too early: Cutting into the bread while it’s still warm ruins the crumb structure.
What to Serve With Simply Sandwich Bread?
1. Classic BLT Sandwich
Crispy bacon, lettuce, tomato, and mayo come alive between two slices of this soft, homemade bread.
2. French Toast
This bread soaks up the egg mixture perfectly, giving you a rich and fluffy breakfast treat.
3. Grilled Cheese
Melted cheddar and buttery, toasted slices — the ultimate comfort food.
4. Avocado Toast
A sturdy base for mashed avocado, a sprinkle of chili flakes, and a drizzle of olive oil.
5. Chicken Salad Sandwich
Creamy chicken salad tastes even better layered between this pillowy bread.
Storage Instructions
Room Temperature: Store the cooled loaf in a bread box or airtight bag at room temperature for up to 4 days. Avoid refrigerating — it dries out the bread.
Freezing: Slice the bread, wrap each slice (or the entire loaf) tightly in plastic wrap and place it in a freezer-safe bag. Freeze for up to 3 months. Toast or thaw at room temperature when ready to use.
Reviving: To refresh slightly stale bread, warm slices briefly in the toaster or oven to bring back the softness.
Estimated Nutrition
- Serving Size: 1 slice (based on 12 slices per loaf)
- Calories: 140
- Fat: 3.5g
- Saturated Fat: 2g
- Cholesterol: 10mg
- Sodium: 180mg
- Carbohydrates: 23g
- Fiber: 1g
- Sugar: 3g
- Protein: 4g
Frequently Asked Questions
How do I know when the dough has risen enough?
It should double in size. Gently press your finger into the dough — if the indentation remains, it’s ready.
Can I make this recipe dairy-free?
Yes, use non-dairy milk like almond or oat, and substitute the butter with neutral oil or vegan butter.
Why is my bread dense?
It could be under-kneaded, or your yeast wasn’t fully activated. Be sure to give the dough enough time to rise.
Can I use whole wheat flour instead?
Yes, but substitute only 50% of the flour to maintain softness. Full whole wheat will make the loaf denser.
How do I get a shiny crust?
Brush the loaf with a little milk or egg wash before baking, or butter after baking for a soft shine.
Conclusion
Simply Sandwich Bread is one of those foundational recipes you’ll find yourself returning to again and again. It’s versatile, reliable, and the perfect way to elevate your everyday meals. Whether you’re meal prepping for the week or just in the mood to bake something soul-satisfying, this loaf delivers on flavor, texture, and simplicity. Make it once, and you’ll see why homemade is always better.
Simply Sandwich Bread
- Total Time: 3 hours
- Yield: 1 loaf 1x
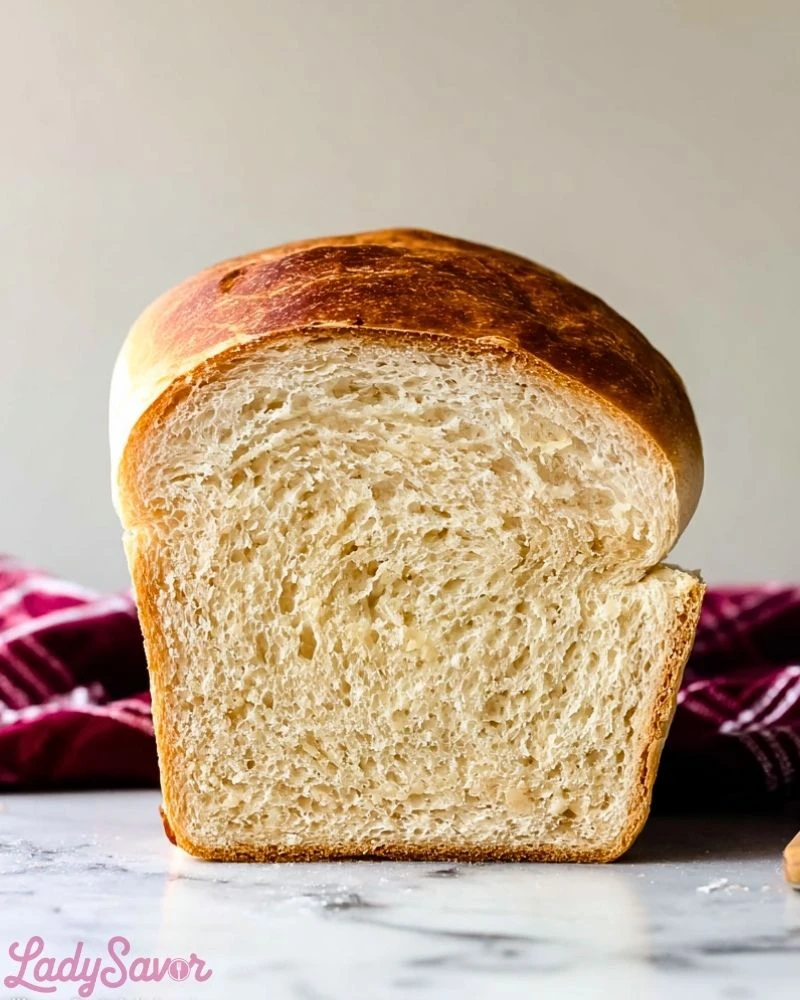
Description
If you’re craving that perfect, fluffy, golden loaf for your sandwiches, breakfasts, or toast, this Simply Sandwich Bread recipe is about to be your new go-to. With its tender crumb, lightly sweet flavor, and pillowy texture, this easy recipe transforms a few pantry staples into a beautiful homemade loaf. Whether you’re looking for quick breakfast options, easy dinner ideas, or a healthy snack base, this loaf delivers on flavor and convenience. Perfect for beginner bakers and satisfying enough for pros, it’s a must-try for anyone seeking wholesome food ideas that never fail.
Ingredients
1 cup whole milk
2 tablespoons honey
2 1/4 teaspoons active dry yeast
1/2 cup warm water
2 tablespoons unsalted butter, softened
3 1/2 cups bread flour
1 1/4 teaspoons salt
Instructions
1. In a small bowl, combine warm water, honey, and active dry yeast. Stir and let sit for 5–10 minutes until foamy.
2. In a large bowl, mix the bloomed yeast with milk and softened butter.
3. Add bread flour and salt gradually, stirring until a shaggy dough forms.
4. Knead the dough for 8–10 minutes by hand or 6 minutes with a stand mixer until smooth and elastic.
5. Place dough in a greased bowl, cover, and let rise in a warm spot for 1.5 to 2 hours or until doubled in size.
6. Punch down the dough, shape into a log, and place into a greased 9×5-inch loaf pan.
7. Cover and let rise again for 45–60 minutes, until the dough crowns about an inch above the rim.
8. Preheat oven to 350°F (177°C). Bake for 30–35 minutes until golden brown and sounds hollow when tapped.
9. Let cool in the pan for 10 minutes, then transfer to a wire rack to cool completely before slicing.
Notes
You can use all-purpose flour if bread flour is unavailable, but the loaf may be slightly less structured.
For an ultra-soft crust, brush the top with melted butter right after baking.
Let the bread cool completely before slicing to avoid a gummy texture inside.
- Prep Time: 25 minutes
- Cook Time: 35 minutes
- Category: Bread
- Method: Baking
- Cuisine: American
Nutrition
- Serving Size: 1 slice
- Calories: 140
- Sugar: 3g
- Sodium: 180mg
- Fat: 3.5g
- Saturated Fat: 2g
- Unsaturated Fat: 1g
- Trans Fat: 0g
- Carbohydrates: 23g
- Fiber: 1g
- Protein: 4g
- Cholesterol: 10mg