
There’s something irresistibly fun about a dessert that throws the rulebook out the window—and Santa’s Trash Cookie Bars do exactly that. Packed with a festive mix of sweet, salty, crunchy, and gooey goodies, these bars are the ultimate holiday indulgence. Every bite delivers a surprise, from melty chocolate chunks to crunchy pretzels and colorful candy pieces, making them as exciting to eat as they are to make.
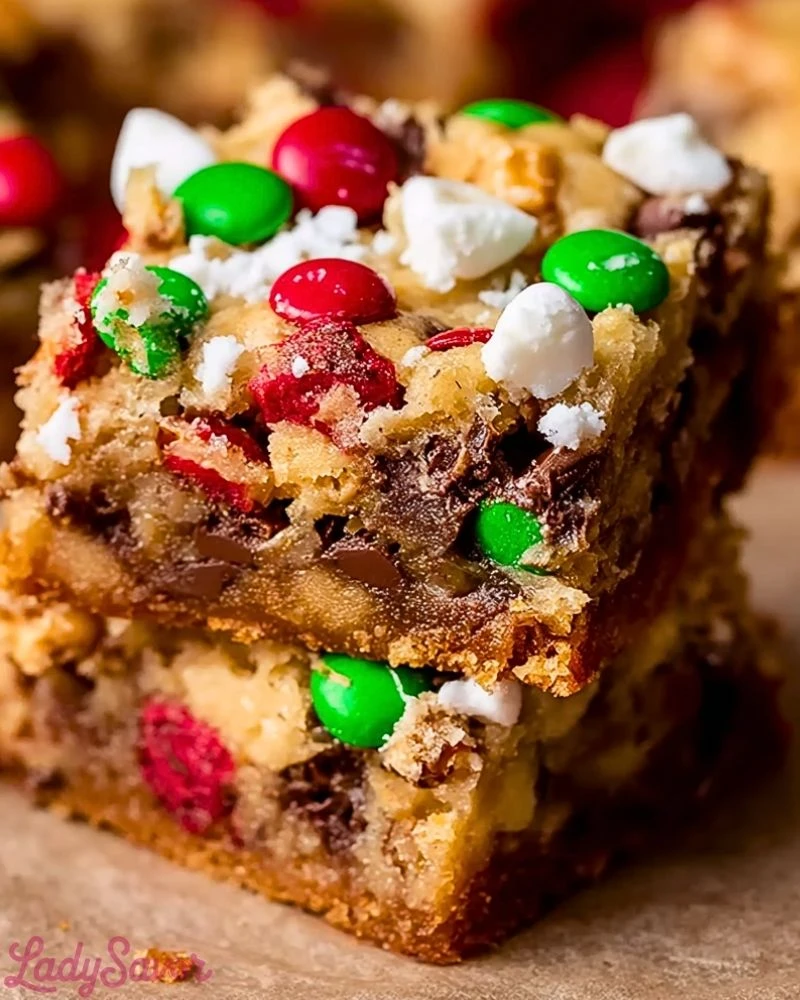
Perfect for holiday gatherings, cookie swaps, or a cozy night in, these cookie bars capture the playful spirit of the season. They’re rich, chewy, and loaded with texture, offering a bakery-style treat without the fuss of scooping individual cookies. Whether you’re baking with kids or whipping up a quick dessert for guests, this recipe brings joy in every square.
Why You’ll Love This Santa’s Trash Cookie Bars
These cookie bars are all about flexibility and fun. You can toss in your favorite mix-ins, making each batch uniquely yours while still delivering that classic buttery, chewy base everyone loves. They come together quickly in one pan, which means less mess and more time enjoying the holiday magic. The balance of sweet chocolate, salty pretzels, and crunchy candies creates a flavor explosion that keeps you reaching for another bite.
Preparation Phase & Tools to Use (Essential Tools and Equipment, and the Importance of Each Tool)
To make Santa’s Trash Cookie Bars successfully, having the right tools on hand makes all the difference. A large mixing bowl is essential for combining all the ingredients evenly, ensuring every bite is packed with flavor. An electric mixer or sturdy whisk helps achieve a smooth, creamy dough base, which is key to the bars’ soft and chewy texture. A 9×13-inch baking pan provides the perfect thickness, allowing the bars to bake evenly without drying out. Parchment paper is highly recommended, as it prevents sticking and makes lifting and slicing the bars effortless. Finally, a spatula is crucial for spreading the thick dough evenly across the pan, ensuring consistent baking throughout.
Preparation Tips
For the best results, start by bringing your butter and eggs to room temperature, as this helps create a smoother batter and better texture. Avoid overmixing once the dry ingredients are added, since this can make the bars dense instead of soft and chewy. When adding mix-ins like candies and pretzels, gently fold them in to keep their texture intact. Press the dough evenly into the pan without packing it too tightly, which allows the bars to bake up with a tender crumb. Keep an eye on baking time—slightly underbaking will give you that perfectly gooey center that makes these bars irresistible.
Santa’s Trash Cookie Bars
Ingredients for this Santa’s Trash Cookie Bars
Creating the perfect batch of Santa’s Trash Cookie Bars starts with a rich, buttery base and a generous mix of fun, festive add-ins. Each ingredient plays a role in building layers of flavor and texture.
Base Ingredients
- 1 cup (2 sticks) unsalted butter, melted
- 1 cup brown sugar, packed (adds moisture and chewiness)
- 1/2 cup granulated sugar (for balanced sweetness)
- 2 large eggs, room temperature
- 2 teaspoons vanilla extract
- 2 1/2 cups all-purpose flour
- 1 teaspoon baking soda
- 1/2 teaspoon salt
Mix-Ins (Customize Freely)
- 1 cup chocolate chips (semi-sweet or milk chocolate)
- 1/2 cup white chocolate chips (optional for contrast)
- 1/2 cup crushed pretzels (adds a salty crunch)
- 1/2 cup holiday M&M’s or candy-coated chocolates
- 1/2 cup chopped caramel candies or soft caramels
- 1/4 cup toffee bits (optional, for extra richness)
- 1/4 cup chopped nuts (walnuts or pecans, optional)
- 1/4 cup sprinkles or holiday-themed decorations
Optional Toppings
- Extra chocolate chunks for topping
- Flaky sea salt (enhances flavor contrast)
- Powdered sugar for a festive finish
Instructions: Step-by-Step Guide for Santa’s Trash Cookie Bars
Step 1: Prepare Your Baking Pan
Preheat your oven to 350°F (175°C). Line a 9×13-inch baking pan with parchment paper, leaving some overhang on the sides. This makes it easier to lift the bars out after baking and ensures nothing sticks.
Step 2: Mix the Wet Ingredients
In a large mixing bowl, combine the melted butter, brown sugar, and granulated sugar. Whisk or beat until the mixture is smooth and glossy. Add the eggs one at a time, mixing well after each addition. Stir in the vanilla extract until fully incorporated.
Step 3: Combine the Dry Ingredients
In a separate bowl, whisk together the flour, baking soda, and salt. This step ensures even distribution of leavening and prevents clumping.
Step 4: Form the Dough
Gradually add the dry ingredients into the wet mixture. Mix until just combined—do not overmix, as this can lead to dense bars. The dough will be thick and slightly sticky.
Step 5: Fold in the Mix-Ins
Gently fold in the chocolate chips, pretzels, candies, caramel pieces, and any other add-ins you’ve chosen. Make sure they are evenly distributed throughout the dough for consistent flavor in every bite.
Step 6: Transfer to the Pan
Spread the dough evenly into the prepared baking pan. Use a spatula or your hands to press it gently into all corners. Avoid packing it too tightly—just enough to create an even layer.
Step 7: Add Toppings
Sprinkle additional chocolate chunks, candies, or pretzels on top for a bakery-style appearance. Lightly press them into the surface so they adhere while baking.
Step 8: Bake to Perfection
Bake in the preheated oven for 25–30 minutes, or until the edges are golden brown and the center is just set. A toothpick inserted in the center should come out with a few moist crumbs (not wet batter).
Step 9: Cool Completely
Remove the pan from the oven and allow the bars to cool completely in the pan. This step is crucial, as it helps the bars firm up and makes slicing cleaner and easier.
Step 10: Slice and Serve
Using the parchment paper overhang, lift the bars out of the pan. Place them on a cutting board and slice into squares or rectangles. Serve and enjoy the festive, gooey goodness.
Santa’s Trash Cookie Bars
Notes
Santa’s Trash Cookie Bars are incredibly forgiving, which makes them perfect for both beginner and experienced bakers. The beauty of this recipe lies in its flexibility—you can swap in leftover pantry items, seasonal candies, or even broken cookie pieces to create your own unique version. If you prefer a softer, gooier texture, lean toward slightly underbaking the bars and allowing them to set as they cool. For a firmer, more structured bar, bake a few minutes longer until the center is fully set. Keep in mind that the type of mix-ins you choose can slightly affect texture and sweetness, so balance salty and sweet elements for the best results.
Watch Out for These Mistakes While Cooking
- Overmixing the dough: This can make the bars dense and tough instead of soft and chewy.
- Using cold ingredients: Butter and eggs should be at room temperature for proper mixing.
- Overbaking: The bars will continue to cook slightly after being removed from the oven, so don’t wait until they look fully done.
- Uneven spreading: Failing to evenly distribute the dough can lead to undercooked centers or overcooked edges.
- Too many mix-ins: Overloading can prevent the bars from holding together properly.
- Skipping parchment paper: This makes removal difficult and can cause the bars to break apart.
Storage Instructions
Once completely cooled, store Santa’s Trash Cookie Bars in an airtight container at room temperature for up to 4 days. To keep them extra soft, you can place a slice of bread in the container, which helps retain moisture. For longer storage, refrigerate the bars for up to one week, though this may slightly firm up their texture. If you’d like to freeze them, wrap individual bars tightly in plastic wrap and place them in a freezer-safe container or bag for up to 3 months. When ready to enjoy, thaw at room temperature or warm briefly in the microwave for that fresh-baked taste.
Estimated Nutrition
(Per serving, approximate values)
- Calories: 280–350 kcal
- Carbohydrates: 35–45g
- Sugar: 20–28g
- Fat: 14–18g
- Saturated Fat: 7–10g
- Protein: 3–5g
- Sodium: 120–220mg
Note: Nutritional values vary depending on the mix-ins used.
Frequently Asked Questions
Can I make Santa’s Trash Cookie Bars ahead of time?
Yes, these bars are perfect for making ahead. Bake them a day or two in advance and store in an airtight container until ready to serve.
Can I freeze Santa’s Trash Cookie Bars?
Absolutely. Wrap them individually and freeze for up to 3 months. Thaw at room temperature before serving.
What are the best mix-ins to use?
A combination of chocolate, candy-coated chocolates, pretzels, and caramel pieces works best for a balance of flavors and textures.
Can I make these bars gluten-free?
Yes, simply substitute the all-purpose flour with a 1:1 gluten-free baking flour.
Why are my bars too dry?
This usually happens from overbaking or adding too much flour. Be sure to measure accurately and watch baking time closely.
Can I use salted butter instead of unsalted?
Yes, but reduce the added salt in the recipe to avoid an overly salty flavor.
How do I know when the bars are done?
The edges should be golden and the center should look set but still slightly soft. A toothpick should come out with moist crumbs.
Can I double this recipe?
Yes, you can double it and bake in a larger pan or two 9×13 pans. Adjust baking time slightly as needed.
Conclusion
Santa’s Trash Cookie Bars bring together everything you love about holiday treats in one easy, crowd-pleasing dessert. With their chewy texture, rich flavor, and playful mix of ingredients, they’re guaranteed to become a seasonal favorite. Whether you’re baking for a party, gifting homemade treats, or simply indulging at home, these bars deliver comfort and joy in every bite.
Santa’s Trash Cookie Bars
- Total Time: 45 minutes
- Yield: 16 bars 1x
- Diet: Vegetarian
Description
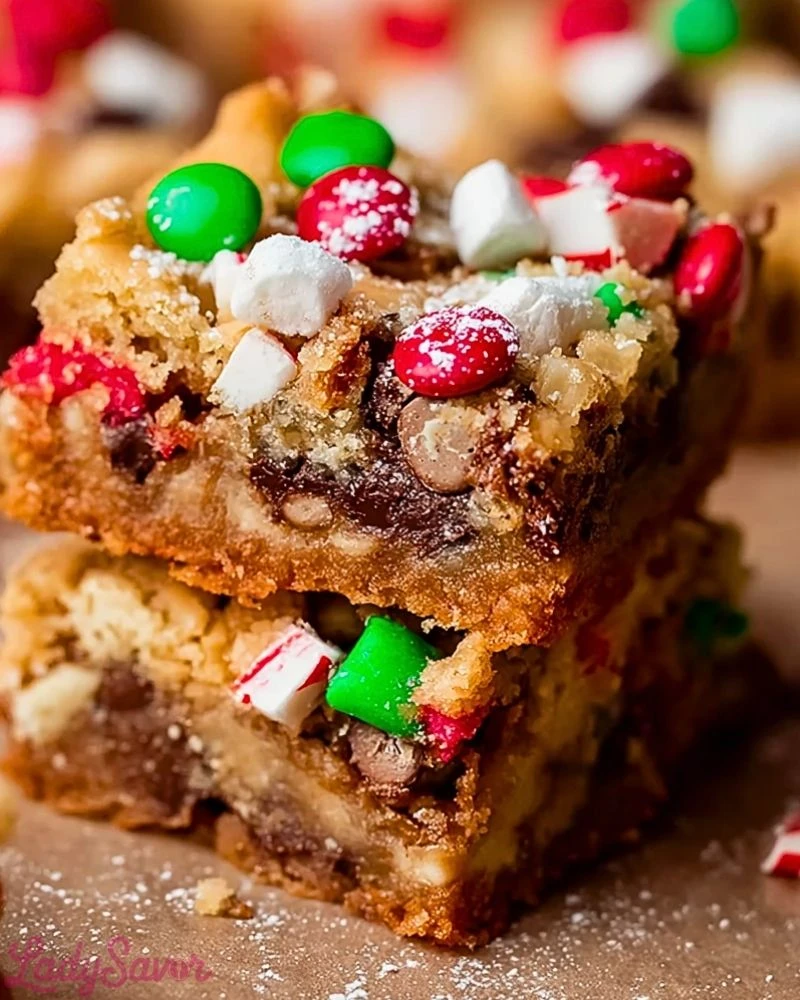
Get ready to bake one of the most fun and irresistible holiday treats ever! Santa’s Trash Cookie Bars are the ultimate easy dessert packed with chocolate, crunchy pretzels, colorful candies, and gooey caramel in every bite. This easy recipe is perfect for quick dessert ideas, holiday baking, party treats, or even a sweet snack to share with family.
Ingredients
1 cup unsalted butter melted
1 cup brown sugar packed
1/2 cup granulated sugar
2 large eggs room temperature
2 teaspoons vanilla extract
2 1/2 cups all purpose flour
1 teaspoon baking soda
1/2 teaspoon salt
1 cup chocolate chips
1/2 cup white chocolate chips
1/2 cup crushed pretzels
1/2 cup holiday M&M’s or candy coated chocolates
1/2 cup chopped caramel candies
1/4 cup toffee bits
1/4 cup chopped nuts optional
1/4 cup sprinkles
Instructions
1. Preheat oven to 350°F (175°C) and line a 9×13 inch pan with parchment paper.
2. Mix melted butter, brown sugar, and granulated sugar until smooth.
3. Add eggs one at a time then mix in vanilla extract.
4. Whisk flour, baking soda, and salt in a separate bowl.
5. Gradually combine dry ingredients into wet mixture without overmixing.
6. Fold in chocolate chips, pretzels, candies, caramel, and mix-ins.
7. Spread dough evenly into prepared pan.
8. Add extra toppings and gently press them in.
9. Bake for 25 to 30 minutes until edges are golden and center is slightly soft.
10. Cool completely before slicing and serving.
Notes
Do not overbake for a soft and gooey center
Balance sweet and salty mix-ins for best flavor
Let bars cool completely before cutting for clean slices
- Prep Time: 15 minutes
- Cook Time: 30 minutes
- Category: Dessert
- Method: Baking
- Cuisine: American
Nutrition
- Serving Size: 1 bar
- Calories: 320
- Sugar: 24g
- Sodium: 180mg
- Fat: 16g
- Saturated Fat: 9g
- Unsaturated Fat: 6g
- Trans Fat: 0g
- Carbohydrates: 40g
- Fiber: 1g
- Protein: 4g
- Cholesterol: 45mg