
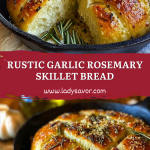
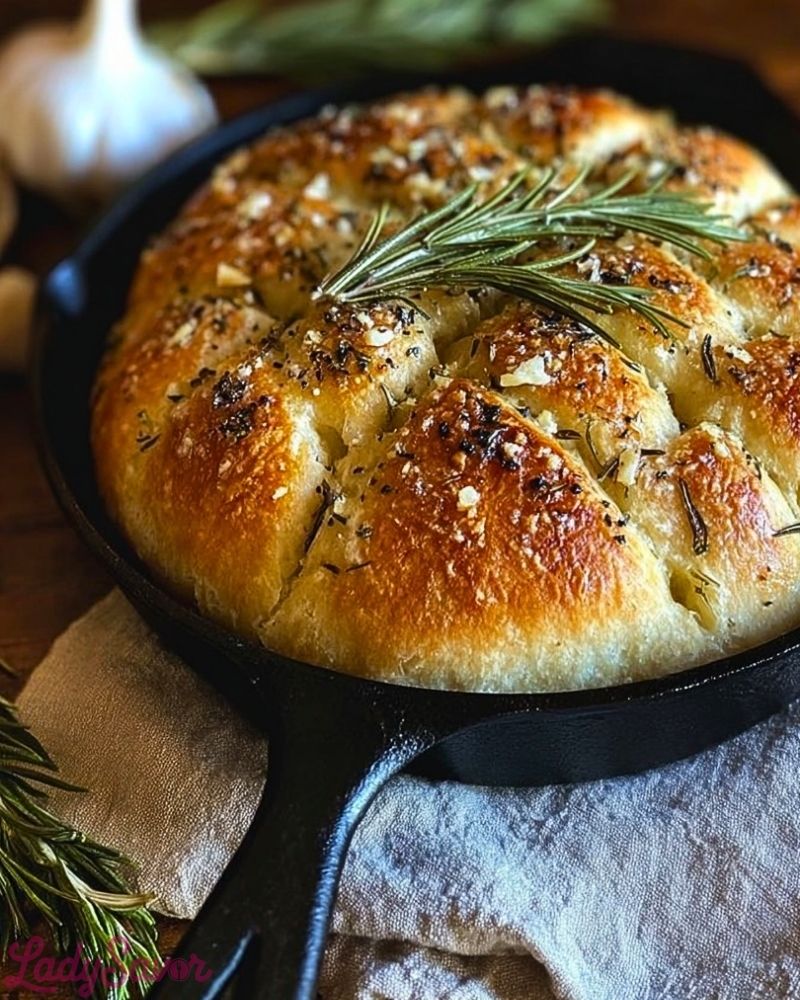
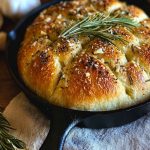
Golden, crusty, and fragrant with fresh rosemary and garlic, this Rustic Garlic Rosemary Skillet Bread is the kind of bread that transforms an ordinary meal into something unforgettable. Baked right in a cast iron skillet, it gets a crunchy, caramelized base while staying soft and fluffy inside. The rustic beauty of this loaf makes it feel straight from a countryside kitchen—inviting, warm, and wholesome.
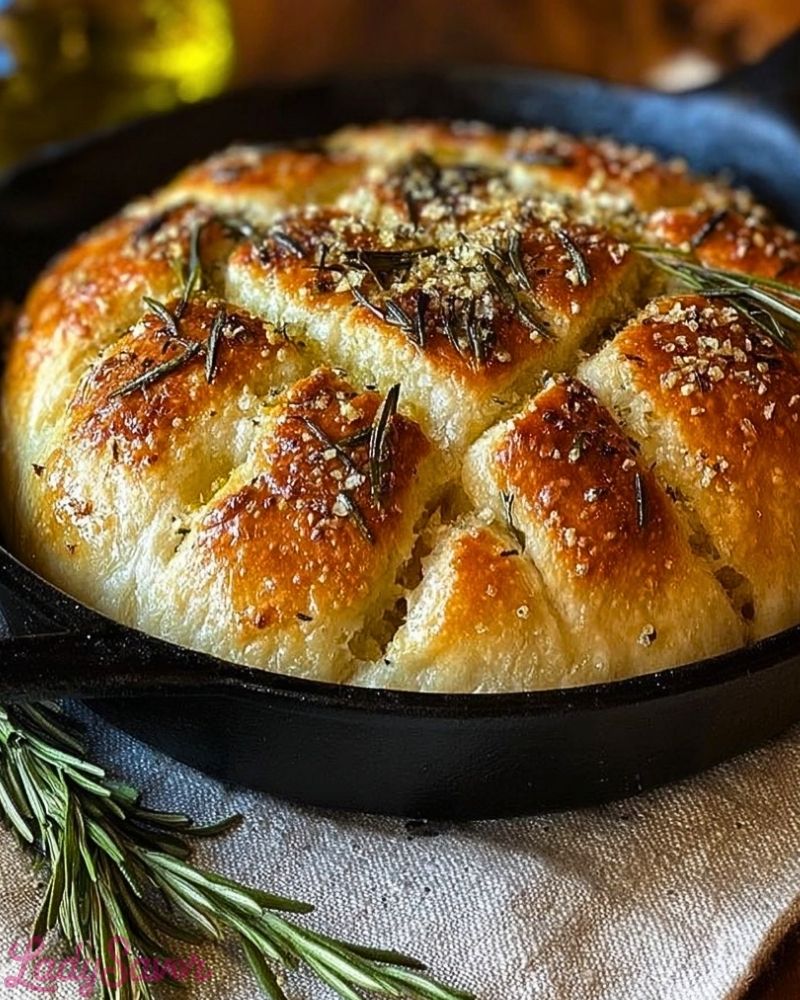
Every bite delivers a comforting hit of roasted garlic and earthy rosemary, with just enough salt and olive oil to tie everything together. Whether it’s served alongside a hearty soup, dipped in olive oil, or simply torn apart and enjoyed warm, this bread is rustic comfort at its finest. The best part? You don’t need to be an expert baker to pull it off.
Why You’ll Love This Rustic Garlic Rosemary Skillet Bread
- Minimal effort, maximum reward – No kneading required, and the skillet does most of the magic.
- Incredible flavor – Garlic and rosemary are a match made in baking heaven.
- Versatile side – Pairs beautifully with soups, pastas, meats, and cheeses.
- Perfect for beginners – Simple ingredients and a forgiving method make this a fantastic entry point into bread baking.
- Crispy crust, tender crumb – That cast iron gives you bakery-style results at home.
Preparation Phase & Tools to Use
Making Rustic Garlic Rosemary Skillet Bread is surprisingly simple, but having the right tools ensures you get that perfect golden crust and fluffy interior. Here’s what you’ll need and why each tool matters:
- Cast Iron Skillet (10-inch preferred): The star of the show. Cast iron retains heat evenly and creates that signature crispy, golden crust on the bottom and edges of the bread. No substitute gives the same rustic effect.
- Mixing Bowl: For combining your dough ingredients. A medium to large bowl is ideal for rising space.
- Wooden Spoon or Silicone Spatula: Perfect for stirring the wet dough without overworking it.
- Plastic Wrap or Clean Kitchen Towel: Essential for covering the dough while it rises, keeping in warmth and moisture.
- Sharp Knife or Kitchen Shears: Used for scoring the dough before baking, helping the bread expand and release steam.
- Pastry Brush: Helps evenly spread olive oil or garlic butter across the dough before baking, adding flavor and color.
Optional but helpful:
- Bench Scraper: Great for shaping the sticky dough.
- Cooling Rack: Keeps the bottom crust crisp as the bread cools.
Preparation Tips
- Use fresh rosemary and garlic: Fresh ingredients make a huge difference in both aroma and flavor. Mince the garlic finely to avoid any bitter bites.
- Let the dough rest adequately: This recipe often calls for a long rise (up to 8 hours or overnight). Don’t rush it—flavor and texture develop over time.
- Preheat your skillet: Place the skillet in the oven during preheating if you want an extra crisp crust. Carefully transfer the dough to the hot pan.
- Flour your hands and tools: The dough will be sticky—this is normal. Lightly flouring your hands or the spatula can make shaping easier.
- Score the top generously: This not only looks beautiful but also helps control the way the bread rises in the oven.
Preparation Phase & Tools to Use
Crafting this Rustic Garlic Rosemary Skillet Bread is as much about the method as it is about the tools. Each piece of equipment plays a vital role in achieving the crusty-on-the-outside, pillowy-on-the-inside perfection.
Essential Tools and Equipment:
-
Cast Iron Skillet (10-inch preferred)
The skillet is key—it holds heat evenly and gives the bread a deep, golden crust. It also doubles as a beautiful serving vessel straight from oven to table. -
Large Mixing Bowl
For mixing and rising the dough. Choose one with plenty of room since the dough will expand significantly. -
Wooden Spoon or Silicone Spatula
Since the dough is no-knead, these tools help mix the sticky dough effectively without needing your hands. -
Plastic Wrap or Clean Towel
Used to cover the dough during rising, keeping the moisture in and the temperature stable. -
Sharp Knife or Kitchen Shears
For scoring the top of the dough before baking. This helps control how the bread expands and gives it a rustic, artisan look. -
Pastry Brush
Helps evenly coat the surface with olive oil or melted garlic butter, enhancing both flavor and color.
Optional but useful:
- Bench Scraper – Ideal for handling sticky dough and shaping.
- Cooling Rack – Keeps the crust crisp by allowing air circulation underneath the bread after baking.
Preparation Tips
-
Plan ahead for rise time
This dough needs at least 6–8 hours to rise properly, or you can let it go overnight. It’s mostly hands-off, but timing is key. -
Use warm water (not hot)
The water should be lukewarm to activate the yeast without killing it—around 100°F (38°C) is perfect. -
Don’t over-mix the dough
A few good stirs are all it takes. Overworking the dough is unnecessary and can actually toughen the crumb. -
Flour lightly, not heavily
Too much flour can make the dough dry. Just dust your hands or spatula lightly to manage the stickiness. -
Score before baking
Make 3–4 deep slashes on top to help the bread expand in the oven and give it a professional look. -
Let it rest before slicing
As tempting as it is to dig in right away, let the bread rest for 10–15 minutes after baking to allow the steam inside to finish the baking process and settle the crumb.
Ingredients for This Rustic Garlic Rosemary Skillet Bread
This recipe uses simple, pantry-friendly ingredients that come together to create a beautifully fragrant and flavorful loaf. Here’s what you’ll need:
- 3 cups all-purpose flour – Spoon and level to measure; this is the base of your bread.
- 2 teaspoons instant yeast – Also known as rapid-rise or quick-rise yeast; helps the dough rise without proofing.
- 1 ½ teaspoons salt – Enhances flavor and balances the richness of the garlic and rosemary.
- 1 ½ cups warm water (about 100°F / 38°C) – Warm enough to activate the yeast but not too hot to kill it.
- 3 tablespoons olive oil, divided – Used in the dough and brushed over the top for extra flavor and color.
- 4 garlic cloves, minced – Fresh garlic brings an aromatic punch; feel free to adjust based on preference.
- 1 tablespoon fresh rosemary, finely chopped – Earthy and fragrant, rosemary is the highlight herb here.
- 1 tablespoon grated Parmesan cheese (optional) – Adds a salty, savory touch to the crust.
- Extra rosemary sprigs (for topping, optional) – For a rustic and elegant finish.
Optional Add-ins:
- A pinch of red pepper flakes for heat
- Swap Parmesan for Pecorino Romano for a sharper taste
- Add roasted garlic for deeper flavor
Step 1: Mix the Dough
In a large mixing bowl, combine the flour, instant yeast, and salt. Stir in the warm water and 1 tablespoon of olive oil until a sticky dough forms. Mix just until there are no dry patches—do not knead.
Step 2: Let the Dough Rise
Cover the bowl tightly with plastic wrap or a clean towel. Let it rise at room temperature for 6–8 hours, or overnight, until it has doubled in size and is bubbly on top.
Step 3: Prep the Skillet
Drizzle 1 tablespoon of olive oil into your cast iron skillet and swirl to coat the bottom and sides. This will help form that irresistible crust and prevent sticking.
Step 4: Shape and Rest the Dough
Using floured hands or a silicone spatula, gently deflate the dough and transfer it to the prepared skillet. Tuck the edges under slightly to form a round shape. Cover loosely with a towel and let it rest for another 30–40 minutes for a final rise.
Step 5: Preheat the Oven
While the dough is resting, preheat your oven to 400°F (200°C). If you want an extra crispy crust, you can place the skillet in the oven during preheating, then carefully add the dough after.
Step 6: Add Toppings and Score
Once rested, drizzle the remaining 1 tablespoon of olive oil over the top of the dough. Sprinkle with minced garlic, chopped rosemary, and grated Parmesan if using. Use a sharp knife or kitchen shears to make 3–4 deep slashes across the top of the dough.
Step 7: Bake
Place the skillet in the preheated oven and bake for 30–35 minutes, or until the bread is deep golden brown and sounds hollow when tapped. The crust should be crisp and caramelized, while the inside stays fluffy.
Step 8: Cool and Serve
Let the bread cool in the skillet for about 10 minutes before transferring to a wire rack. Slice or tear and serve warm.
Notes
- No kneading required: This is a wet, no-knead dough, so don’t worry about traditional bread-making steps—just mix, rest, and bake.
- Make it your own: Try adding chopped sun-dried tomatoes, olives, or even caramelized onions for a personalized twist.
- Serve fresh, always: This bread tastes best the same day it’s made, especially while still warm.
Watch Out for These Mistakes While Cooking
- Using cold water: If the water is too cool, the yeast won’t activate properly, resulting in a flat, dense loaf. Aim for lukewarm water around 100°F (38°C).
- Skipping the second rise: The rest in the skillet allows the dough to puff up and develop a better texture—don’t skip it.
- Overloading with toppings: While garlic and rosemary are delicious, using too much can weigh the dough down or burn in the oven. Stick to the suggested amounts.
- Underbaking: Make sure the crust is golden and the bread sounds hollow when tapped. If it looks too pale, give it 5 more minutes.
- Cutting too soon: Slicing right out of the oven lets steam escape too quickly, resulting in a gummy texture. Let it rest at least 10–15 minutes.
- Forgetting to oil the skillet: This can cause the bread to stick and ruin the crust. Always coat it well with olive oil before placing the dough.
- Not scoring the dough: Scoring allows for better oven spring and helps the bread rise evenly.
- Storing improperly: Leaving it uncovered or in plastic will soften the crust—see storage tips in the next section.
What to Serve With Rustic Garlic Rosemary Skillet Bread
This savory, crusty bread is incredibly versatile and can elevate any meal—or become the star of the table on its own. From cozy dinners to fresh appetizers, here are some delicious pairing ideas:
8 Recommendations
1. Creamy Tomato Basil Soup
The warm, herbal notes of the bread pair beautifully with a tangy tomato soup. Dip and enjoy the contrast between crunchy crust and velvety broth.
2. Charcuterie Board
Add this skillet bread to a platter of cheeses, cured meats, olives, and spreads. Its rustic quality complements both soft brie and sharp cheddar.
3. Roasted Chicken or Herb-Crusted Pork
Use the bread to mop up pan juices or serve it alongside roasted meats for a comforting, hearty meal.
4. Olive Oil and Balsamic Dip
Keep it simple. A dish of good olive oil with cracked pepper, balsamic vinegar, and a pinch of sea salt makes for a quick and delicious appetizer.
5. Pasta with Creamy or Garlic-Based Sauces
Think fettuccine alfredo, carbonara, or garlic butter shrimp pasta—this bread is perfect for catching every last bit of sauce.
6. Grilled Vegetables and Hummus
Layer grilled zucchini, eggplant, and bell peppers on top of torn pieces, or use it as a base for Mediterranean-inspired open-faced bites.
7. Egg Dishes (like Shakshuka or Omelets)
Dip into a skillet of simmered eggs or serve alongside for a savory brunch option that won’t disappoint.
8. Fresh Salads with Tangy Dressings
A crisp arugula salad with lemon vinaigrette or a Greek salad balances well with the richness of the bread.
Storage Instructions
Rustic breads like this skillet loaf are best enjoyed fresh, but you can still preserve the texture and flavor for a couple of days with the right method:
- At Room Temperature: Wrap the cooled bread in a clean kitchen towel or parchment paper and store in a bread box or paper bag. This keeps the crust from going soggy. Avoid plastic wrap—it traps moisture and softens the crust. Best eaten within 2 days.
- To Reheat: Warm slices in a 350°F (175°C) oven for 8–10 minutes or toast in a skillet to bring back that fresh-baked crispness.
- Freezing: Let the bread cool completely, then wrap it tightly in foil and place in a freezer-safe bag. Freeze for up to 2 months. Thaw at room temperature and reheat in the oven to revive texture.
Estimated Nutrition (Per Slice – based on 8 slices)
| Nutrient | Amount |
|---|---|
| Calories | ~180 kcal |
| Total Fat | 5g |
| Saturated Fat | 1g |
| Unsaturated Fat | 4g |
| Cholesterol | 0mg |
| Sodium | 290mg |
| Total Carbohydrates | 29g |
| Dietary Fiber | 1g |
| Total Sugars | <1g |
| Protein | 4g |
| Trans Fat | 0g |
Note: These values are approximate and may vary based on specific ingredients used, toppings, and serving sizes.
Frequently Asked Questions
1. Can I use active dry yeast instead of instant yeast?
Yes, you can. Just dissolve the active dry yeast in warm water and let it sit for 5–10 minutes until foamy before mixing it with the dry ingredients.
2. What if I don’t have a cast iron skillet?
No problem—use an oven-safe baking dish or a Dutch oven instead. The crust might not be as crisp, but the bread will still be delicious.
3. Can I add cheese into the dough?
Absolutely. Stir in ½ cup of shredded cheese like mozzarella, cheddar, or Parmesan into the dough for an extra cheesy twist.
4. How do I know when the bread is done?
It should be deep golden brown and sound hollow when tapped on the bottom. You can also check for an internal temperature of around 200°F (93°C).
5. Can I make this gluten-free?
Yes, but it requires a 1:1 gluten-free flour blend made specifically for bread. Expect a slightly different texture, and avoid overmixing.
6. Can I let the dough rise longer than 8 hours?
You can let it go up to 12 hours in the fridge for a slower rise, which adds flavor. Just be sure to let it come to room temperature before baking.
7. Why is my bread too dense or flat?
Likely causes include inactive yeast, water that was too hot or too cold, or skipping the final rest before baking. Make sure all rise steps are followed.
8. Is this bread vegan?
Yes, as long as you skip the optional Parmesan topping, this recipe is completely plant-based.
Conclusion
Rustic Garlic Rosemary Skillet Bread is a wonderful way to bring homemade baking into your kitchen without the need for kneading or complex techniques. With its bold flavors, crusty exterior, and pillowy interior, it’s a go-to recipe whether you’re entertaining guests, complementing a cozy dinner, or just craving something warm and fresh from the oven.
Simple ingredients, a forgiving process, and big flavor make this one of those recipes you’ll come back to again and again. Whether it’s your first bread or your fiftieth, this loaf delivers every single time.
Rustic Garlic Rosemary Skillet Bread
- Total Time: 8 hours
- Yield: 1 loaf 1x
Description
Warm, crusty, and deeply aromatic, this Rustic Garlic Rosemary Skillet Bread is your new go-to for cozy dinners and impressive side dishes. It’s an easy recipe with no kneading required, just simple pantry ingredients and a cast iron skillet. Perfect for anyone looking for quick baking ideas, savory bread recipes, or dinner ideas with a rustic, homemade touch. Whether you’re dunking it into soup, serving it with pasta, or enjoying it on its own, this healthy snack or quick side dish hits the spot every time.
Ingredients
3 cups all-purpose flour
2 teaspoons instant yeast
1 ½ teaspoons salt
1 ½ cups warm water
3 tablespoons olive oil, divided
4 garlic cloves, minced
1 tablespoon fresh rosemary, finely chopped
1 tablespoon grated Parmesan cheese (optional)
Extra rosemary sprigs (optional)
Instructions
1. In a large bowl, combine the flour, instant yeast, and salt.
2. Add warm water and 1 tablespoon of olive oil. Stir until a sticky dough forms.
3. Cover the bowl and let the dough rise at room temperature for 6–8 hours or overnight.
4. Drizzle 1 tablespoon of olive oil into a cast iron skillet and spread evenly.
5. Gently deflate the dough and transfer it to the skillet. Shape loosely into a round.
6. Cover with a towel and let it rest for 30–40 minutes.
7. Preheat oven to 400°F (200°C).
8. Drizzle remaining 1 tablespoon olive oil over the dough.
9. Sprinkle with minced garlic, rosemary, and Parmesan if using.
10. Score the dough with 3–4 slashes using a sharp knife.
11. Bake for 30–35 minutes until golden brown and crusty.
12. Let rest for 10–15 minutes before slicing and serving.
Notes
Let the dough rise fully—don’t rush this part for best texture and flavor.
Always oil your skillet well to prevent sticking and get that crispy crust.
Use fresh rosemary and garlic for maximum aroma and depth of flavor.
- Prep Time: 10 minutes
- Cook Time: 35 minutes
- Category: Bread
- Method: Baked
- Cuisine: Rustic / Homemade
Nutrition
- Serving Size: 1 slice
- Calories: 180
- Sugar: <1g
- Sodium: 290mg
- Fat: 5g
- Saturated Fat: 1g
- Unsaturated Fat: 4g
- Trans Fat: 0g
- Carbohydrates: 29g
- Fiber: 1g
- Protein: 4g
- Cholesterol: 0mg