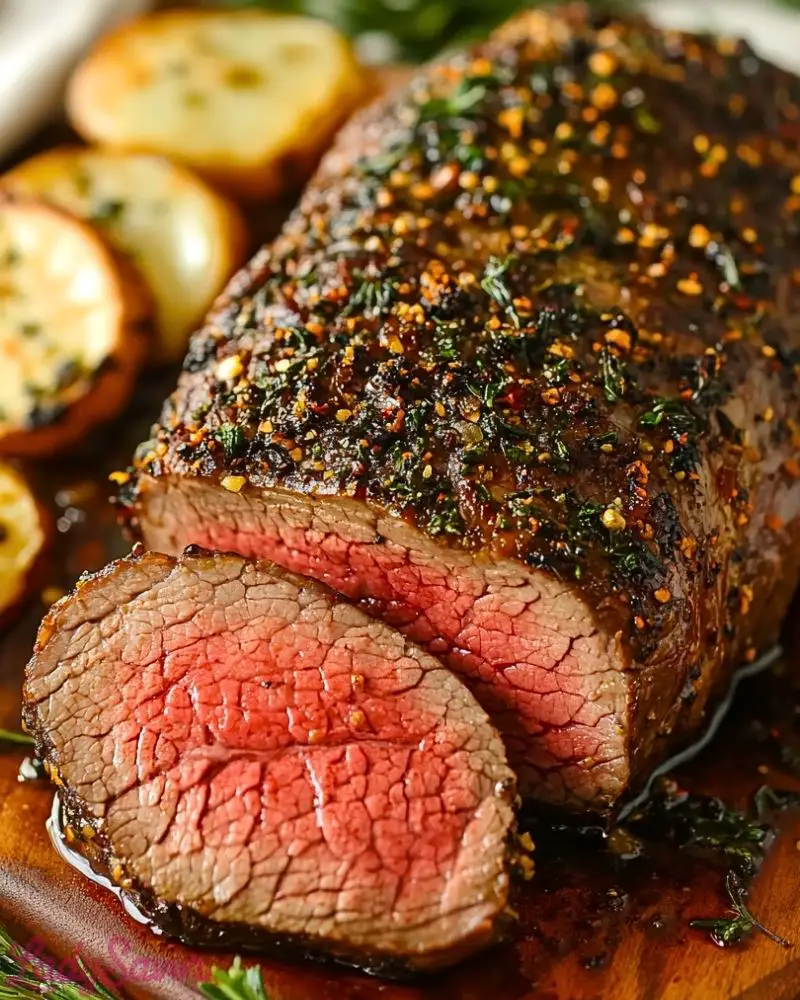
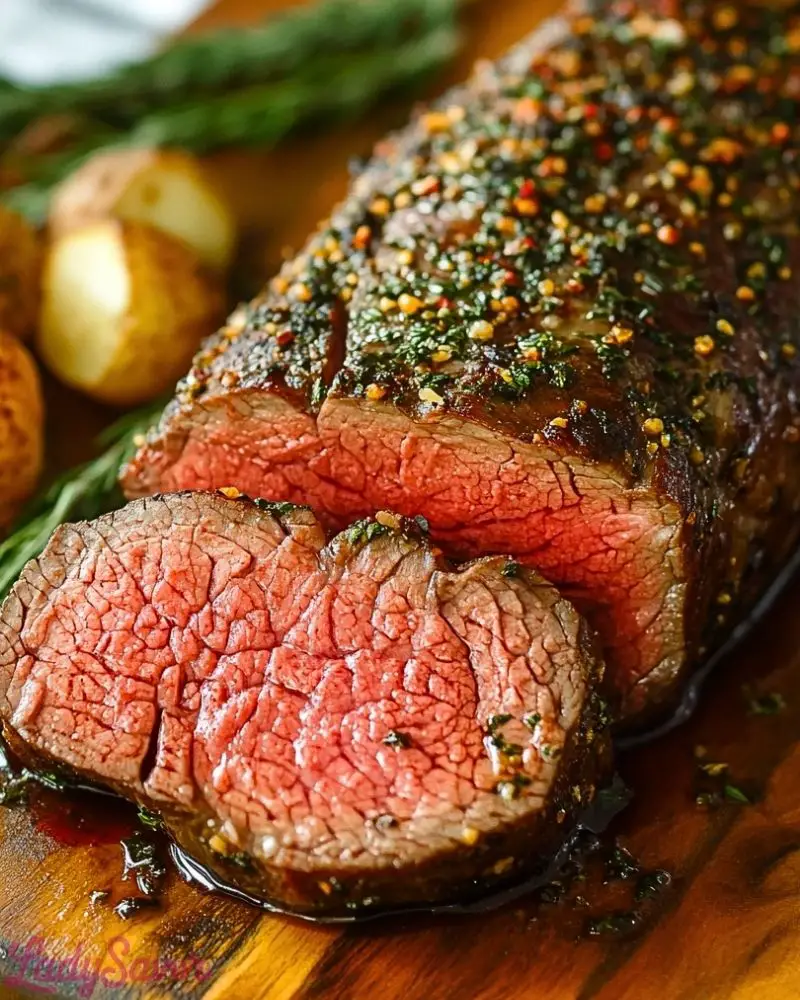
Beef tenderloin is already one of the most luxurious cuts you can buy, but when it’s reverse-seared to perfection, it becomes the centerpiece of an unforgettable meal. The method allows the meat to cook slowly and evenly before finishing with a sizzling sear, locking in juices and delivering a perfectly pink interior surrounded by a savory crust. The result? A tenderloin that’s buttery soft with every slice, bold in flavor, and show-stopping in presentation.

Reverse searing isn’t just a technique; it’s a game changer—especially for premium cuts like this. By using gentle heat followed by a quick sear, you’ll get that beautiful edge-to-edge doneness that traditional roasting often struggles to achieve. Whether you’re hosting a holiday feast or a special dinner party, this Roast Beef Tenderloin Reverse Sear will earn you high praise and zero leftovers.
Why You’ll Love This Roast Beef Tenderloin Reverse Sear
- Even Cooking: Say goodbye to grey rings around your meat—this method ensures a uniform pink center from edge to edge.
- Juicy and Tender: Low, slow roasting helps retain moisture while tenderizing the beef.
- Impressive Presentation: That peppery crust and rosy interior look like they belong in a steakhouse.
- Simple Yet Elegant: With just a few ingredients and basic prep, you’ll deliver restaurant-quality results at home.
- Perfect for Occasions: Ideal for holiday dinners, anniversaries, or when you want to spoil your guests (or yourself).
Preparation Phase & Tools to Use (Essential Tools and the Importance of Each Tool)
Before diving into the recipe, having the right setup makes all the difference—especially with a precision method like reverse searing. Here’s what you’ll need to execute this roast to perfection:
- Meat Thermometer (Instant-Read or Probe Thermometer): This is non-negotiable. It guarantees accurate doneness, especially with high-value cuts like beef tenderloin. Aim for 125°F for medium-rare before searing.
- Wire Rack & Baking Sheet: Elevating the beef on a wire rack helps air circulate evenly around the roast, encouraging uniform cooking and a better crust.
- Cast Iron Skillet or Heavy Oven-Safe Pan: Essential for achieving a flavorful sear post-roast. Cast iron holds heat extremely well and creates that golden crust in seconds.
- Sharp Knife: For clean, confident slicing that doesn’t shred the delicate meat.
- Tongs: Keep your hands safe and control the meat easily while flipping and searing.
Preparation Tips
- Trim the Tenderloin: If not pre-trimmed, remove silver skin and any excess fat for a smooth, clean roast.
- Tie It Up: Use butcher’s twine to tie the tenderloin every 1–2 inches. This helps it hold a uniform shape, leading to even cooking.
- Season in Advance: Salt generously and let the beef sit uncovered in the fridge for a few hours or overnight. This dry brine method enhances flavor and helps develop a better crust.
- Bring to Room Temp: Let your beef sit out for 30–45 minutes before cooking to ensure even heat penetration.
- Preheat Carefully: For reverse sear, you want a low oven temp (around 225°F). This gently brings the beef to the right internal temp without overcooking the exterior.
Ingredients for This Roast Beef Tenderloin Reverse Sear
This recipe focuses on letting the beef shine, supported by simple but bold seasonings that enhance the natural richness of the meat. Here’s everything you’ll need:
- 1 whole beef tenderloin roast (approximately 3 to 4 pounds), trimmed and tied
- 2 tablespoons olive oil – for coating and helping the seasoning adhere
- 2 teaspoons kosher salt – essential for flavor and for dry brining
- 1½ teaspoons freshly ground black pepper – adds boldness and enhances the crust
- 1 teaspoon garlic powder – subtle aroma and depth
- 1 teaspoon fresh rosemary, finely chopped (or ½ teaspoon dried) – earthy and aromatic
- 1 teaspoon fresh thyme, finely chopped (or ½ teaspoon dried) – fragrant and herbaceous
- 2 tablespoons unsalted butter – for basting during searing
- 2–3 garlic cloves, smashed – for flavor infusion in the pan while searing
- Fresh rosemary or thyme sprigs (optional, for garnish or pan-searing)

Step 1: Prep the Beef Tenderloin
Start by patting the beef tenderloin dry with paper towels. If your roast isn’t pre-trimmed, remove any silver skin and large pieces of surface fat. Tie the roast with butcher’s twine every 1–2 inches to help it cook evenly. Rub the entire surface with olive oil, then season generously with salt, pepper, garlic powder, chopped rosemary, and thyme. Let it rest uncovered in the fridge for at least 4 hours, or overnight for deeper flavor and a drier surface (which means a better sear later).
Step 2: Bring to Room Temperature
Take the tenderloin out of the fridge about 45 minutes before roasting. This allows the meat to come to room temperature and cook more evenly in the oven. During this time, preheat your oven to 225°F (107°C) and place a wire rack over a rimmed baking sheet.
Step 3: Slow Roast
Transfer the seasoned tenderloin onto the wire rack and place it in the oven. Insert a meat thermometer into the thickest part of the roast. Roast until the internal temperature reaches 120–125°F (49–52°C) for medium-rare. This usually takes about 45 minutes to 1 hour, depending on the size of your roast. Remove it from the oven and let it rest while you prepare for the sear.
Step 4: Sear for the Crust
Heat a cast iron skillet over high heat until it’s blazing hot. Add the butter, smashed garlic cloves, and a few sprigs of rosemary or thyme to the pan. Once the butter is melted and fragrant, sear the roast for about 1–2 minutes per side until a deep golden-brown crust forms all around.
Step 5: Rest and Slice
Transfer the seared tenderloin to a cutting board and let it rest for 10 minutes. This allows the juices to redistribute and keeps the beef tender and juicy. Slice into thick medallions and serve immediately.
Notes
- Target Doneness: For perfect medium-rare, pull the roast from the oven at 120–125°F, as it will rise a few degrees during searing and resting. For medium, aim for 130°F before searing.
- Dry Brining Advantage: Salting in advance (even overnight) enhances tenderness and flavor. Plus, it helps dry the surface, allowing for a better sear.
- Pan Sauce Option: After searing, deglaze the skillet with a splash of red wine or beef broth and simmer with the garlic and herbs to make a simple pan sauce.
- Serving Size: A 3–4 lb roast typically serves 6–8 people generously.
- Make Ahead: You can season and tie the roast a day in advance—just keep it uncovered in the fridge to develop that dry surface.
Watch Out for These Mistakes While Cooking
- Skipping the Thermometer: Guesswork with tenderloin is risky. Always use a thermometer for consistent, perfect doneness.
- Oven Too Hot: Reverse searing needs low and slow heat. Higher temps can lead to uneven cooking and overdone edges.
- Not Letting It Rest: Resting after roasting and after searing is crucial. Cut too soon, and you’ll lose all those flavorful juices.
- Underseasoning: Tenderloin is mild in flavor—don’t be afraid to season generously with salt and pepper.
- Searing Too Long: You’re just forming a crust, not cooking the meat further. High heat, short time—about 1–2 minutes per side.
- Uneven Shape: If the tenderloin is thinner on one end, fold it under and tie it to even things out before roasting.
- Cold Pan for Searing: A lukewarm skillet won’t give you the crust you want. It must be hot before adding the roast.
- Cutting with a Dull Knife: A dull knife tears the meat. Use a sharp one for clean, even slices.
What to Serve With Roast Beef Tenderloin Reverse Sear?
This elegant main course pairs beautifully with a variety of sides—from rustic comfort foods to refined dinner-party favorites. Whether you’re aiming for cozy or classy, these pairings complete the experience.
8 Recommendations
- Garlic Mashed Potatoes – Creamy, buttery, and infused with roasted garlic, they’re a comforting contrast to the tender beef.
- Roasted Brussels Sprouts with Balsamic Glaze – Their slight bitterness and tangy finish balance the richness of the meat.
- Creamed Spinach – A silky, savory side that’s decadent without overpowering the main event.
- Horseradish Cream Sauce – The sharp bite of horseradish adds a bold, bright element to each bite of beef.
- Grilled Asparagus with Lemon Zest – Light, fresh, and vibrant—perfect for spring or summer dinner tables.
- Yorkshire Pudding – Traditional and airy, these savory popovers are made for soaking up beefy juices.
- Red Wine Mushroom Sauce – Deep, earthy flavors that bring out the natural umami of the tenderloin.
- Herbed Couscous or Wild Rice Pilaf – For a lighter grain-based option with herbs that mirror the seasoning on the beef.
Mix and match these sides depending on the season and vibe of your meal. You can’t go wrong with a well-rounded plate of comforting textures and complementary flavors.
Storage Instructions
Leftover roast beef tenderloin stores exceptionally well if handled properly. Here’s how to keep it fresh and flavorful:
- Refrigeration: Wrap sliced or whole pieces tightly in foil or store in an airtight container. Keep in the fridge for up to 4 days.
- Freezing: You can freeze the beef (preferably unsliced) for up to 2 months. Wrap it in plastic wrap and then foil, or use a vacuum sealer for best results.
- Reheating: Gently reheat slices in a skillet over low heat with a splash of beef broth or water, covered, to prevent drying. Avoid microwaving, which can toughen the meat.
Tip: For sandwiches or salads, cold roast beef straight from the fridge is also fantastic.
Estimated Nutrition (Per Serving, Based on 8 Servings)
- Calories: 410
- Protein: 38g
- Fat: 28g
- Saturated Fat: 11g
- Carbohydrates: 1g
- Fiber: 0g
- Sugar: 0g
- Cholesterol: 130mg
- Sodium: 500mg
Note: These values can vary based on portion size and exact ingredients used, especially any sauces or sides you serve it with.
Frequently Asked Questions
1. Can I cook the beef tenderloin without a wire rack?
Yes, but a wire rack helps air circulate around the roast for even cooking. Without it, the bottom might steam instead of roast, which can affect texture.
2. What internal temperature should I aim for?
Pull the roast from the oven at 120–125°F for medium-rare. After searing and resting, it should reach around 130°F—the sweet spot for juicy, tender slices.
3. Can I reverse sear using a grill instead of the oven?
Absolutely! Use indirect heat on the grill to slow roast, then finish over high direct heat for the sear. Just monitor the internal temp carefully.
4. How far in advance can I season the beef?
Ideally, season the tenderloin at least 4 hours in advance—or even better, overnight. This helps the salt penetrate and dries the surface for better searing.
5. What if my tenderloin is thinner on one end?
Tuck the thinner end under itself and tie it with kitchen twine to create a uniform shape. This ensures even cooking from end to end.
6. Can I use dried herbs instead of fresh?
Yes. Substitute ½ the amount of dried herbs for fresh ones. Just make sure they’re still fragrant and not stale.
7. What should I do if I don’t have a meat thermometer?
A thermometer is strongly recommended, especially for premium cuts like tenderloin. Without one, you’ll be guessing doneness, which risks over- or undercooking.
8. Can I sear the tenderloin before roasting instead?
You can, but reverse searing provides more control, a better crust, and avoids overcooking the outer layers. It’s especially ideal for thick cuts like this.
Conclusion
Roast Beef Tenderloin Reverse Sear is more than just a cooking technique—it’s the ultimate way to elevate a luxurious cut of meat into a perfectly tender, flavor-packed centerpiece. By roasting low and slow, then finishing with a bold sear, you get that ideal crust without sacrificing the juicy, pink interior. With minimal ingredients and a little attention to detail, this dish transforms into a crowd-pleasing masterpiece that feels both fancy and effortless. Whether it’s for holidays, celebrations, or a next-level Sunday dinner, this recipe belongs in your go-to special occasion playbook.

Roast Beef Tenderloin Reverse Sear
- Total Time: 0 hours
- Yield: 6-8 1x
Description
This Roast Beef Tenderloin Reverse Sear delivers a juicy, evenly cooked center wrapped in a golden-brown crust, using a low-and-slow roast followed by a quick, high-heat sear. Perfect for holidays, special occasions, or an indulgent dinner, it’s a simple method that brings out the absolute best in one of the finest cuts of beef.
Ingredients
- 1 whole beef tenderloin roast (3–4 lbs), trimmed and tied
- 2 tablespoons olive oil
- 2 teaspoons kosher salt
- 1½ teaspoons freshly ground black pepper
- 1 teaspoon garlic powder
- 1 teaspoon fresh rosemary, finely chopped (or ½ tsp dried)
- 1 teaspoon fresh thyme, finely chopped (or ½ tsp dried)
- 2 tablespoons unsalted butter
- 2–3 garlic cloves, smashed
- Fresh rosemary or thyme sprigs (optional, for searing/garnish)
Instructions
- Trim and tie the beef tenderloin if not pre-trimmed. Pat dry with paper towels.
- Rub with olive oil and season generously with salt, pepper, garlic powder, rosemary, and thyme.
- Refrigerate uncovered for at least 4 hours or overnight for best flavor and crust.
- Remove from fridge 45 minutes before cooking to bring to room temperature.
- Preheat oven to 225°F (107°C). Place a wire rack on a baking sheet and set the roast on top.
- Insert thermometer into the thickest part of the roast.
- Roast until internal temp reaches 120–125°F for medium-rare (about 45–60 minutes).
- Rest the roast while heating a cast iron skillet over high heat.
- Sear the tenderloin with butter, smashed garlic, and herbs—about 1–2 minutes per side until a golden crust forms.
- Rest again for 10 minutes before slicing. Serve and enjoy!
- Prep Time: 15 minutes (plus 4+ hours dry brining)
- Cook Time: 45 minutes roasting + 5 minutes searing

