
These Retro Christmas Gumdrop Cookies are a joyful blast from the past, filled with nostalgic flavor and a festive pop of color in every bite. Buttery and chewy with a delicate crunch on the edges, each cookie is studded with soft, fruity gumdrops that melt into the dough as they bake, creating little pockets of sweetness. They’re as beautiful as they are delicious, and perfect for adding charm to your holiday cookie trays.
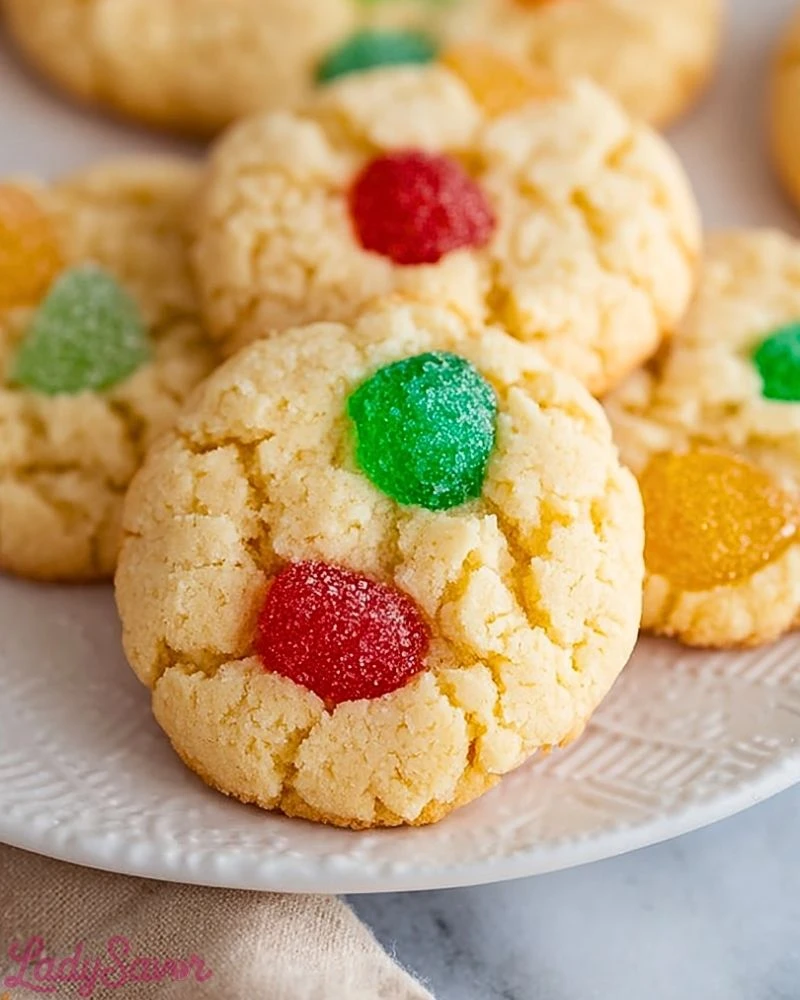
Whether you’re reviving a cherished family tradition or just looking for a whimsical treat that stands out, these cookies deliver both flavor and fun. With their playful look and old-fashioned appeal, they’re guaranteed to bring a smile to anyone who tries them—kids and adults alike. Pair them with a cup of hot cocoa or wrap them up as a gift—they’re a holiday essential.
Why You’ll Love This Retro Christmas Gumdrop Cookies Recipe
- Bursting with chewy, fruity gumdrops in every bite
- Buttery and soft with golden, crisp edges
- Eye-catching and festive, perfect for Christmas cookie platters
- Simple to make with pantry staples and a playful twist
- A delightful way to revive nostalgic holiday memories
Preparation Phase & Tools to Use
To get the best results when baking Retro Christmas Gumdrop Cookies, a few essential tools can make all the difference:
- Mixing Bowls: You’ll need a large bowl for the cookie dough and a smaller one for dry ingredients. A wide bowl helps incorporate the ingredients evenly.
- Electric Mixer: Whether it’s a hand mixer or a stand mixer, this helps cream the butter and sugar thoroughly for a smooth, fluffy base.
- Spatula: Ideal for scraping down the bowl and folding in gumdrops without overmixing.
- Sharp Knife or Kitchen Scissors: Needed to cut the gumdrops into smaller pieces—coat the blade with sugar to prevent sticking.
- Cookie Scoop or Tablespoon: Ensures evenly sized cookies for consistent baking.
- Baking Sheets & Parchment Paper: Prevents sticking and promotes even browning on the cookie bottoms.
Each of these tools plays a specific role in creating perfectly baked cookies that hold their shape and texture.
Preparation Tips
To make your Retro Christmas Gumdrop Cookies truly shine, chop the gumdrops in advance and toss them lightly in flour to keep them from sinking or sticking together. Soften the butter to room temperature before mixing—it should yield slightly when pressed but not be greasy. Cream the butter and sugar for a few minutes until it’s light and fluffy, as this helps give the cookies structure. When incorporating the flour, don’t overmix; a gentle fold is enough to avoid tough cookies. Finally, if time allows, chill the dough for 20–30 minutes—it helps prevent spreading and intensifies the flavors.
Ingredients for This Retro Christmas Gumdrop Cookies Recipe
- 2 1/4 cups all-purpose flour
- 1/2 teaspoon baking soda
- 1/2 teaspoon salt
- 3/4 cup unsalted butter, softened
- 1 cup granulated sugar
- 1/2 cup packed light brown sugar
- 1 large egg
- 2 teaspoons pure vanilla extract
- 1 1/2 cups gumdrops (fruit-flavored, not spiced), chopped into small pieces
- 1 tablespoon flour (for tossing gumdrops)
Step 1: Prepare the Gumdrops
Chop the gumdrops into small bits, about the size of chocolate chips. Use a sharp knife or kitchen scissors lightly coated in sugar to prevent sticking. Toss the chopped gumdrops with 1 tablespoon of flour so they distribute evenly in the dough without sinking or clumping.
Step 2: Preheat the Oven and Line Baking Sheets
Set your oven to 350°F (175°C). Line two baking sheets with parchment paper or silicone baking mats. This prevents the cookies from sticking and promotes even browning on the bottoms.
Step 3: Mix the Dry Ingredients
In a medium bowl, whisk together the all-purpose flour, baking soda, and salt. Set aside. This ensures the leavening agent is evenly dispersed throughout the dough for uniform texture.
Step 4: Cream the Butter and Sugars
In a large mixing bowl, beat the softened butter, granulated sugar, and brown sugar together using a hand mixer or stand mixer on medium-high speed. Mix for 2-3 minutes until light, fluffy, and pale in color. This step creates air pockets in the dough, making your cookies soft and tender.
Step 5: Add Egg and Vanilla
Beat in the egg and vanilla extract until fully incorporated. The egg binds the ingredients and adds richness, while vanilla gives depth to the flavor.
Step 6: Combine Wet and Dry Ingredients
Reduce the mixer speed to low and gradually add in the dry flour mixture. Mix just until no streaks of flour remain. Avoid overmixing to keep the cookies soft and chewy.
Step 7: Fold in the Gumdrops
Using a spatula or wooden spoon, gently fold in the flour-coated gumdrops. Mix until they are well distributed throughout the dough.
Step 8: Portion and Shape the Cookies
Use a cookie scoop or tablespoon to drop even-sized portions of dough onto the prepared baking sheets, spacing them about 2 inches apart. For extra color, press a few extra gumdrop pieces on top of each dough ball.
Step 9: Bake the Cookies
Bake for 10–12 minutes, or until the edges are lightly golden and the centers look just set. Do not overbake—the cookies will continue to firm up as they cool.
Step 10: Cool and Serve
Let the cookies cool on the baking sheets for 5 minutes before transferring them to a wire rack to cool completely. Once cooled, serve immediately or store in an airtight container to maintain freshness.
Notes
If your gumdrops are a little firm or sugary on the outside, you can soften them slightly by microwaving for 5–10 seconds before chopping. Always use fruit-flavored gumdrops instead of the spiced ones, unless you prefer that bold holiday flavor. If you’re baking multiple trays at once, rotate them halfway through to ensure even baking. These cookies are even more delightful when allowed to rest for a few hours, as the gumdrop flavors blend beautifully into the dough.
Watch Out for These Mistakes While Cooking
- Using spiced gumdrops: The intense flavor can overpower the delicate cookie base.
- Skipping the flour toss: This causes gumdrops to sink to the bottom or clump together.
- Overmixing the dough: Leads to dense, tough cookies instead of a tender, chewy texture.
- Overbaking: These cookies should be just set in the center when removed; they continue cooking as they cool.
- Not spacing properly: The dough spreads, so cookies can run together if placed too close.
Storage Instructions
Store the cooled cookies in an airtight container at room temperature for up to 5 days. To keep them soft, place a slice of bread in the container to maintain moisture. If you’d like to freeze the cookies, arrange them in a single layer on a tray until frozen, then transfer to a zip-top freezer bag for up to 2 months. Thaw at room temperature before serving.
Estimated Nutrition
Per cookie (approximate, based on a 24-cookie yield):
- Calories: 145
- Fat: 6g
- Saturated Fat: 3.5g
- Unsaturated Fat: 2g
- Trans Fat: 0g
- Cholesterol: 20mg
- Sodium: 60mg
- Carbohydrates: 22g
- Sugar: 14g
- Fiber: 0.3g
- Protein: 1g
Frequently Asked Questions
How do I keep the gumdrops from melting too much?
Toss them in flour and bake just until the cookies are set; avoid high heat which causes excessive melting.
Can I use spiced gumdrops instead?
Yes, but be aware they’ll drastically change the flavor. Use if you prefer a more traditional holiday spice profile.
Why did my cookies come out too flat?
This usually happens if the butter was too soft or the dough was overmixed. Try chilling the dough for 20–30 minutes before baking.
Are these cookies suitable for freezing?
Absolutely. You can freeze both the dough and the baked cookies. Thaw at room temperature before enjoying.
What if I can’t find gumdrops?
You can substitute with chopped fruit jellies or even gummy candies, though results may vary slightly in texture.
Can I double the recipe?
Yes, this recipe doubles well. Just be sure to mix in batches and rotate baking sheets to ensure even baking.
Do I need to refrigerate the dough?
It’s optional but recommended. Chilling for at least 20 minutes helps the flavors meld and prevents too much spreading.
Can kids help make these cookies?
Definitely! Kids love pressing gumdrops into the dough and helping with mixing. Just supervise when using sharp tools.
Conclusion
Retro Christmas Gumdrop Cookies are more than just a treat—they’re a festive tradition wrapped in cheerful colors and timeless flavor. Soft, chewy, and irresistibly sweet, they’re perfect for cookie swaps, holiday parties, or cozy nights by the fire. Whether you’re baking for a crowd or just for yourself, these cookies are guaranteed to spark joy and bring back warm, nostalgic memories of holidays past.

Retro Christmas Gumdrop Cookies
- Total Time: 32 minutes
- Yield: 24 cookies 1x
- Diet: Vegetarian
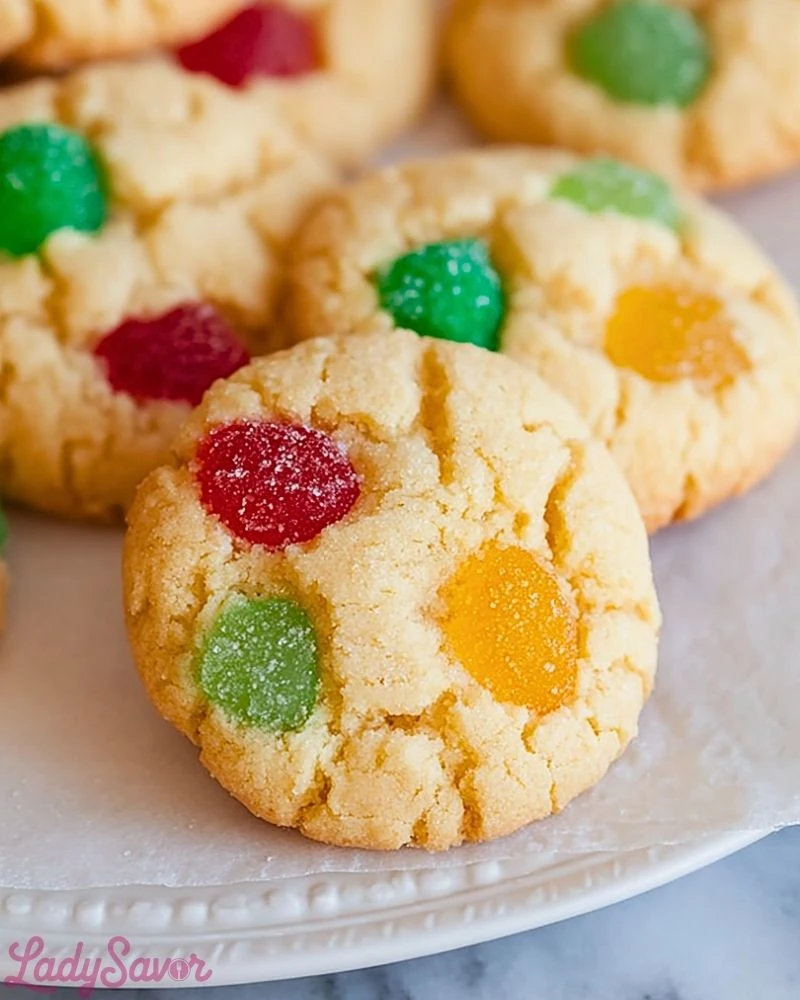
Description
Bring nostalgic charm to your holiday table with these soft and chewy Retro Christmas Gumdrop Cookies. Bursting with colorful fruit-flavored gumdrops and rich buttery flavor, these classic cookies are perfect for cookie exchanges, family gatherings, or simply enjoying with a cup of hot cocoa. With their vibrant appearance and melt-in-your-mouth texture, they’re a standout addition to any festive spread. If you’re looking for easy dessert recipes, fun food ideas for kids, or holiday baking inspiration, this is a must-try! Ideal for anyone craving a quick holiday treat or adding a pop of fun to their Christmas baking ideas.
Ingredients
2 1/4 cups all-purpose flour
1/2 teaspoon baking soda
1/2 teaspoon salt
3/4 cup unsalted butter, softened
1 cup granulated sugar
1/2 cup packed light brown sugar
1 large egg
2 teaspoons pure vanilla extract
1 1/2 cups gumdrops (fruit-flavored), chopped into small pieces
1 tablespoon flour (for tossing gumdrops)
Instructions
1. Chop the gumdrops into small bits, about the size of chocolate chips. Use a sharp knife or kitchen scissors lightly coated in sugar to prevent sticking. Toss the chopped gumdrops with 1 tablespoon of flour.
2. Preheat oven to 350°F (175°C) and line baking sheets with parchment paper.
3. In a medium bowl, whisk together the flour, baking soda, and salt.
4. In a large mixing bowl, beat the softened butter, granulated sugar, and brown sugar for 2–3 minutes until light and fluffy.
5. Add egg and vanilla extract and beat until well combined.
6. Slowly add in the dry ingredients, mixing just until no flour streaks remain.
7. Gently fold in the flour-coated gumdrops.
8. Scoop cookie dough onto baking sheets, spacing 2 inches apart. Optionally press a few gumdrop pieces on top of each.
9. Bake for 10–12 minutes until edges are golden and centers are just set.
10. Cool on the baking sheet for 5 minutes, then transfer to a wire rack to cool completely.
Notes
Always toss the gumdrops in flour before folding them into the dough to prevent sticking and sinking.
Use only fruit-flavored gumdrops (not spiced) unless you prefer a strong, bold flavor.
Do not overbake; the cookies should be just set in the center when removed from the oven.
- Prep Time: 20 minutes
- Cook Time: 12 minutes
- Category: Dessert
- Method: Baking
- Cuisine: American
Nutrition
- Serving Size: 1 cookie
- Calories: 145
- Sugar: 14g
- Sodium: 60mg
- Fat: 6g
- Saturated Fat: 3.5g
- Unsaturated Fat: 2g
- Trans Fat: 0g
- Carbohydrates: 22g
- Fiber: 0.3g
- Protein: 1g
- Cholesterol: 20mg