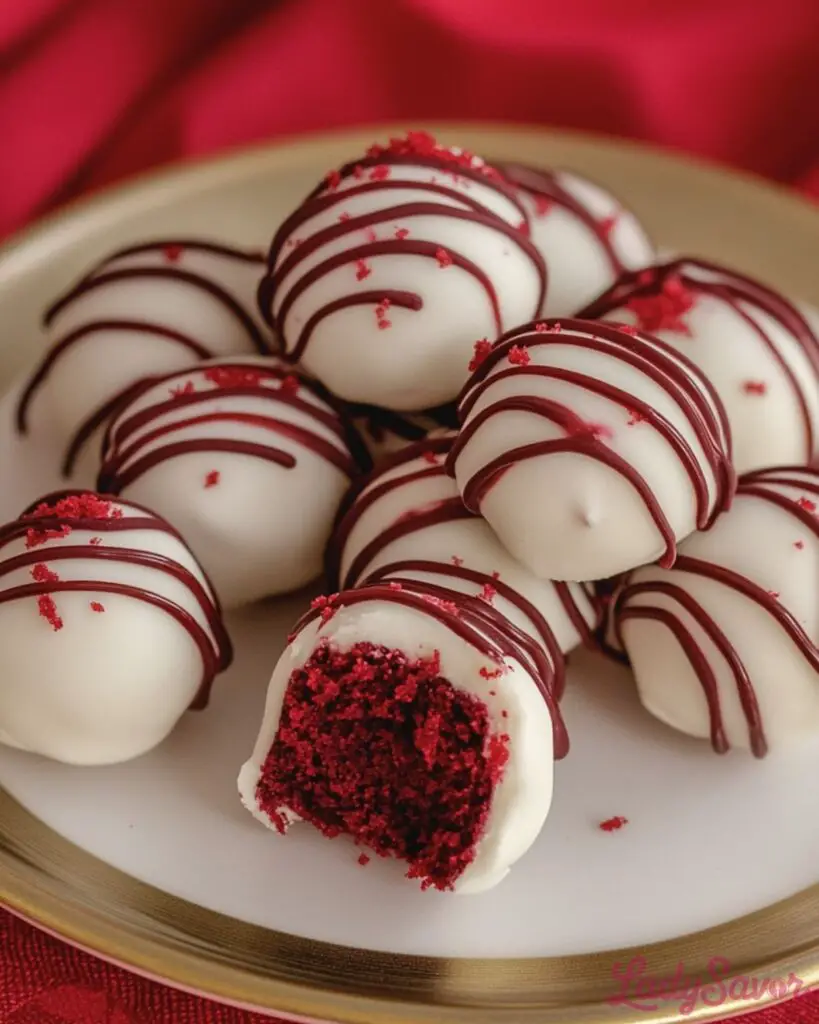
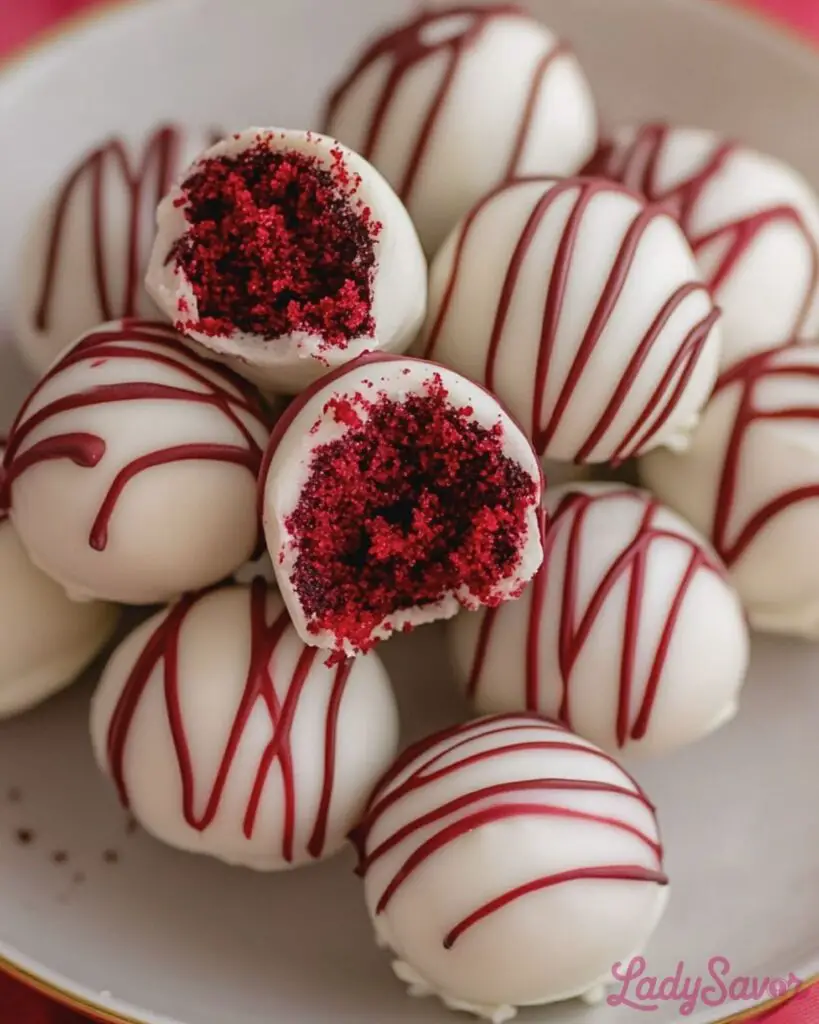
Red Velvet Cake Balls are the perfect bite-sized treats for any occasion. These rich and decadent confections feature the classic flavors of red velvet cake, paired with a creamy white chocolate coating that melts in your mouth. Whether you’re making them for a party, a romantic dessert, or just a fun weekend project, these cake balls are always a hit.

Irresistibly Sweet and Easy to Make
Making Red Velvet Cake Balls is both fun and rewarding. The process combines the moist texture of red velvet cake crumbs with a luscious cream cheese frosting, rolled into bite-sized balls and dipped in white chocolate. Not only are they visually stunning with their vibrant red and white contrast, but they’re also incredibly easy to prepare, even for beginners.
Perfect for gifting, special celebrations, or an elegant dessert platter, these cake balls deliver a delightful mix of flavors and textures in every bite. Once you try them, you’ll want to make them again and again!
Ingredients for Red Velvet Cake Balls
Creating these delightful Red Velvet Cake Balls requires just a handful of simple ingredients. Together, they transform into a rich, flavorful, and visually stunning dessert. Here’s what you’ll need:
- Red Velvet Cake – You can use a homemade red velvet cake or a boxed mix to save time. Either way, make sure it’s moist and flavorful.
- Cream Cheese Frosting – This adds a creamy, tangy richness that perfectly complements the cake. Store-bought or homemade frosting both work well.
- White Chocolate – Melted white chocolate forms the smooth, glossy coating that encases each cake ball. Use high-quality chocolate for the best flavor.
- Red Gel Food Coloring (optional) – If your red velvet cake isn’t vibrant enough, a small amount of gel food coloring can enhance its appearance.
How to Make Red Velvet Cake Balls
Making these decadent cake balls is a straightforward process. Follow these steps to create your own batch of irresistible treats:
Step 1:
Start by preparing your red velvet cake according to the recipe or package instructions. Once baked, allow the cake to cool completely.
Step 2:
Crumble the cooled cake into fine crumbs in a large mixing bowl. Make sure there are no large chunks remaining for a smooth texture.
Step 3:
Add the cream cheese frosting to the cake crumbs, a little at a time, mixing until the mixture holds together when pressed. Be careful not to add too much frosting; you want the mixture to be firm, not overly sticky.
Step 4:
Scoop out small portions of the mixture using a tablespoon or a cookie scoop, then roll each portion into a smooth ball. Place the rolled balls onto a parchment-lined baking sheet.
Step 5:
Chill the cake balls in the refrigerator or freezer for about 30 minutes. This step helps them hold their shape during dipping.
Step 6:
Melt the white chocolate in a microwave-safe bowl or using a double boiler. Stir until smooth and creamy.
Step 7:
Using a fork or a toothpick, dip each chilled cake ball into the melted white chocolate, ensuring it’s fully coated. Tap off any excess chocolate and place the coated cake balls back onto the parchment paper.
Step 8:
Drizzle additional melted chocolate over the top for decoration, or sprinkle with festive toppings like red sugar crystals. Allow the chocolate to set completely before serving.

How Long to Make Red Velvet Cake Balls
Making Red Velvet Cake Balls involves a few simple steps, but timing is essential to ensure they turn out perfect. Here’s a breakdown of the process:
- Baking the Cake: If you’re making the red velvet cake from scratch or using a mix, allocate about 25-30 minutes for baking and additional time for cooling completely (approximately 30-40 minutes).
- Mixing and Rolling: Crumbling the cake, mixing it with frosting, and rolling the mixture into balls will take about 20-30 minutes.
- Chilling the Balls: To prevent them from falling apart during dipping, chill the cake balls in the refrigerator or freezer. This step requires at least 1 hour in the fridge or 20-30 minutes in the freezer.
- Coating with Chocolate: Dipping the cake balls in melted white chocolate and adding any decorations takes 20-30 minutes.
In total, you’ll need about 2.5 to 3 hours to make these cake balls from start to finish, including cooling and chilling times.
How to Store Red Velvet Cake Balls
To ensure your Red Velvet Cake Balls stay fresh and delicious, follow these storage tips:
- Refrigerator: Place the cake balls in an airtight container and store them in the fridge for up to 5 days. The chilled temperature helps maintain their texture and freshness.
- Freezer: For longer storage, freeze the cake balls in an airtight container or freezer-safe bag for up to 2 months. Thaw them in the fridge for a few hours before serving.
Tips for Perfect Red Velvet Cake Balls
Here are some expert tips to make your cake balls flawless every time:
- Crumb Texture: Ensure the cake crumbs are fine and evenly mixed with the frosting. This helps create a smooth, cohesive dough for rolling.
- Chill Before Dipping: Chilling the cake balls before dipping is crucial to prevent them from crumbling or breaking apart in the melted chocolate.
- Use a Dipping Tool: A fork or candy dipping tool makes coating the cake balls in melted chocolate easier and less messy.
- Customize the Coating: While white chocolate is classic, you can experiment with dark or milk chocolate, or even drizzle red-tinted chocolate for a festive look.
- Decorate Quickly: If adding sprinkles or decorations, apply them right after dipping the cake balls in chocolate, before the coating sets.
By following these tips and steps, you’ll create beautifully smooth and delicious Red Velvet Cake Balls that everyone will love!
Print
Red Velvet Cake Balls
- Total Time: 2 hours
- Yield: 24 cake balls 1x
Description
Red Velvet Cake Balls are a delightful combination of moist red velvet cake and creamy frosting, coated in luscious white chocolate. These bite-sized treats are perfect for parties, special occasions, or gifting. They’re simple to make and deliver a delicious balance of flavor and texture that everyone will enjoy!
Ingredients
- 1 box red velvet cake mix (or homemade red velvet cake recipe)
- Ingredients required for the cake mix (e.g., eggs, oil, water)
- 1 cup cream cheese frosting (store-bought or homemade)
- 12 oz white chocolate or white chocolate melting wafers
- Optional decorations: red or white sprinkles, chocolate drizzle
Instructions
- Prepare the red velvet cake according to the package or recipe instructions. Bake and allow the cake to cool completely.
- Crumble the cooled cake into a large bowl, breaking it into fine crumbs.
- Add the cream cheese frosting to the cake crumbs and mix until fully combined, creating a dough-like consistency.
- Roll the mixture into small balls (about 1 inch in diameter) and place them on a baking sheet lined with parchment paper.
- Chill the cake balls in the refrigerator for 1 hour or in the freezer for 20-30 minutes.
- Melt the white chocolate or wafers in a microwave-safe bowl, stirring every 30 seconds until smooth.
- Using a fork or dipping tool, dip each cake ball into the melted chocolate, ensuring it’s fully coated. Place them back on the parchment-lined baking sheet.
- Add sprinkles or drizzle with additional chocolate before the coating sets.
- Allow the chocolate to harden completely before serving. Store in the refrigerator for best results.
Notes
- For a homemade touch, use a red velvet cake recipe from scratch and freshly whipped cream cheese frosting.
- Add a teaspoon of vegetable oil to the white chocolate if it’s too thick for dipping.
- For a festive touch, use colored sprinkles or drizzle with contrasting chocolate.
- These cake balls can be stored in the refrigerator for up to 5 days or frozen for up to 2 months.
- Prep Time: 30 minutes
- Chill Time: 1 hour
- Cook Time: 30 minutes
- Category: Dessert


