
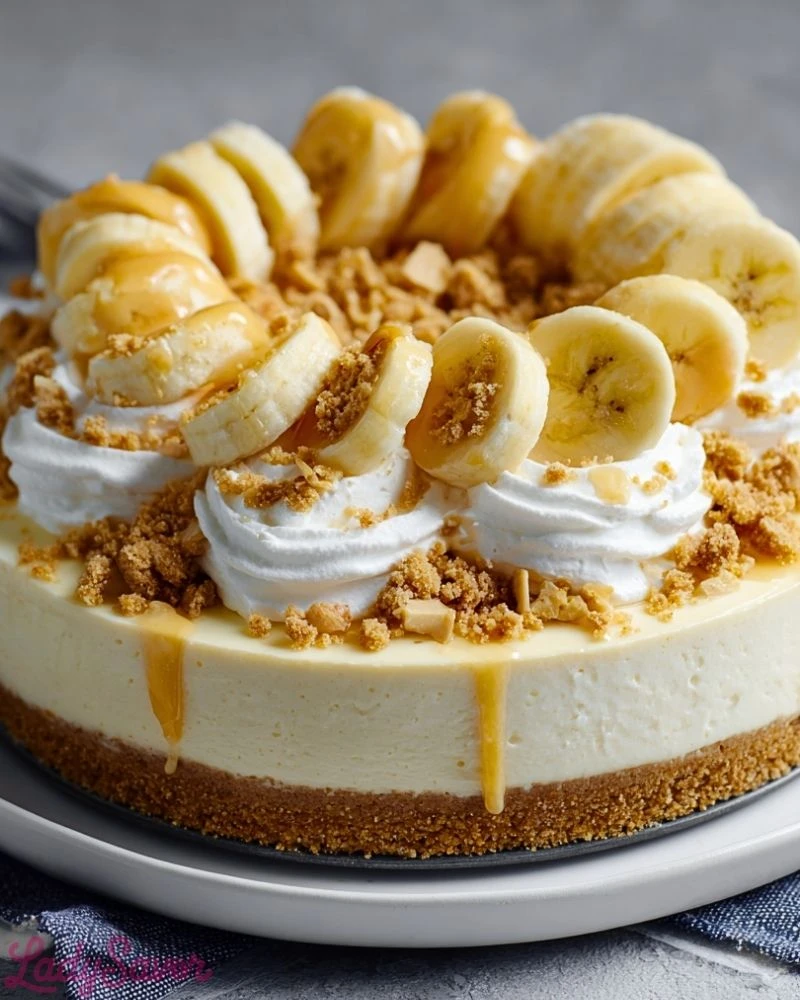
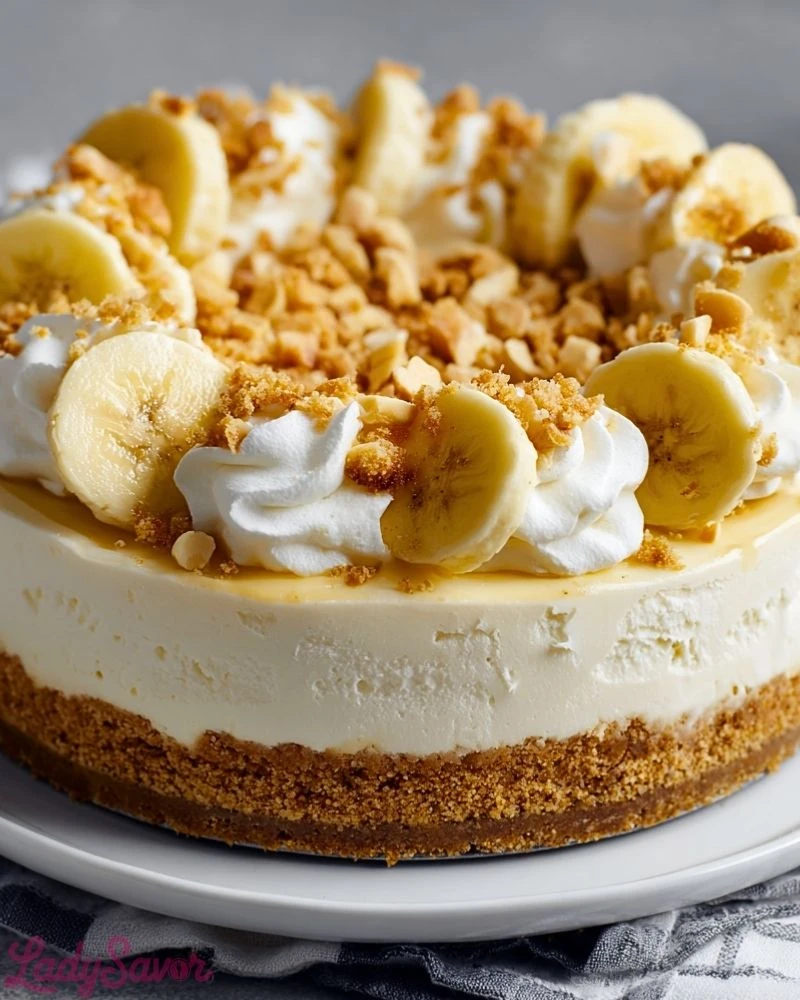
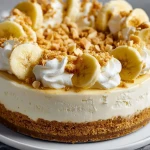
A creamy, dreamy dessert that combines the comforting flavors of banana pudding with the smooth, rich texture of cheesecake—this No-Bake Banana Pudding Cheesecake is the ultimate indulgence. With layers of velvety cream cheese, whipped topping, and real banana slices nestled over a crunchy graham cracker crust, every bite feels like a celebration. Whether you’re hosting a summer party, planning a holiday dessert table, or simply want something special to enjoy with coffee, this cheesecake never disappoints.
One of the best parts? You don’t even have to turn on the oven. It’s a no-fuss, chill-and-set dessert that looks as impressive as it tastes. Light yet satisfying, this cheesecake is a hit for banana lovers and those who adore simple, no-bake treats with a touch of nostalgia.
Why You’ll Love This No-Bake Banana Pudding Cheesecake
- No oven required, making it perfect for warmer months.
- Classic banana pudding flavor meets cheesecake in a creamy, rich filling.
- Ideal for parties, potlucks, or as a make-ahead dessert.
- Easy-to-follow steps with minimal ingredients.
- Customizable with toppings like whipped cream, banana slices, or crushed cookies.
Preparation Phase & Tools to Use
To make this dessert a breeze, you’ll want to have a few essential tools ready. A springform pan is key for easy release and that signature cheesecake shape. A food processor or rolling pin helps you get a fine crumb for the graham cracker crust. A stand or hand mixer is useful for whipping the filling until it’s smooth and fluffy. And don’t forget a rubber spatula for folding and spreading, plus mixing bowls for various components. Each tool contributes to texture, consistency, and presentation—which matter just as much as flavor here.
Preparation Tips
Let your cream cheese soften at room temperature before mixing to ensure a lump-free filling. Use ripe but firm bananas for topping; overly ripe bananas can become mushy and brown quickly. Chill your crust before adding the filling so it holds together well, and once assembled, give your cheesecake plenty of time to set in the fridge—at least 6 hours, but overnight is ideal. If you want cleaner slices, run your knife under hot water before cutting. Always add fresh banana slices and whipped cream just before serving to keep them looking fresh.
No-Bake Banana Pudding Cheesecake
Ingredients for this No-Bake Banana Pudding Cheesecake
For the Crust:
- 2 cups graham cracker crumbs (about 14–16 full crackers)
- 1/2 cup unsalted butter, melted
- 2 tablespoons granulated sugar (optional, for extra sweetness)
For the Cheesecake Filling:
- 16 oz (2 blocks) cream cheese, softened to room temperature
- 1 cup powdered sugar
- 1 package (3.4 oz) instant banana pudding mix
- 1 1/2 cups cold milk
- 1 teaspoon vanilla extract
- 1 1/2 cups heavy whipping cream (or 1 tub whipped topping)
For the Topping:
- 2–3 ripe bananas, sliced
- 1 cup whipped cream (for piping or spreading)
- 1/2 cup crushed vanilla wafers or graham crackers
- Optional: caramel drizzle or honey for extra flavor
Step 1: Prepare the Crust
In a mixing bowl, combine the graham cracker crumbs, melted butter, and sugar. Mix until the texture resembles wet sand and holds together when pressed. Transfer the mixture into a 9-inch springform pan and firmly press it into the bottom and slightly up the sides to form an even crust layer. Use the bottom of a glass or measuring cup to smooth it out. Place the crust in the refrigerator to chill for at least 20–30 minutes to help it set properly.
Step 2: Make the Banana Pudding Base
In a medium bowl, whisk together the instant banana pudding mix and cold milk. Continue whisking for about 2–3 minutes until it thickens to a creamy consistency. Set aside and allow it to firm up slightly while you prepare the cheesecake layer.
Step 3: Prepare the Cheesecake Filling
In a large bowl, beat the softened cream cheese using a hand mixer or stand mixer until completely smooth and free of lumps. Add the powdered sugar and vanilla extract, and continue mixing until fully incorporated. The mixture should be light, creamy, and slightly fluffy.
Step 4: Combine Pudding and Cheesecake Mixture
Add the prepared banana pudding to the cream cheese mixture. Beat on low to medium speed until everything is well combined and smooth. This step infuses the cheesecake with rich banana flavor and creates a silky texture.
Step 5: Whip the Cream
In a separate chilled bowl, whip the heavy cream until stiff peaks form. If using whipped topping, ensure it is thawed and ready to fold. Gently fold the whipped cream into the banana cheesecake mixture using a spatula. This step lightens the filling and gives it that airy, mousse-like consistency.
Step 6: Assemble the Cheesecake
Remove the chilled crust from the refrigerator. Pour the cheesecake filling over the crust and spread it evenly using a spatula. Smooth the top for a clean, professional look. Tap the pan gently on the counter to remove any air bubbles.
Step 7: Chill and Set
Cover the cheesecake with plastic wrap or foil and place it in the refrigerator. Allow it to chill for at least 6 hours, though overnight is highly recommended for the best texture and flavor development. The filling should be firm and sliceable when ready.
Step 8: Add Toppings Before Serving
Just before serving, decorate the cheesecake with whipped cream swirls, fresh banana slices, and a generous sprinkle of crushed cookies. For an extra indulgent touch, drizzle caramel or honey over the top. Slice using a warm knife for clean cuts and serve chilled.
No-Bake Banana Pudding Cheesecake
Notes
This no-bake dessert relies heavily on proper chilling time to achieve its signature firm yet creamy texture. If rushed, the cheesecake may turn out too soft to slice cleanly. For best results, always allow it to chill overnight. You can also experiment with different crusts such as vanilla wafers or digestive biscuits for a slightly different flavor profile. If you prefer a stronger banana taste, consider adding mashed banana into the filling—but keep in mind this may slightly alter the texture and shelf life.
Watch Out for These Mistakes While Cooking
- Using cold cream cheese: This leads to a lumpy filling instead of a smooth, creamy consistency.
- Skipping chill time: Not allowing enough time to set will result in a loose cheesecake.
- Overmixing whipped cream: This can turn it grainy or buttery instead of light and fluffy.
- Adding bananas too early: Fresh banana slices can brown and become mushy if added too far in advance.
- Not pressing the crust firmly: A loose crust will crumble when slicing.
- Using too much liquid: Incorrect milk measurement can prevent the filling from setting properly.
Storage Instructions
Store the cheesecake covered in the refrigerator for up to 3–4 days. To maintain freshness, keep it in an airtight container or wrap it tightly with plastic wrap. If you plan to store leftovers, it’s best to remove any banana slices beforehand and add fresh ones when serving again. This cheesecake can also be frozen for up to 1 month—just wrap it well and thaw overnight in the refrigerator before serving. Note that freezing may slightly affect the texture of the filling.
Estimated Nutrition
Per serving (based on 10 slices, approximate values):
- Calories: 380–420 kcal
- Carbohydrates: 32g
- Protein: 5g
- Fat: 26g
- Saturated Fat: 15g
- Sugar: 22g
- Sodium: 240mg
Frequently Asked Questions
Can I make this cheesecake ahead of time?
Yes, this dessert is perfect for making ahead. Preparing it a day in advance actually improves the texture and flavor.
Can I use homemade whipped cream instead of store-bought?
Absolutely. Freshly whipped cream provides better flavor and texture, just ensure it reaches stiff peaks before folding.
How do I prevent bananas from browning?
You can lightly toss banana slices in lemon juice, but for best appearance, add them just before serving.
Can I use a different pudding flavor?
Yes, vanilla pudding works well if banana pudding is unavailable, though the flavor will be milder.
Is this cheesecake freezer-friendly?
Yes, it can be frozen. Wrap it tightly and thaw in the fridge before serving for best results.
What can I use instead of a springform pan?
You can use a deep pie dish or square pan, though removing clean slices may be slightly more difficult.
How long does it take to fully set?
At least 6 hours, but overnight chilling is strongly recommended for the best consistency.
Can I make this gluten-free?
Yes, simply use gluten-free graham crackers or cookies for the crust.
Conclusion
No-Bake Banana Pudding Cheesecake is a delightful fusion of two classic desserts, offering a creamy, rich, and satisfying treat without the need for baking. With simple ingredients and straightforward steps, it’s an approachable recipe that delivers impressive results every time. Whether you’re making it for a gathering or just to satisfy a sweet craving, this cheesecake is sure to become a favorite in your dessert rotation.
No-Bake Banana Pudding Cheesecake
- Total Time: 6 hours 25 minutes
- Yield: 10 servings 1x
- Diet: Vegetarian
Description
This no-bake banana pudding cheesecake is a creamy, rich, and easy dessert perfect for quick breakfast ideas, easy dinner desserts, or healthy snack alternatives when you want something indulgent. Packed with banana flavor, smooth cheesecake filling, and a buttery crust, this easy recipe is one of the best food ideas for gatherings and celebrations.
Ingredients
2 cups graham cracker crumbs
1/2 cup unsalted butter, melted
2 tablespoons granulated sugar
16 oz cream cheese, softened
1 cup powdered sugar
1 package (3.4 oz) banana pudding mix
1 1/2 cups cold milk
1 teaspoon vanilla extract
1 1/2 cups heavy whipping cream
2–3 bananas, sliced
1 cup whipped cream
1/2 cup crushed vanilla wafers
Instructions
1. Mix graham cracker crumbs, melted butter, and sugar, then press into a pan and chill.
2. Whisk banana pudding mix with cold milk until thickened.
3. Beat cream cheese until smooth, then add powdered sugar and vanilla.
4. Combine pudding with cream cheese mixture.
5. Whip heavy cream to stiff peaks and fold into filling.
6. Spread filling over crust evenly.
7. Refrigerate for at least 6 hours or overnight.
8. Top with bananas, whipped cream, and crushed cookies before serving.
Notes
Use softened cream cheese for a smooth filling.
Chill overnight for best results and structure.
Add banana slices just before serving to prevent browning.
- Prep Time: 25 minutes
- Cook Time: 0 minutes
- Category: Dessert
- Method: No-Bake
- Cuisine: American
Nutrition
- Serving Size: 1 slice
- Calories: 400
- Sugar: 22g
- Sodium: 240mg
- Fat: 26g
- Saturated Fat: 15g
- Unsaturated Fat: 9g
- Trans Fat: 0g
- Carbohydrates: 32g
- Fiber: 1g
- Protein: 5g
- Cholesterol: 70mg