
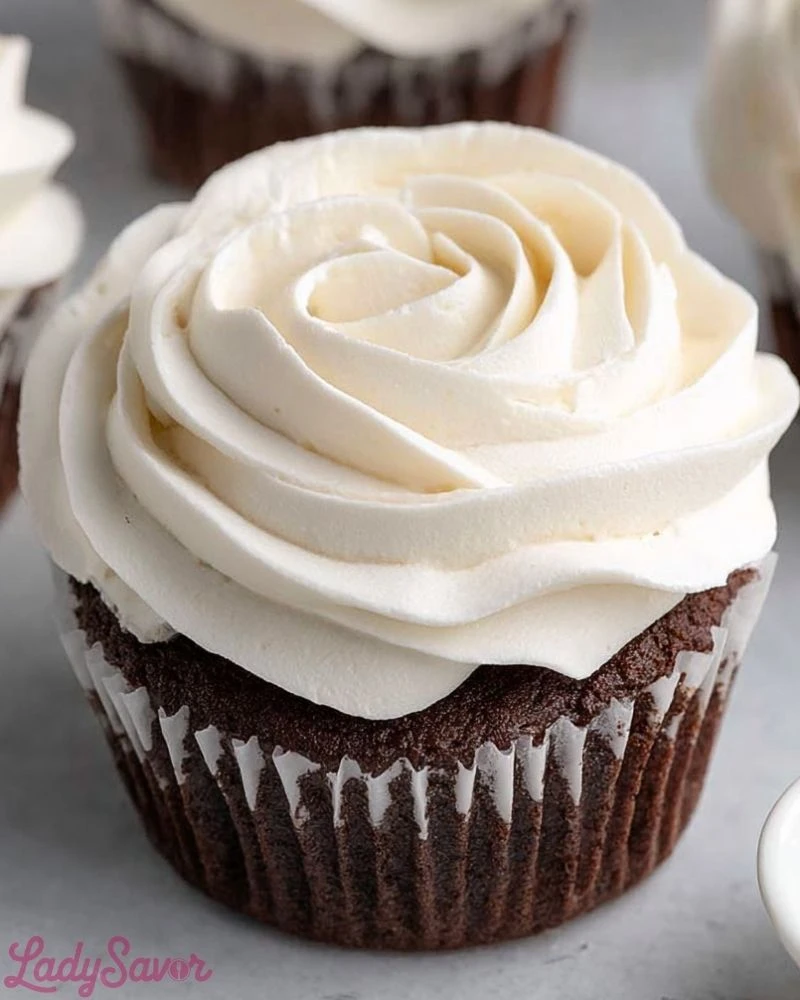
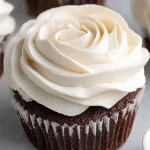
Light, fluffy, and irresistibly creamy — marshmallow frosting is the dreamy topping every cupcake, cake, or cookie deserves. Unlike traditional buttercream, this frosting brings a subtle vanilla sweetness with a melt-in-your-mouth texture that feels like biting into a cloud. It holds its shape beautifully, making it perfect for elegant swirls and intricate piping designs, while still delivering a homemade charm.
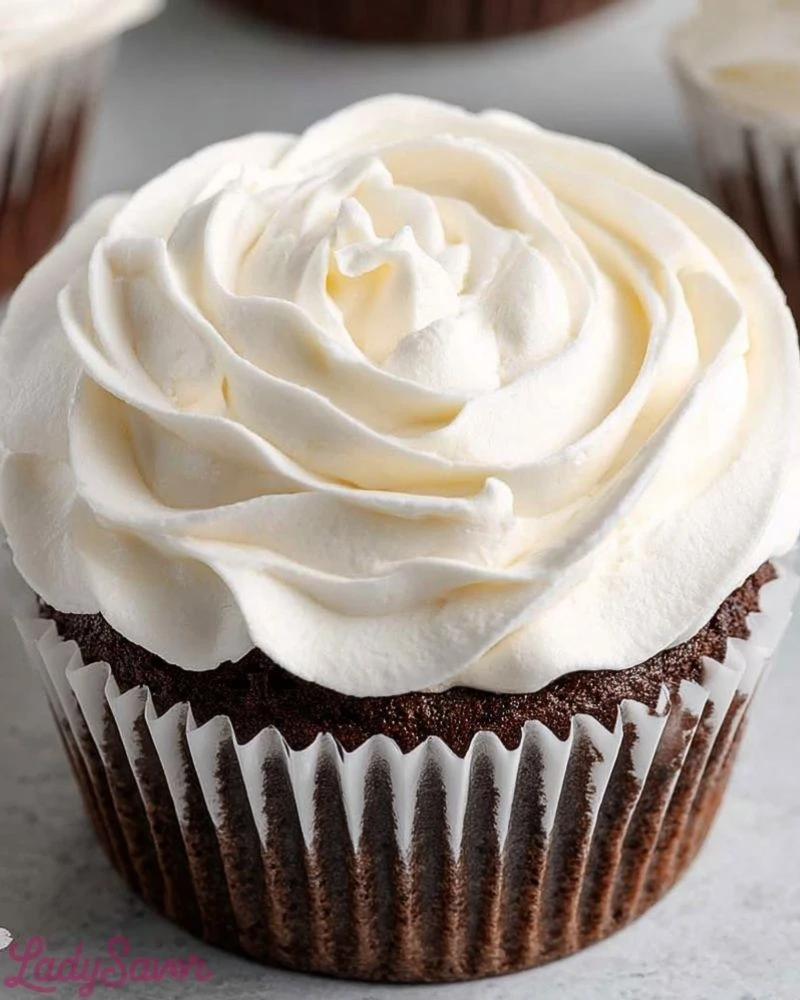
Whether you’re dressing up a batch of chocolate cupcakes or layering it between graham crackers for a twist on s’mores, marshmallow frosting adds a unique flair without overpowering the dessert. It’s especially ideal for those who prefer a lighter, less buttery finish. If you’ve never made this kind of frosting before, you’re in for a delightful surprise.
Why You’ll Love This Marshmallow Frosting
- It’s ultra-light and airy with a smooth, silky texture.
- Perfect for piping beautiful designs that hold shape.
- A fun alternative to buttercream — less greasy and more melt-in-your-mouth.
- No need for powdered sugar overload — it’s sweet, but balanced.
- Ideal for themed cakes, cupcakes, and nostalgic dessert twists.
Preparation Phase & Tools to Use (Essential Tools and Equipment + Their Importance)
Making marshmallow frosting isn’t hard, but using the right tools is key to nailing the texture. First, you’ll need a stand mixer or handheld electric mixer. Beating the egg whites and sugar mixture to stiff, glossy peaks takes power — and doing this by hand is nearly impossible. A heatproof mixing bowl, preferably stainless steel or glass, is essential for placing over a simmering pot of water to gently cook the mixture without scrambling the eggs. This setup creates a double boiler, which helps dissolve the sugar fully while gently heating the egg whites to a safe temperature.
You’ll also want a candy thermometer to monitor the temperature (around 160°F or 71°C is the sweet spot for safety and stability). Lastly, a rubber spatula is helpful for folding and scraping, and a piping bag with decorative tips if you’re planning to frost with flair.
Preparation Tips
Always start with a clean, grease-free bowl — even a hint of oil or yolk can prevent egg whites from whipping properly. When heating the egg whites and sugar, stir constantly to prevent the eggs from cooking at the bottom. Once you move the mixture to the mixer, beat on high until it’s cool to the touch and forms stiff, glossy peaks — this ensures the frosting will hold up. If your kitchen is hot, work quickly or store the finished frosting in the fridge for a few minutes before piping. Freshly made marshmallow frosting is best used the same day for peak texture and shine.
Ingredients for This Marshmallow Frosting
- 4 large egg whites (room temperature)
- 1 cup (200g) granulated sugar
- 1/4 teaspoon cream of tartar
- 1 teaspoon pure vanilla extract
- Pinch of salt
Optional:
- 1/2 teaspoon almond extract (for a flavor twist)
- 1/4 teaspoon lemon juice (enhances brightness)
Step 1: Prepare the Double Boiler Setup
Fill a medium saucepan with about 2 inches of water and bring it to a simmer over medium heat. In a large heatproof bowl (preferably stainless steel or glass), combine the egg whites, sugar, cream of tartar, and salt. Place the bowl over the simmering water — make sure the bottom of the bowl doesn’t touch the water.
Step 2: Whisk and Heat the Mixture
Continuously whisk the egg white mixture while it gently heats. Keep whisking for about 4–5 minutes until the sugar dissolves completely and the mixture reaches 160°F (71°C). You can test this by rubbing a little between your fingers — it should feel smooth with no sugar granules.
Step 3: Beat Until Stiff Peaks Form
Carefully transfer the warm mixture to a stand mixer fitted with the whisk attachment (or use a hand mixer). Beat on high speed for 6–8 minutes until the frosting becomes thick, glossy, and holds stiff peaks. The bowl should be cool to the touch by the time it’s ready.
Step 4: Add Vanilla and Optional Flavors
Once stiff peaks have formed, add the vanilla extract and any additional flavorings like almond or lemon juice. Beat for another 30 seconds until well combined. Do not overmix at this stage — just enough to incorporate the flavor.
Step 5: Use Immediately or Store Briefly
Marshmallow frosting is best used right away while it’s still fluffy and glossy. Spoon it into a piping bag if decorating cupcakes, or spread with an offset spatula onto cakes or cookies. If needed, you can refrigerate it for up to 2 hours, but re-whisk gently before using.
Notes
Marshmallow frosting is most successful when used fresh, ideally within a few hours of making it. The texture is light and airy, which means it’s not as stable for long-term storage or extreme heat. It’s naturally gluten-free and doesn’t require butter or heavy cream, making it a great option for those avoiding dairy. You can slightly toast it with a kitchen torch for a s’mores-like experience or serve it as-is for a clean, sweet finish.
Watch Out for These Mistakes While Cooking
- Overheating the egg whites: This can cook the eggs, resulting in scrambled pieces in your frosting. Use a thermometer for accuracy.
- Skipping the cream of tartar: It helps stabilize the egg whites, leading to fluffier, more stable peaks.
- Greasy tools or bowls: Any oil or fat can prevent egg whites from whipping. Always clean tools thoroughly.
- Under-whipping or over-whipping: Stop mixing once stiff peaks form. Under-whipping leads to runny frosting, while over-whipping can make it grainy.
Storage Instructions
Marshmallow frosting is best used immediately after making it. However, if you need to store it, place it in an airtight container in the refrigerator for up to 2 hours. When ready to use, bring it back to room temperature and whisk briefly to revive its texture. Do not freeze marshmallow frosting — it doesn’t thaw well and will lose its structure.
Estimated Nutrition (Per Serving – Approx. 2 tbsp)
- Calories: 70
- Total Fat: 0g
- Saturated Fat: 0g
- Cholesterol: 0mg
- Sodium: 30mg
- Total Carbohydrates: 17g
- Sugars: 17g
- Protein: 1g
- Fiber: 0g
Frequently Asked Questions
What does marshmallow frosting taste like?
It tastes sweet and airy with a subtle vanilla flavor, very similar to marshmallows but lighter in texture.
Can I toast marshmallow frosting?
Yes! Use a kitchen torch to lightly toast the surface for a golden brown finish that mimics toasted marshmallows.
Is it safe to eat since it has raw eggs?
Yes, the egg whites are cooked to 160°F during the double boiler process, which is considered food-safe.
How long does marshmallow frosting last?
It’s best used the day it’s made but can be stored in the fridge for up to 2 hours.
Can I color this frosting?
Absolutely. Use gel food coloring for best results. Add it at the end, once stiff peaks form.
Does it crust like buttercream?
No, marshmallow frosting stays soft and fluffy. It doesn’t form a crust.
Can I use it under fondant?
Not recommended. It’s too soft and can weep under the weight of fondant.
Is marshmallow frosting dairy-free?
Yes! It contains no butter or milk, making it a great dairy-free option.
Conclusion
Marshmallow frosting is an easy, impressive way to elevate your desserts with minimal ingredients and maximum wow-factor. Its light, fluffy texture and sweet flavor make it an excellent choice for cakes, cupcakes, or even as a dip for cookies and fruit. With just a bit of care and the right technique, you’ll have a frosting that’s as beautiful as it is delicious.
Marshmallow Frosting
- Total Time: 20 minutes
- Yield: Frosts 12 cupcakes 1x
Description
Fluffy, glossy, and sweet with a soft melt-in-your-mouth finish, marshmallow frosting is a game-changer for home bakers. This easy recipe creates a stable, light-as-air topping that pipes beautifully onto cupcakes, spreads smoothly over cakes, and even makes a fun dip for cookies. Whether you’re exploring breakfast ideas or hunting for an easy recipe for your next dessert table, this marshmallow frosting offers a healthier, dairy-free alternative to buttercream. It’s perfect for quick baking projects, party food ideas, or creative dinner ideas with a sweet twist.
Ingredients
4 large egg whites (room temperature)
1 cup granulated sugar
1/4 teaspoon cream of tartar
1 teaspoon pure vanilla extract
Pinch of salt
Optional: 1/2 teaspoon almond extract
Optional: 1/4 teaspoon lemon juice
Instructions
1. Fill a saucepan with 2 inches of water and bring to a simmer. In a heatproof bowl, combine egg whites, sugar, cream of tartar, and salt. Place over the simmering water without touching it.
2. Whisk constantly for 4–5 minutes until the sugar dissolves and the mixture reaches 160°F (71°C). Rub between fingers to test smoothness.
3. Transfer the mixture to a stand mixer or use a hand mixer. Beat on high for 6–8 minutes until stiff, glossy peaks form and the bowl feels cool.
4. Add vanilla and any optional flavorings. Beat for another 30 seconds until well combined.
5. Use immediately by piping or spreading. If storing, refrigerate for up to 2 hours and whisk again before using.
Notes
Always use a clean, grease-free bowl for best whipping results.
Don’t overmix after adding flavoring; it can deflate the frosting.
A kitchen torch can lightly toast the top for a golden marshmallow look.
- Prep Time: 15 minutes
- Cook Time: 5 minutes
- Category: Frosting
- Method: Whipping / Double Boiler
- Cuisine: American
Nutrition
- Serving Size: 2 tablespoons
- Calories: 70
- Sugar: 17g
- Sodium: 30mg
- Fat: 0g
- Saturated Fat: 0g
- Unsaturated Fat: 0g
- Trans Fat: 0g
- Carbohydrates: 17g
- Fiber: 0g
- Protein: 1g
- Cholesterol: 0mg