
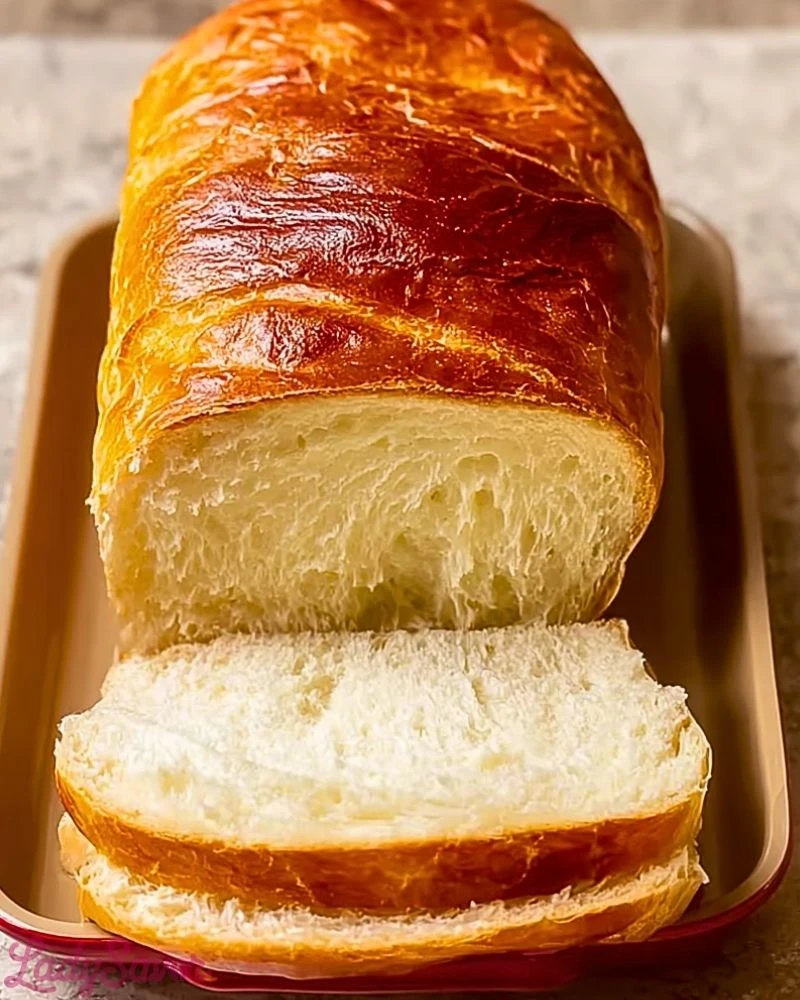
Fluffy, tender, and slightly sweet, Amish White Bread is the kind of homemade loaf that makes you rethink store-bought bread forever. Its pillowy crumb and buttery golden crust make it perfect for everything from simple sandwiches to thick, satisfying toast. This classic recipe has roots in Amish kitchens, where simple ingredients come together to create comforting, soul-warming food.
The aroma that fills your kitchen while it bakes is enough reason to try this bread at least once—but after one bite, you’ll want it to be a weekly ritual. Whether you’re a seasoned baker or just starting out, this recipe rewards you with results that taste like they’ve been passed down through generations.
Why You’ll Love This Amish White Bread Recipe
- It’s beginner-friendly and requires no fancy techniques.
- Uses basic pantry staples you likely already have.
- Creates a soft, fluffy texture with a golden-brown, slightly sweet crust.
- Perfect for sandwiches, French toast, or served warm with butter.
- Freezes beautifully for future use.
Preparation Phase & Tools to Use
To get started with Amish White Bread, you’ll need a few essential tools to ensure success:
- Mixing bowls – A large bowl is necessary to mix and knead the dough.
- Measuring cups & spoons – Precision matters, especially with yeast-based recipes.
- Stand mixer with dough hook (optional) – Helps with kneading, but hand-kneading works just as well.
- Loaf pans – Standard 9×5-inch pans shape the dough into that perfect loaf form.
- Kitchen towel or plastic wrap – For covering the dough during proofing.
- Oven thermometer (optional) – Ensures accurate baking temperature.
Each tool helps simplify steps like mixing, rising, and baking, making the whole process more enjoyable.
Preparation Tips
Use warm water (around 110°F) to activate the yeast without killing it. Always allow your dough enough time to rise in a warm, draft-free area; this ensures that signature airy texture. Lightly grease your loaf pans to avoid sticking, and avoid over-proofing, which can lead to collapsing in the oven. For that beautifully golden top, brush with melted butter right after baking—this also keeps the crust soft and flavorful.
Ingredients for this Irresistible Amish White Bread Recipe
- 2 cups warm water (110°F/45°C)
- 2/3 cup granulated sugar
- 1 1/2 tablespoons active dry yeast
- 1 1/2 teaspoons salt
- 1/4 cup vegetable oil (or melted unsalted butter)
- 6 cups all-purpose flour (plus extra for dusting if kneading by hand)
- Softened butter (optional, for brushing the tops)

Step 1: Activate the Yeast
In a large mixing bowl, dissolve the sugar in warm water. Stir until fully dissolved, then sprinkle in the active dry yeast. Let it sit for 5 to 10 minutes, until the yeast becomes foamy. This signals that the yeast is active and ready to leaven the dough.
Step 2: Mix the Dough
Add the salt and oil to the yeast mixture. Gradually stir in the flour, 1 cup at a time. If using a stand mixer, switch to the dough hook after the first few cups and knead for about 5-7 minutes. If kneading by hand, turn the dough onto a floured surface and knead for 8-10 minutes, until the dough is smooth and elastic.
Step 3: First Rise
Lightly oil a clean bowl, place the dough inside, and turn it once to coat all sides with oil. Cover with a clean kitchen towel or plastic wrap. Let it rise in a warm, draft-free location for about 1 hour, or until it has doubled in size.
Step 4: Punch Down & Shape
Once the dough has risen, punch it down gently to release air bubbles. Turn it out onto a lightly floured surface, divide it into two equal portions, and shape each into a loaf. Place each loaf into a greased 9×5-inch loaf pan.
Step 5: Second Rise
Cover the loaf pans with a kitchen towel and let them rise again for about 30 to 40 minutes, or until the dough domes about 1 inch above the edge of the pan.
Step 6: Bake
Preheat the oven to 350°F (175°C). Bake the loaves for 30 to 35 minutes, or until the tops are golden brown and the bread sounds hollow when tapped. For extra softness and shine, brush the tops with butter immediately after removing from the oven.
Step 7: Cool and Serve
Remove the loaves from the pans and place them on a wire rack to cool. Let them cool completely before slicing for clean cuts. Enjoy fresh or store for later use.
Notes
This bread is best enjoyed the day it’s baked, but its flavor deepens beautifully over a day or two. You can substitute the sugar with honey for a more natural sweetness and slightly denser crumb. The dough is very forgiving, making this an excellent recipe for beginner bakers. You can also add variations like garlic powder, dried herbs, or shredded cheese to customize the flavor profile.
Watch Out for These Mistakes While Cooking
- Using water that’s too hot can kill the yeast. Stick to water that feels warm but not hot to the touch (about 110°F).
- Over-proofing the dough might cause the loaves to collapse or develop a sour flavor.
- Not kneading long enough results in a dense, underdeveloped texture. Proper kneading is essential for gluten development.
- Skipping the second rise can make your loaves heavy and flat instead of light and fluffy.
- Cutting into the bread too soon releases steam and dries out the loaf quickly. Let it cool completely before slicing.
Storage Instructions
Once fully cooled, wrap the loaves tightly in plastic wrap or place them in an airtight container. Store at room temperature for up to 4 days. For longer storage, slice and freeze the bread in a freezer-safe bag—toast slices straight from frozen as needed. Avoid refrigerating as it dries out the bread faster.
Estimated Nutrition (per slice, based on 24 slices total)
- Calories: 140
- Total Fat: 2.5g
- Saturated Fat: 0.5g
- Unsaturated Fat: 2g
- Trans Fat: 0g
- Cholesterol: 0mg
- Sodium: 150mg
- Total Carbohydrates: 26g
- Dietary Fiber: 1g
- Sugars: 4g
- Protein: 3g
Frequently Asked Questions
Can I use whole wheat flour instead of all-purpose?
Yes, but replace only up to half of the flour with whole wheat to maintain softness. Using all whole wheat will yield a denser loaf.
How can I tell when the bread is fully baked?
The top should be golden brown, and the loaf should sound hollow when tapped on the bottom. You can also use a thermometer: the internal temp should read about 190–200°F.
Can I make this recipe without a stand mixer?
Absolutely! Kneading by hand works perfectly; it just takes a bit more effort—around 8–10 minutes of kneading.
How do I prevent my bread from drying out?
Store it properly in an airtight container and avoid slicing until fully cooled. Freezing slices also helps retain moisture.
Can I double the recipe?
Yes, but make sure your stand mixer (if using) can handle the volume. Double all ingredients equally and divide into four loaf pans.
What if my dough isn’t rising?
Check that your yeast is still active and the room temperature is warm enough. Cold environments slow down yeast activity.
Is it okay to reduce the sugar?
Yes. You can use half the amount or even less, but sugar does help with browning and adds flavor.
Can I make rolls instead of loaves?
Definitely. Shape the dough into rolls, place them on a baking sheet or in a pan, and reduce the baking time to about 20–25 minutes.
Conclusion
Irresistible Amish White Bread is more than just a recipe—it’s a return to wholesome, simple baking that fills your home with warmth and flavor. It’s easy enough for beginners and flexible enough for bakers who love to tweak and experiment. Whether you’re enjoying it with butter straight from the oven or transforming it into a next-day sandwich, this loaf is a comforting staple you’ll want to make again and again.

Irresistible Amish White Bread
- Total Time: 2 hours
- Yield: 2 loaves (24 slices total) 1x
- Diet: Vegetarian
Description
Craving the ultimate homemade loaf? This Irresistible Amish White Bread delivers a soft, fluffy crumb with a perfectly golden crust. It’s the best easy recipe for those seeking classic comfort food ideas, quick breakfast toast, or sandwich-ready bread. Whether you’re looking for easy dinner pairings or hearty breakfast ideas, this easy recipe made with pantry staples hits the mark. It’s ideal for beginner bakers, yet satisfying enough for experts. Slice it fresh, slather with butter, or freeze for later—this loaf is a must-have in your kitchen rotation.
Ingredients
2 cups warm water (110°F/45°C)
2/3 cup granulated sugar
1 1/2 tablespoons active dry yeast
1 1/2 teaspoons salt
1/4 cup vegetable oil (or melted unsalted butter)
6 cups all-purpose flour
Softened butter (optional, for brushing the tops)
Instructions
1. In a large bowl, dissolve sugar in warm water. Stir, then sprinkle yeast on top. Let sit 5–10 minutes until foamy.
2. Stir in salt and oil. Gradually add flour, 1 cup at a time, mixing until a dough forms.
3. Knead for 5–7 minutes with a stand mixer or 8–10 minutes by hand, until smooth and elastic.
4. Place dough in a lightly oiled bowl, turning to coat. Cover and let rise 1 hour or until doubled.
5. Punch down dough and divide into two equal portions. Shape into loaves and place in greased 9×5 pans.
6. Cover and let rise again for 30–40 minutes until loaves rise about 1 inch above pans.
7. Preheat oven to 350°F (175°C). Bake loaves for 30–35 minutes until golden brown.
8. Brush tops with butter immediately after baking. Cool completely on a wire rack before slicing.
Notes
Let the bread cool completely before slicing to maintain moisture and texture.
You can substitute honey for sugar to create a slightly denser, naturally sweet version.
Freezes well: slice and store in freezer-safe bags for fresh bread anytime.
- Prep Time: 20 minutes
- Cook Time: 35 minutes
- Category: Bread
- Method: Baking
- Cuisine: American
Nutrition
- Serving Size: 1 slice
- Calories: 140
- Sugar: 4g
- Sodium: 150mg
- Fat: 2.5g
- Saturated Fat: 0.5g
- Unsaturated Fat: 2g
- Trans Fat: 0g
- Carbohydrates: 26g
- Fiber: 1g
- Protein: 3g
- Cholesterol: 0mg