
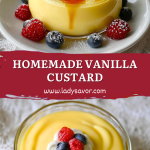
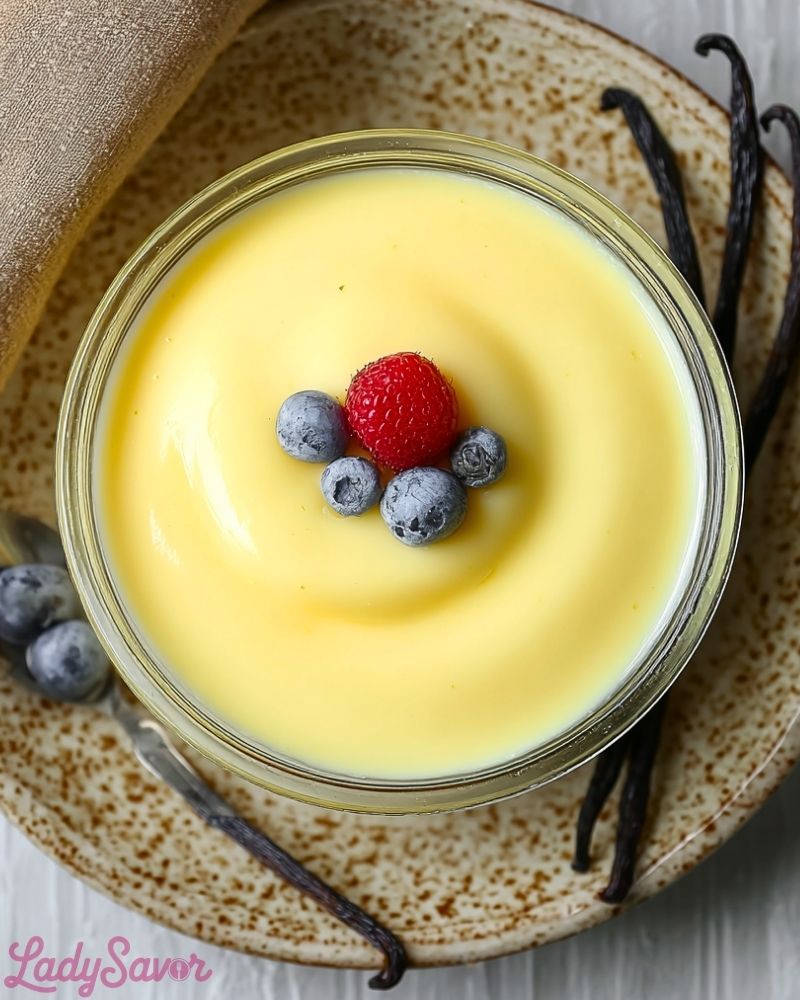
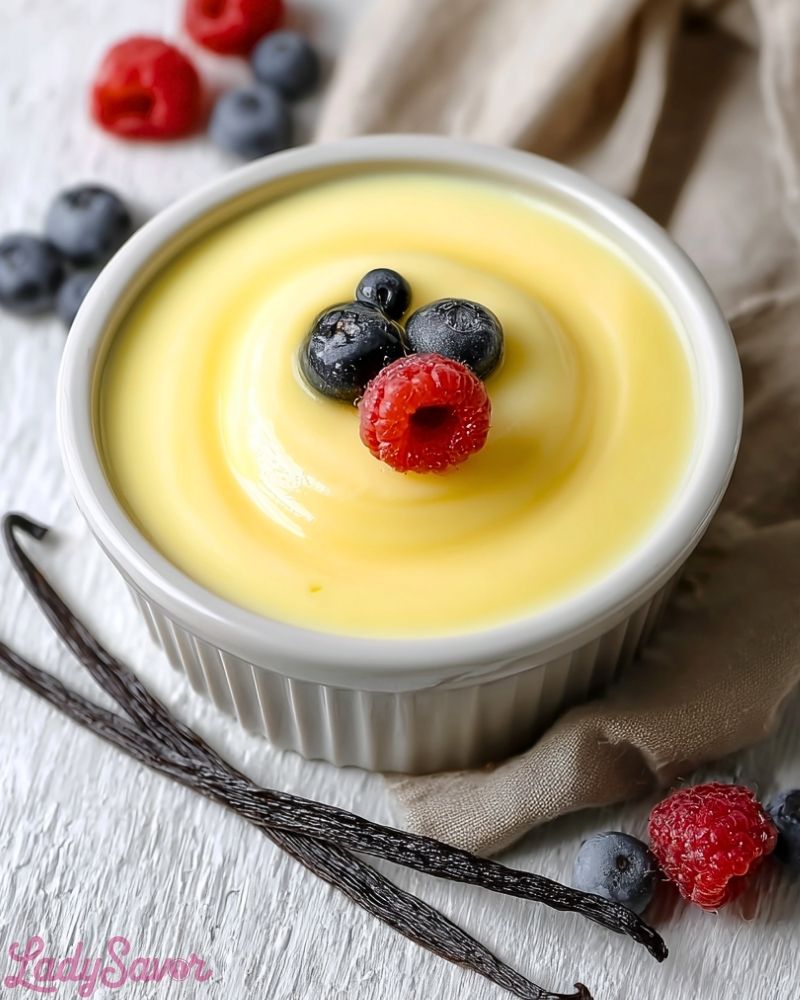
Homemade Vanilla Custard is one of those timeless desserts that wraps you in comfort with each silky, creamy spoonful. Its pale golden hue, speckled with the aroma of real vanilla, carries a nostalgic charm—reminding many of cherished family meals or simple indulgent moments. Whether served warm or chilled, this custard glides over the tongue with a luxurious texture and delicate sweetness that’s balanced, never overpowering.
Made with a handful of basic ingredients—milk, eggs, sugar, and vanilla—this recipe showcases how something so simple can be deeply satisfying. Homemade Vanilla Custard can stand alone in elegance or become a canvas for fresh fruits, crumbled cookies, or layered desserts like trifles and tarts. If you’re searching for a sweet ending to dinner or a cozy treat with tea, this one hits the mark.
Why You’ll Love This Homemade Vanilla Custard
- Elegant Simplicity: Just a few pantry staples come together to create something that tastes gourmet.
- Incredibly Versatile: Perfect on its own, but also ideal for pairing with fruits, cakes, or pies.
- Comforting Texture: Ultra-smooth and creamy with a lush mouthfeel.
- Make-Ahead Friendly: Great for prepping in advance for parties or personal treats.
- Customizable: Adjust sweetness, add citrus zest, or swirl in caramel for unique twists.
Preparation Phase & Tools to Use (Essential Tools and Equipment, and the Importance of Each Tool)
Making the perfect Homemade Vanilla Custard calls for a bit of kitchen mindfulness and the right tools to guide the process smoothly:
- Heavy-Bottomed Saucepan: Prevents scorching and allows for even heat distribution while gently heating the milk and thickening the custard.
- Whisk: An absolute must. It ensures that the eggs blend seamlessly with the hot milk and that your custard remains lump-free and silky.
- Heatproof Mixing Bowls: Ideal for tempering eggs without risk of curdling, and for transferring the custard as it cools.
- Fine-Mesh Strainer: Even if you’re careful, small curdles can form—this tool guarantees a flawless finish.
- Silicone Spatula: Perfect for stirring the custard while scraping every bit from the sides and bottom of the pan.
- Measuring Cups & Spoons: Accuracy matters in custards. Eyeballing the ingredients can throw off the texture.
- Serving Dishes or Ramekins: Choose your favorite presentation—chilled in glass bowls, or layered in elegant dessert cups.
Each tool here has a purpose that contributes to texture, consistency, and the ease of achieving a professional result.
Preparation Tips
- Temper the Eggs Slowly: When combining hot milk with egg yolks, do it gradually. Pour a little milk at a time while whisking constantly to prevent the eggs from scrambling.
- Don’t Walk Away: Custard thickens quickly once it reaches the right temperature. Stay close and stir continuously to avoid lumps or sticking.
- Use Low to Medium Heat: Patience is key. High heat can curdle the eggs or scorch the milk, so slow and steady wins.
- Know When It’s Done: The custard should coat the back of a spoon. Run your finger across the spoon—if the line holds, it’s ready.
- Cool Properly: If chilling, press plastic wrap directly on the surface of the custard to prevent a skin from forming.
Ingredients for This Homemade Vanilla Custard
Here’s what you’ll need to create a smooth and luscious custard from scratch:
- 2 cups whole milk – For the richest, creamiest texture. Avoid low-fat milk for best results.
- 1/2 cup granulated sugar – Adds just the right amount of sweetness.
- 4 large egg yolks – The key to that beautiful yellow hue and velvety consistency.
- 2 tablespoons cornstarch – Helps stabilize the custard and prevent it from being too runny.
- 1 tablespoon unsalted butter – Adds a touch of richness and sheen to the final custard.
- 1 1/2 teaspoons pure vanilla extract – Brings warmth and depth of flavor.
- Pinch of salt – Balances sweetness and enhances the overall flavor.
Optional toppings:
- Fresh berries (raspberries, blueberries, strawberries)
- Mint leaves
- Shaved chocolate or cookie crumbles
Step 1: Warm the Milk
In a heavy-bottomed saucepan, heat the milk over medium heat until it’s steaming but not boiling. Stir occasionally to prevent scorching. Once heated, remove from the heat and set aside for a moment.
Step 2: Whisk the Yolks and Sugar
In a separate mixing bowl, whisk together the egg yolks, sugar, cornstarch, and a pinch of salt. Whisk until the mixture turns pale and slightly thickened—this helps dissolve the sugar and gives the custard its structure.
Step 3: Temper the Eggs
Slowly drizzle about ½ cup of the warm milk into the egg mixture while whisking constantly. This step brings the eggs up to temperature gradually and avoids scrambling. Continue whisking in the rest of the milk in a slow stream.
Step 4: Cook the Custard
Pour the mixture back into the saucepan. Cook over low to medium heat, stirring constantly with a spatula or whisk. After several minutes, the custard will begin to thicken. You’ll know it’s done when it coats the back of a spoon and a line drawn with your finger holds its shape.
Step 5: Finish with Butter and Vanilla
Remove the saucepan from the heat and stir in the butter and vanilla extract. Mix until the butter is fully melted and the custard is glossy and smooth.
Step 6: Strain and Cool
For the silkiest finish, pour the custard through a fine-mesh strainer into a clean bowl. Cover the surface directly with plastic wrap to avoid a skin forming. Let cool at room temperature, then refrigerate until fully chilled.
Step 7: Serve and Garnish
Once chilled, give the custard a gentle stir and spoon into serving dishes. Top with fresh berries and mint, or enjoy as-is for a classic treat.
Notes
- For an Extra Vanilla Kick: Use a scraped vanilla bean instead of extract for a richer, more aromatic custard.
- Texture Check: Always strain the custard to remove any tiny cooked egg bits. This ensures an ultra-smooth result.
- Serving Temperature: While chilled custard is most common, it can also be served slightly warm, especially when paired with baked desserts.
Watch Out for These Mistakes While Cooking
- Overheating the Milk: If it boils, it can curdle when mixed with eggs. Keep it just under a simmer.
- Rushing the Tempering Process: Adding hot milk too quickly to the egg mixture will scramble the eggs. Always whisk constantly and pour slowly.
- Using High Heat: Custard requires low, controlled heat. High heat risks splitting the mixture or turning it grainy.
- Skipping the Straining Step: Even well-cooked custards can have tiny lumps. Straining creates that silky, pro-level finish.
- Not Stirring Constantly: Once it’s back on the heat, don’t walk away. Stirring ensures even cooking and prevents scorching.
- Letting It Form a Skin: Always press plastic wrap directly onto the surface during cooling to avoid an unappetizing film.
What to Serve With Homemade Vanilla Custard?
8 Recommendations
-
Fresh Seasonal Berries
Raspberries, strawberries, or blueberries add a tart contrast to the rich custard and brighten the presentation. -
Classic Sponge Cake
Pour warm custard over a slice of sponge cake for a comforting, British-style dessert. -
Caramelized Bananas
Sliced bananas sautéed with brown sugar and butter complement the custard with toasty, sweet flavors. -
Apple Pie or Fruit Crumble
Serve a dollop of custard alongside warm pie or crumble for the ultimate cozy combination. -
Toasted Nuts
A sprinkle of crushed almonds or pistachios adds crunch and contrast to the creamy base. -
Chocolate Shavings
Dark or milk chocolate curls sprinkled on top give it elegance and a bittersweet bite. -
Ladyfingers or Biscotti
These crisp cookies are ideal for dipping into the custard or layering for a trifle. -
Espresso or Coffee
A small cup of strong coffee makes a perfect pairing, cutting the sweetness and elevating the experience.
Storage Instructions
Homemade Vanilla Custard is best enjoyed fresh, but it stores quite well:
- Refrigeration: Allow the custard to cool completely, then transfer it to an airtight container. It will keep in the fridge for up to 3 days.
- Avoid Freezing: Freezing can alter the creamy texture, causing it to separate or become grainy after thawing.
- Preventing a Skin: Always press plastic wrap directly onto the surface of the custard before sealing the container. This stops a thick, rubbery skin from forming.
- Reheating: If serving warm, gently heat the custard over low heat while stirring constantly. Avoid the microwave—it can overcook it in seconds.
Estimated Nutrition (Per Serving – makes approx. 4 servings)
- Calories: 240 kcal
- Total Fat: 12g
- Saturated Fat: 6g
- Unsaturated Fat: 5g
- Trans Fat: 0g
- Cholesterol: 185mg
- Sodium: 60mg
- Carbohydrates: 26g
- Sugar: 21g
- Fiber: 0g
- Protein: 6g
- Serving Size: 1/2 cup
- Category: Dessert
- Method: Stovetop
- Cuisine: European
- Diet: Vegetarian
- Keywords: custard recipe, easy dessert, vanilla custard, homemade pudding, classic custard
Frequently Asked Questions
1. Can I make this custard ahead of time?
Yes, it stores well in the fridge for up to 3 days. Just be sure to cover it with plastic wrap directly on the surface to prevent a skin from forming.
2. What if I don’t have cornstarch?
You can use all-purpose flour as a substitute (use 3 tablespoons instead of 2), though the texture will be slightly less smooth.
3. Can I use a plant-based milk instead of dairy?
Yes, but choose creamier options like oat milk or full-fat coconut milk for a more satisfying result. The texture will vary slightly.
4. Why did my custard turn out lumpy?
Most likely, the eggs cooked too quickly. To prevent this, temper the eggs slowly and stir constantly over low heat.
5. Can I use whole eggs instead of just yolks?
Technically yes, but the custard will be less rich and have a more eggy flavor. Egg yolks alone produce a smoother, silkier texture.
6. Is it safe to eat if the custard is a bit runny?
Yes, but it means it wasn’t cooked quite long enough. Return it to the heat and cook a little longer until it coats the back of a spoon.
7. Can I turn this into a baked custard?
No, this recipe is designed as a stovetop custard. For a baked version, you’ll need a slightly different ratio of eggs and milk, and a water bath.
8. How do I know when it’s perfectly thickened?
Dip a spoon in the custard—if it coats the back and you can run a finger through it without the line filling in, it’s ready.
Conclusion
Homemade Vanilla Custard is a silky-smooth dessert that proves simplicity can be sensational. It’s versatile, comforting, and elegant all at once—perfect for everything from an afternoon treat to the finishing touch of a dinner party. Once you master this timeless recipe, you’ll find endless reasons to return to it, whether to pair with fruit, drizzle over cakes, or enjoy entirely on its own.

Homemade Vanilla Custard
- Total Time: 20 minutes
- Yield: 4 servings 1x
- Diet: Vegetarian
Description
Silky, smooth, and beautifully aromatic, Homemade Vanilla Custard is the ultimate comfort dessert. Whether served warm with sponge cake or chilled with berries, it’s a timeless treat that pairs perfectly with countless sweet additions. This easy recipe uses simple ingredients like milk, egg yolks, and vanilla to create a creamy base ideal for quick desserts, breakfast ideas, or elegant dinner finales. A must-have for any collection of classic, easy recipes and food ideas!
Ingredients
2 cups whole milk
1/2 cup granulated sugar
4 large egg yolks
2 tablespoons cornstarch
1 tablespoon unsalted butter
1 1/2 teaspoons pure vanilla extract
1 pinch salt
Instructions
1. In a heavy-bottomed saucepan, warm the milk over medium heat until it begins to steam but does not boil. Remove from heat.
2. In a separate bowl, whisk together the egg yolks, sugar, cornstarch, and salt until pale and slightly thickened.
3. Slowly pour 1/2 cup of the warm milk into the egg mixture while whisking constantly to temper the eggs.
4. Gradually whisk in the remaining warm milk, then pour the entire mixture back into the saucepan.
5. Cook over low to medium heat, stirring constantly, until the custard thickens and coats the back of a spoon.
6. Remove from heat and stir in the butter and vanilla extract until smooth and glossy.
7. Strain the custard through a fine-mesh sieve into a clean bowl to ensure smoothness.
8. Press plastic wrap directly onto the surface of the custard and let it cool at room temperature, then refrigerate.
9. Serve chilled or slightly warmed, garnished as desired.
Notes
Use a vanilla bean instead of extract for deeper flavor.
Always strain the custard to ensure a perfectly smooth finish.
Refrigerate with plastic wrap directly on the surface to avoid a skin.
- Prep Time: 10 minutes
- Cook Time: 10 minutes
- Category: Dessert
- Method: Stovetop
- Cuisine: European
Nutrition
- Serving Size: 1/2 cup
- Calories: 240
- Sugar: 21g
- Sodium: 60mg
- Fat: 12g
- Saturated Fat: 6g
- Unsaturated Fat: 5g
- Trans Fat: 0g
- Carbohydrates: 26g
- Fiber: 0g
- Protein: 6g
- Cholesterol: 185mg