
Bright, chewy, and irresistibly fun—homemade gummies are a nostalgic treat that brings out the kid in everyone. Whether you’re looking for a colorful snack for your next party, a healthier alternative to store-bought candy, or a creative kitchen project, these gummies deliver on all fronts. With just a handful of ingredients and endless flavor possibilities, they’re as satisfying to make as they are to eat.
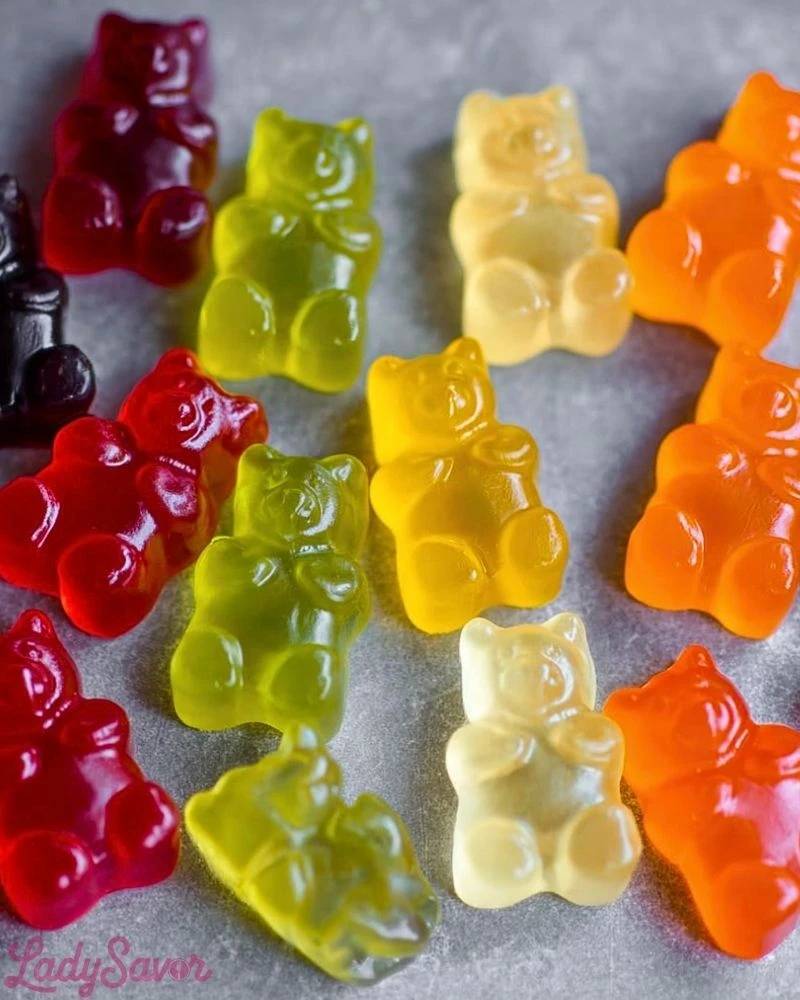
Made with fruit juice, gelatin, and a touch of sweetener, homemade gummies let you control exactly what goes into your sweets—no artificial flavors or dyes unless you want them. Customize the shapes, colors, and flavors to suit the season or a theme. From tangy citrus bears to sweet berry worms, you can create a rainbow of treats that are perfect for lunchbox surprises, movie night snacks, or edible gifts.
Why You’ll Love This Homemade Gummies Fun Treat Recipe
- It’s super easy and kid-friendly—perfect for weekend projects.
- You can choose your favorite juices and flavors.
- They’re made with simple, clean ingredients.
- It’s a fun and customizable treat for holidays, birthdays, or anytime you need a pick-me-up.
Preparation Phase & Tools to Use
To make the perfect batch of homemade gummies, a few essential tools are key:
- Silicone Gummy Molds: These give your treats that iconic shape and make popping them out easy without sticking or tearing.
- Dropper or Pipette: Essential for neatly filling gummy molds without spills.
- Small Saucepan: Needed to heat and dissolve the gelatin into your juice base.
- Whisk or Spoon: Helps to mix the gelatin thoroughly and avoid clumps.
- Measuring Cups & Spoons: Precision matters, especially when working with gelatin.
Having these tools ready makes the process clean, fast, and enjoyable, especially if little helpers are joining in.
Preparation Tips
Before you begin, make sure your molds are clean and dry. Prepare your ingredients in advance and measure everything out. Stir the gelatin slowly into cool liquid before heating to prevent clumping. Once the mixture is warm and fully dissolved, move quickly to pour it into molds—gelatin sets fast as it cools. Allow the gummies to chill fully in the refrigerator for a firmer texture and easy removal. For best results, use 100% fruit juice for both flavor and natural color.
Ingredients for this Homemade Gummies Fun Treat Recipe
- 1 cup 100% fruit juice (any kind: apple, grape, orange, berry, etc.)
- 2 tablespoons lemon juice (optional for tartness and flavor boost)
- 2-3 tablespoons honey, maple syrup, or sugar (adjust to taste)
- 3 tablespoons unflavored gelatin powder (about 3 packets)
- Optional: Natural food coloring or fruit/vegetable powders
- Optional: Vitamin C powder or supplements (if making wellness gummies)
- Cooking spray (for lightly greasing the molds if needed)

Step 1: Prepare Your Workstation
Set out your silicone molds on a baking sheet for easy transfer to the fridge. Have your dropper or pipette, measuring tools, and saucepan ready. Lightly spray molds with cooking spray if they are not non-stick.
Step 2: Combine Juice and Sweetener
In a small saucepan (off the heat), pour in the fruit juice and lemon juice. Stir in your choice of sweetener and mix well until mostly dissolved.
Step 3: Add the Gelatin
Slowly sprinkle the gelatin powder over the juice mixture, letting it absorb naturally for 1-2 minutes. This blooming step is crucial for smooth texture. Do not stir right away.
Step 4: Heat and Dissolve
Turn the heat to low and gently warm the mixture while whisking continuously. Don’t let it boil. Within 3-5 minutes, the gelatin should dissolve completely, leaving a smooth, slightly thickened liquid. If using food coloring or powders, add them now and mix thoroughly.
Step 5: Fill the Molds
Use the dropper to carefully fill each cavity of your silicone molds with the warm gummy mixture. Be precise to avoid overflow and mess.
Step 6: Chill Until Set
Transfer the baking sheet with molds to your refrigerator. Let the gummies chill for at least 1-2 hours until completely firm to the touch.
Step 7: Unmold and Store
Gently pop each gummy out of its mold. Store in an airtight container in the fridge for up to 2 weeks. Optionally, dust with a tiny bit of cornstarch to prevent sticking if you’re stacking them.
Notes
Homemade gummies are versatile and can be tailored to your flavor and health preferences. You can use fruit and vegetable powders for color, or include nutritional supplements like vitamin C or elderberry syrup for an immune boost. Always keep the temperature low while heating to maintain the integrity of added nutrients. These gummies aren’t just for kids—adults can enjoy them too, especially when spiked with kombucha or infused with herbal tea.
Watch Out for These Mistakes While Cooking
- Overheating the mixture: High heat can degrade the flavor and nutrients in your juice, and may ruin the consistency of your gelatin.
- Skipping the bloom step: Not allowing the gelatin to bloom can result in a lumpy, uneven texture.
- Using too much sweetener: Over-sweetening can mask the fruity flavor and make the gummies sticky.
- Pouring hot mixture into molds too fast: It can spill or splash, causing air bubbles and uneven gummies.
- Removing gummies too soon: They need full time to chill and set to achieve that satisfying chew.
Storage Instructions
Store your homemade gummies in an airtight container in the refrigerator. They will stay fresh for about 1 to 2 weeks. For best texture, avoid leaving them at room temperature for too long, especially in warm or humid environments. If stacking, dust lightly with cornstarch or arrowroot powder to prevent sticking. Freeze only if necessary, as this can alter the texture.
Estimated Nutrition (per 4-5 small gummies)
- Calories: 35
- Sugar: 4g
- Sodium: 5mg
- Fat: 0g
- Saturated Fat: 0g
- Carbohydrates: 6g
- Fiber: 0g
- Protein: 3g (from gelatin)
- Cholesterol: 0mg
Frequently Asked Questions
How long do homemade gummies last?
They last about 1-2 weeks when stored in an airtight container in the fridge.
Can I use agar-agar instead of gelatin?
Yes, but the texture will be firmer and less chewy. Adjust the ratio as agar behaves differently.
Are these gummies vegan?
Not with gelatin, but you can substitute agar-agar for a plant-based version.
Can I use flavored drink mixes or soda?
You can, but look for options without artificial sweeteners or colorants for a healthier treat.
Why are my gummies sticky?
Too much sweetener or not enough setting time can cause stickiness. Use cornstarch or arrowroot to coat them lightly.
Can I add vitamins or supplements?
Yes! Add powdered vitamin C, elderberry, or probiotics after removing from heat to retain potency.
Do I have to refrigerate them?
Yes, especially if you want to keep them firm and fresh for longer.
Can I freeze homemade gummies?
You can, but freezing may change the texture. Best to enjoy them fresh from the fridge.
Conclusion
Homemade gummies are more than just a playful snack—they’re a creative way to enjoy real fruit flavors with fewer additives. Once you master the basic method, the possibilities are endless: from vitamin-packed daily treats to fun party favors. Whether you’re whipping them up for health, fun, or flavor, this recipe adds a personal twist to your snack game. Make a batch today and taste the joy of homemade candy!

Homemade Gummies Fun Treat Recipe
- Total Time: 15 minutes
- Yield: 50 small gummies 1x
Description
Turn your kitchen into a candy lab with this easy, colorful, and kid-approved Homemade Gummies Fun Treat Recipe! This quick recipe is the perfect way to make a fun snack with wholesome ingredients—no artificial dyes or flavors needed. It’s an ideal healthy snack, a quick dessert idea, or a creative food project for both kids and adults. Whether you’re craving easy fruit candy, planning a party favor, or looking for fun snack ideas, these gummies have you covered.
Ingredients
1 cup 100% fruit juice
2 tablespoons lemon juice
2 tablespoons honey (or to taste)
3 tablespoons unflavored gelatin powder
Optional: natural food coloring or fruit/vegetable powders
Optional: vitamin C powder or supplements
Cooking spray for molds
Instructions
1. Set your silicone gummy molds on a tray and prepare your tools. Lightly grease the molds if necessary.
2. In a saucepan off the heat, combine fruit juice, lemon juice, and honey. Stir until well mixed.
3. Gradually sprinkle gelatin over the liquid. Let it bloom for 1-2 minutes without stirring.
4. Turn heat to low and whisk gently until gelatin dissolves fully. Do not boil.
5. Add optional colorings or supplements and stir well.
6. Use a dropper to fill each mold cavity with the mixture.
7. Chill molds in the fridge for 1-2 hours until gummies are fully set.
8. Gently remove from molds and store in an airtight container in the fridge.
Notes
Always bloom the gelatin for smoother, chewier gummies.
Use 100% fruit juice for best color and flavor—avoid juice cocktails.
Don’t skip chilling time; fully set gummies are easier to remove and enjoy.
- Prep Time: 10 minutes
- Cook Time: 5 minutes
- Category: Snack / Candy
- Method: No-bake / Stovetop
- Cuisine: American
Nutrition
- Serving Size: 5 gummies
- Calories: 35
- Sugar: 4g
- Sodium: 5mg
- Fat: 0g
- Saturated Fat: 0g
- Unsaturated Fat: 0g
- Trans Fat: 0g
- Carbohydrates: 6g
- Fiber: 0g
- Protein: 3g
- Cholesterol: 0mg