
A golden, flaky pie crust that melts in your mouth—this is the kind of culinary magic only a grandma can perfect. Whether it’s filled with apples and cinnamon or a rich, savory chicken pot pie, this crust provides the perfect base for any filling. Handcrafted with love and simplicity, Grandma’s Pie Crust is more than just a recipe; it’s a tradition passed down through generations.
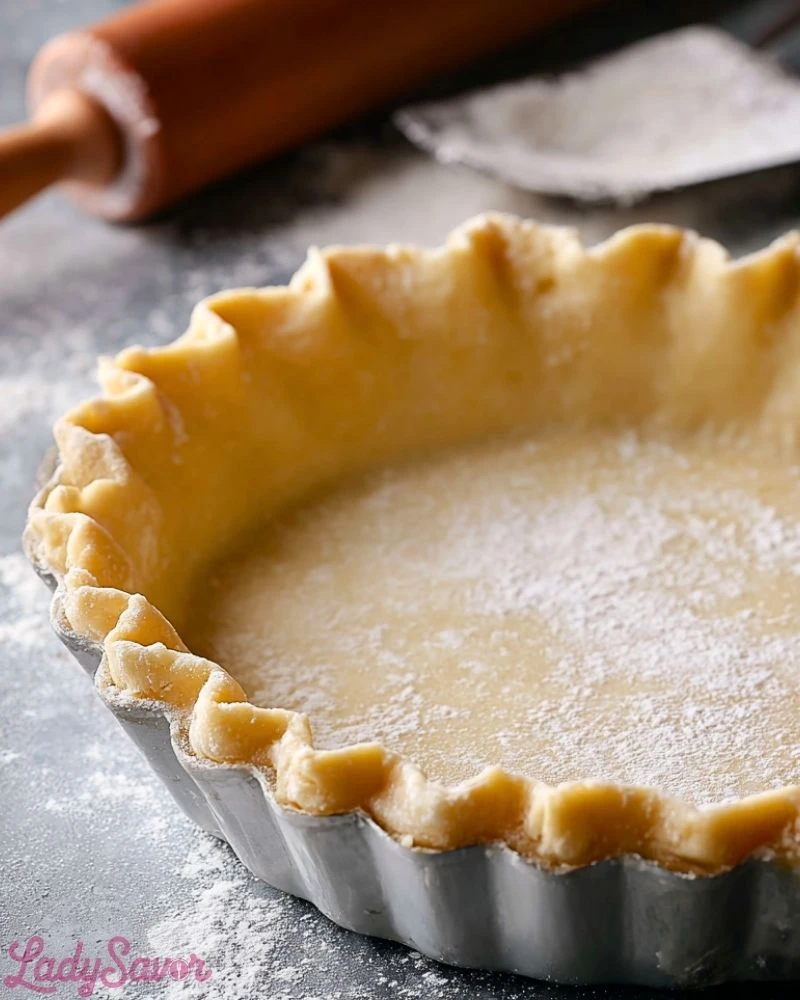
Each bite of this crust delivers a delicate crunch followed by a buttery softness that complements both sweet and savory dishes. The beauty lies in its rustic charm: perfectly imperfect edges, a gentle sheen from a well-brushed egg wash, and that nostalgic aroma of home baking. It’s the kind of recipe that turns a simple pie into a warm memory.
Why You’ll Love This Grandma’s Pie Crust
- It’s incredibly versatile—ideal for fruit pies, quiches, or meat pies.
- Requires minimal ingredients, most of which are pantry staples.
- Delivers a perfect balance of flakiness and tenderness.
- Freezer-friendly for make-ahead convenience.
- Easy enough for beginners, yet cherished by seasoned bakers.
Preparation Phase & Tools to Use
For best results, gather these essential tools:
- Pastry Cutter or Food Processor: To incorporate the fat into the flour evenly, creating that desired flaky texture.
- Rolling Pin: Crucial for rolling out your dough to an even thickness.
- Mixing Bowl: For combining the dough ingredients.
- Measuring Cups & Spoons: Precision is key for pie crust success.
- Plastic Wrap or Parchment Paper: To chill and rest the dough without it drying out.
- Pie Dish: A 9-inch pie dish is standard for most recipes.
Each tool contributes to texture, shape, and consistency—important elements in achieving pie crust perfection.
Preparation Tips
Always use very cold butter or shortening—cold fat creates steam pockets while baking, which gives your crust its flakiness. Avoid overworking the dough; too much handling can result in a tough crust. After forming the dough, wrap it tightly and let it chill in the refrigerator for at least 30 minutes. This resting period allows the gluten to relax, making it easier to roll out and preventing shrinkage in the oven. Lightly flour your surface and rolling pin, and rotate the dough as you roll to maintain a circular shape and avoid sticking. Finally, gently transfer the rolled dough into the pie dish without stretching it, which can cause cracking or shrinking during baking.
Ingredients for Grandma’s Pie Crust
- 2 1/2 cups (310g) all-purpose flour
- 1 tsp salt
- 1 tbsp granulated sugar (optional, for a hint of sweetness)
- 1 cup (226g) unsalted butter, very cold and cut into cubes
- 6 to 8 tbsp ice water (adjust as needed)
- 1 tbsp apple cider vinegar or lemon juice (helps tenderize the dough)
Optional for baking:
- 1 egg (for egg wash, mixed with 1 tbsp water)
Step 1: Mix the Dry Ingredients
In a large mixing bowl, whisk together the flour, salt, and sugar (if using). Make sure the dry ingredients are evenly distributed to avoid clumping later in the dough.
Step 2: Cut in the Butter
Using a pastry cutter or food processor, cut the cold butter into the flour mixture. Stop when the mixture resembles coarse crumbs with pea-sized bits of butter throughout. This texture is crucial for a flaky crust.
Step 3: Add the Liquid
In a small bowl or measuring cup, combine the ice water and vinegar or lemon juice. Gradually drizzle this into the flour-butter mixture, stirring with a fork or spatula after each addition. Stop adding liquid once the dough begins to clump together but is not sticky.
Step 4: Form the Dough
Turn the dough out onto a lightly floured surface. Gently knead and press it into a ball, being careful not to overwork it. Divide into two equal discs, wrap each in plastic wrap, and refrigerate for at least 30 minutes, or up to 2 days.
Step 5: Roll Out the Dough
Lightly flour your work surface and rolling pin. Roll out one disc of dough into a 12-inch circle for a 9-inch pie plate. Start from the center and roll outward, rotating the dough often to maintain shape and prevent sticking.
Step 6: Transfer to the Pie Dish
Gently lift the rolled dough (use your rolling pin or fold it in half), and transfer it to your pie plate. Carefully press it into the bottom and sides without stretching it.
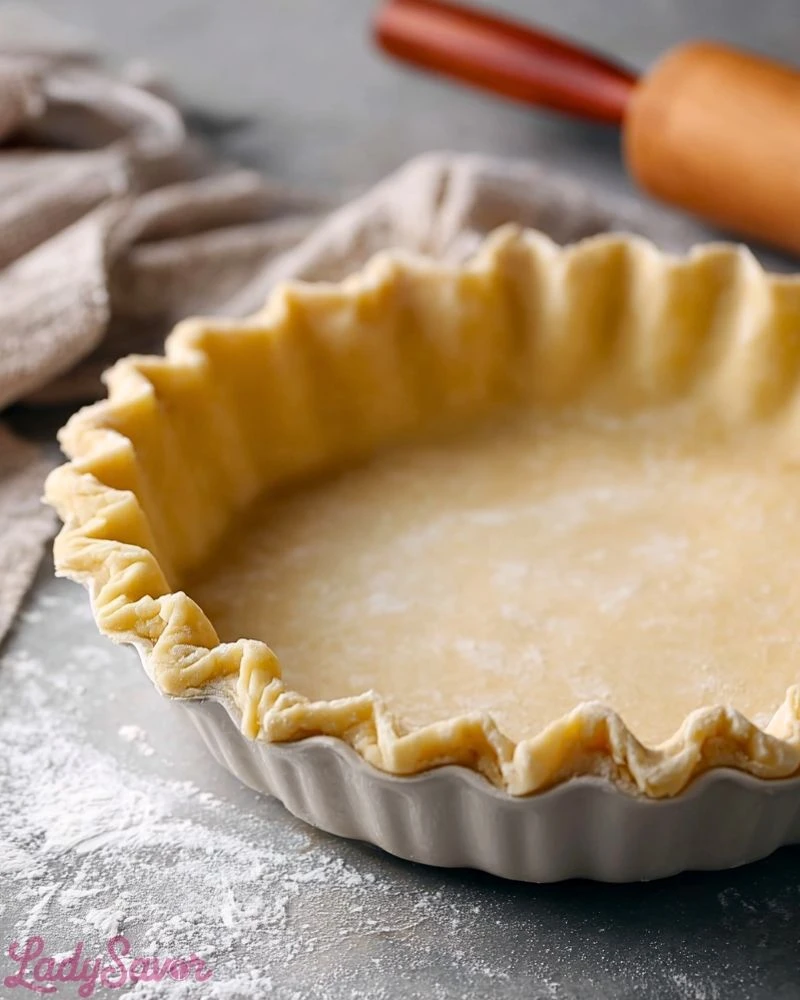
Step 7: Crimp and Finish the Edges
Trim any excess dough hanging over the sides, leaving about 1/2 inch. Tuck the edges under and crimp with your fingers or a fork for a decorative touch. If making a double crust pie, add your filling and repeat the rolling process with the second dough disc, sealing the edges before baking.
Step 8: Chill Again (Optional but Recommended)
Place the prepared crust in the fridge for another 15–30 minutes before baking. This helps the dough firm up, which reduces shrinking and promotes a crisp texture.
Step 9: Bake as Needed
Follow your pie recipe’s baking instructions. For blind baking (pre-baking), prick the bottom with a fork, line with parchment paper, and fill with pie weights or dried beans. Bake at 375°F (190°C) for 15–20 minutes, then remove weights and continue baking until golden brown.
Notes
This pie crust is freezer-friendly. You can make it in advance and store it as a disc wrapped in plastic wrap and sealed in a zip-top bag for up to 3 months. Let it thaw in the refrigerator overnight before using. The dough also works beautifully for both sweet and savory pies—just skip the sugar if you’re aiming for a more neutral base.
Always chill the dough after rolling and shaping it in the pan before baking—this helps prevent shrinkage and promotes a crisp, even bake. If blind baking, don’t skip the pie weights or beans to avoid puffing and bubbling.
Watch Out for These Mistakes While Cooking
- Using warm or room-temperature butter: This ruins the flakiness. The butter must be cold to create pockets of steam while baking.
- Overworking the dough: Too much kneading activates gluten and results in a tough crust.
- Skipping the chill time: This is essential. Dough that hasn’t rested will shrink and lose its shape in the oven.
- Not enough water or too much water: Inaccurate hydration can lead to crumbly or overly sticky dough. Add liquid slowly and stop as soon as the dough comes together.
- Forgetting to dock the crust during blind baking: Pricking holes prevents air bubbles from forming.
Storage Instructions
Once prepared, pie dough discs can be stored in the refrigerator for up to 2 days or in the freezer for up to 3 months. For leftover baked pie, store it tightly covered in the refrigerator for 3–4 days, depending on the filling. If you’ve blind-baked the crust, it can be wrapped in plastic and stored at room temperature for a day, or frozen for longer storage.
Estimated Nutrition
(Per 1/8 slice of one crust)
- Calories: 210
- Total Fat: 14g
- Saturated Fat: 9g
- Trans Fat: 0g
- Cholesterol: 35mg
- Sodium: 190mg
- Carbohydrates: 18g
- Fiber: 1g
- Sugar: 1g
- Protein: 2g
Frequently Asked Questions
Can I use shortening instead of butter?
Yes, you can replace some or all of the butter with shortening. This will give a slightly different texture—more tender but less flavorful.
Why does my crust shrink in the oven?
This usually happens when the dough hasn’t rested long enough, or it was stretched while being placed in the pie dish.
Can I make the dough in a food processor?
Absolutely! Just be careful not to overmix. Pulse in short bursts until the dough begins to come together.
What if I don’t have pie weights?
Use dried beans, uncooked rice, or even sugar as substitutes for pie weights when blind baking.
How do I know when the crust is done baking?
It should be golden brown around the edges and slightly golden on the bottom. The timing will vary based on your filling and recipe.
Can I use this for a lattice pie top?
Yes, this dough is sturdy enough to handle lattice work beautifully. Make sure to chill the strips before arranging them.
Should I add sugar if I’m making a savory pie?
No, skip the sugar for savory applications like quiches or pot pies.
How do I fix cracks in the dough?
Press a small piece of dough into the crack to seal it, or patch from leftover trimmings before baking.
Conclusion
Grandma’s Pie Crust is the cornerstone of homemade baking—a simple yet powerful recipe that never fails to deliver. With a few classic ingredients and the right techniques, you can create a flaky, tender crust that transforms your pies into something unforgettable. Whether you’re baking for the holidays or just because, this crust will give your fillings a home they deserve.
Grandma’s Pie Crust
- Total Time: 35 minutes
- Yield: 2 pie crusts 1x
- Diet: Vegetarian
Description
Nothing says comfort like a flaky, buttery pie crust passed down from generations. Grandma’s Pie Crust is the ultimate foundation for both sweet and savory pies. Whether you’re making apple pie, chicken pot pie, or a quiche, this easy recipe delivers dependable results every time. With just a few pantry staples and cold butter, you can master a golden crust that’s tender, crisp, and packed with nostalgic flavor. Ideal for all seasons and great for beginners, this easy recipe belongs in every home baker’s collection. Perfect for baking lovers seeking quick breakfast ideas, easy dinner bases, or delicious food ideas that stand the test of time.
Ingredients
2 1/2 cups all-purpose flour
1 tsp salt
1 tbsp granulated sugar (optional)
1 cup unsalted butter, very cold and cut into cubes
6 to 8 tbsp ice water
1 tbsp apple cider vinegar or lemon juice
1 egg (for egg wash, mixed with 1 tbsp water — optional)
Instructions
1. In a large bowl, whisk together flour, salt, and sugar until evenly combined.
2. Add cold butter cubes and use a pastry cutter or food processor to blend until mixture forms pea-sized crumbs.
3. Mix ice water with vinegar or lemon juice. Gradually add to flour mixture, stirring just until dough clumps form.
4. Turn dough onto floured surface. Gently knead into a ball, divide in two, and form discs.
5. Wrap discs in plastic wrap and chill in the fridge for at least 30 minutes.
6. Roll out one dough disc into a 12-inch circle on a lightly floured surface.
7. Transfer rolled dough to a 9-inch pie plate and press gently without stretching.
8. Trim excess dough, fold edges under, and crimp as desired.
9. Chill again for 15–30 minutes before baking.
10. Blind bake if needed by pricking the base, lining with parchment, and using pie weights. Bake at 375°F for 15–20 minutes. Remove weights and bake until golden.
Notes
Always use very cold butter for optimal flakiness.
Chill the dough before and after rolling to avoid shrinkage.
You can freeze dough discs for up to 3 months for convenience.
- Prep Time: 15 minutes
- Cook Time: 20 minutes
- Category: Baking / Pie Dough
- Method: Mixing, Rolling
- Cuisine: American
Nutrition
- Serving Size: 1/8 crust
- Calories: 210
- Sugar: 1g
- Sodium: 190mg
- Fat: 14g
- Saturated Fat: 9g
- Unsaturated Fat: 4g
- Trans Fat: 0g
- Carbohydrates: 18g
- Fiber: 1g
- Protein: 2g
- Cholesterol: 35mg