
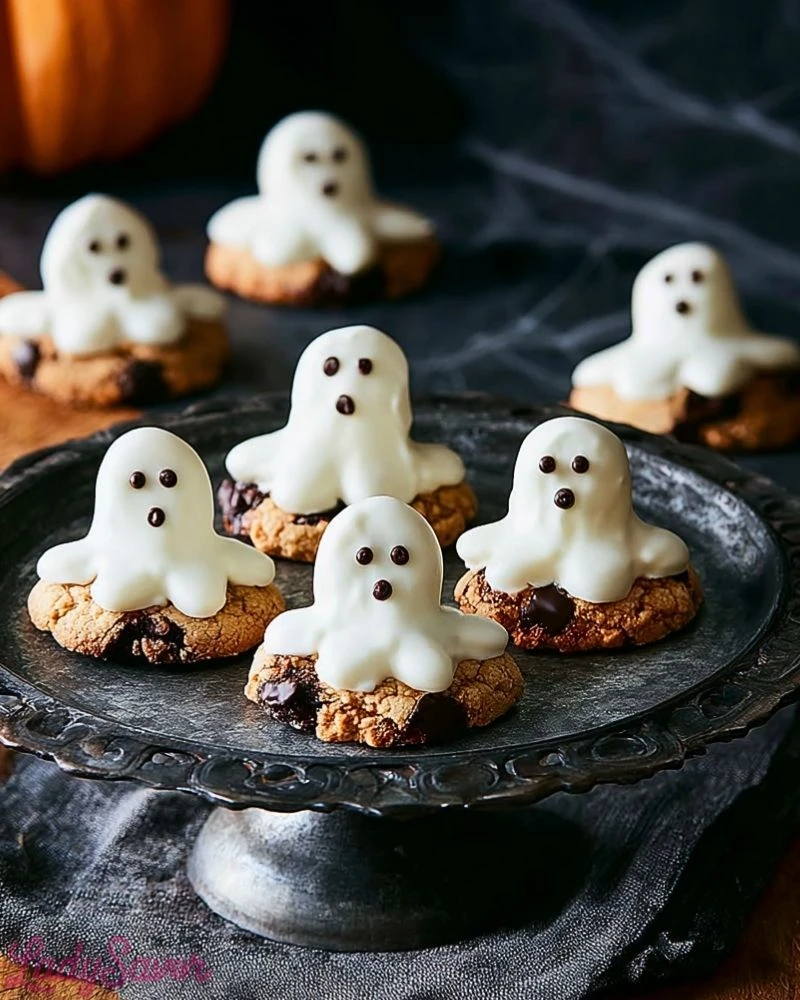
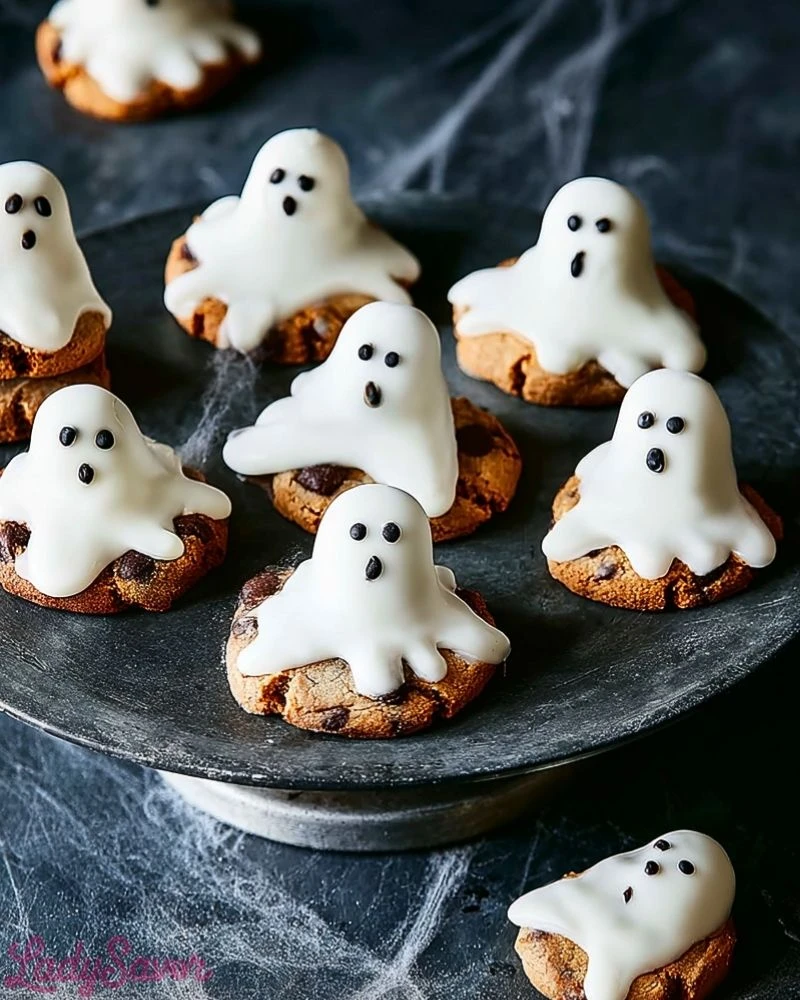
These Ghost Cookies are the ultimate Halloween treat — spooky, sweet, and so easy to make! Each cookie features a gooey marshmallow ghost cloaked in a smooth white chocolate or icing “sheet,” perched atop a chewy chocolate chip cookie base. They’re hauntingly adorable and will disappear fast at any party or spooky-themed snack table.
Perfect for baking with kids or creating a show-stopping dessert platter, these ghost cookies combine fun and flavor in every bite. Whether you’re throwing a Halloween bash or just want to surprise your coworkers or family, this recipe is a festive crowd-pleaser. The best part? You don’t need to be a professional baker to pull off these ghostly goodies — just a few simple ingredients and tools will do the trick!
Why You’ll Love This Ghost Cookies Recipe
- It’s super easy and fun to make, even for beginners.
- The cookies are both spooky and adorable, perfect for Halloween.
- No fancy equipment or hard-to-find ingredients required.
- Great for baking with kids or making ahead for parties.
- A creative way to use chocolate chip cookies and marshmallows!
Preparation Phase & Tools to Use
Before diving in, gather your essential tools: a baking tray, parchment paper, a microwave-safe bowl for melting the white chocolate or icing, a spoon for drizzling, and food-safe markers or black icing for the eyes. The cookie base can be homemade or store-bought, so no mixer is required unless you’re making cookies from scratch.
- Baking Tray – to hold and cool your cookies.
- Parchment Paper – prevents sticking and keeps cleanup easy.
- Microwave-Safe Bowl – perfect for melting chocolate or heating icing safely.
- Spoon or Small Spatula – for draping the white coating over the marshmallows.
- Edible Marker or Black Icing – to give each ghost its spooky face.
Each of these tools ensures the process is simple and mess-free, letting you focus on the fun decorating part!
Preparation Tips
To make the cutest and smoothest ghost cookies, be sure to let your cookies cool completely before decorating. This prevents the marshmallows and coating from melting too fast. Use large marshmallows for the ghost bodies — they hold their shape better. When drizzling the white chocolate or icing, don’t worry about perfection; a little unevenness gives the ghosts more personality. Use black icing gel or food markers to dot on eyes and a mouth once the coating has set. And finally, work on a non-stick surface or parchment paper to keep the cleanup easy.
Ingredients for This Ghost Cookies Recipe
- 12 chocolate chip cookies (homemade or store-bought)
- 12 large marshmallows
- 1 cup white chocolate chips or white candy melts
- 1 teaspoon coconut oil or vegetable shortening (optional, for smoother melting)
- Black decorating gel or edible black marker
- Parchment paper
- Optional: mini chocolate chips (for eyes if you don’t use gel)
Step 1: Prepare Your Base Cookies
Place your chocolate chip cookies on a parchment-lined baking tray. If you’re baking cookies from scratch, let them cool completely before decorating to avoid melting your ghost faces.
Step 2: Add Marshmallow Ghost Bodies
Take one large marshmallow and place it in the center of each cookie. Press gently so it sticks slightly. This will be the base for your ghostly drape.
Step 3: Melt the White Chocolate
In a microwave-safe bowl, add white chocolate chips and optional coconut oil. Microwave in 20-second intervals, stirring each time, until smooth and fully melted. Be careful not to overheat — white chocolate can seize easily.
Step 4: Create the Ghost Cloaks
Using a spoon, pour a generous amount of melted white chocolate over the marshmallow, letting it drip down around the sides to resemble a ghost sheet. It doesn’t need to be perfect — natural drips and folds add character.
Step 5: Let the Coating Set
Allow the white chocolate to set completely. You can leave the tray at room temperature or place it in the fridge for 10–15 minutes for faster results.
Step 6: Draw the Ghost Faces
Once the coating is firm, use black decorating gel or an edible marker to draw two eyes and a spooky (or cute!) mouth on each ghost. If you prefer, press in mini chocolate chips before the coating sets for the eyes.
Step 7: Display and Serve
Gently lift the cookies off the parchment paper and place them on your serving tray. Decorate your table with Halloween-themed props like spiderwebs or pumpkins for extra festive flair. Enjoy your adorable ghost cookies!
Notes
You can get creative with this recipe by using different cookie bases — think sugar cookies, peanut butter cookies, or even brownie bites. If you’re short on time, store-bought cookies and marshmallows work perfectly. Be sure to use high-quality white chocolate or candy melts to get that smooth, spooky drape. For a glossy finish, add a tiny bit of coconut oil when melting.
Watch Out for These Mistakes While Cooking
- Overheating the white chocolate: This is a common issue that causes the chocolate to seize. Use short intervals and stir frequently.
- Decorating too early: Make sure the coating is fully set before adding facial features, or the decorations might slide off.
- Using warm cookies: Placing marshmallows on warm cookies can cause them to melt and deform instead of standing upright.
- Using too much icing for faces: A little goes a long way — overdoing it can result in messy or runny ghost faces.
Storage Instructions
Store your finished ghost cookies in an airtight container at room temperature for up to 5 days. If your kitchen is warm, refrigerate them to prevent the chocolate from softening or melting. Place parchment paper between layers if stacking to avoid sticking or smudging. These cookies are not ideal for freezing, as the marshmallows and chocolate may become sticky upon thawing.
Estimated Nutrition (Per Cookie)
- Calories: 180–220 kcal
- Sugar: 18g
- Fat: 10g
- Saturated Fat: 5g
- Unsaturated Fat: 4g
- Trans Fat: 0g
- Cholesterol: 5mg
- Sodium: 90mg
- Carbohydrates: 28g
- Fiber: 1g
- Protein: 2g
Frequently Asked Questions
Can I use homemade cookies?
Yes! You can use any type of homemade cookie as long as it’s sturdy enough to hold the marshmallow and chocolate coating.
What if I don’t have white chocolate?
You can use white candy melts or vanilla-flavored almond bark instead. Both give a smooth finish.
Can I make these ahead of time?
Absolutely. Make them a day or two in advance and store in a cool, dry place.
Are they safe for kids to make?
Yes, with supervision. Kids can help place marshmallows and decorate the faces, but an adult should handle the melting.
How do I prevent the chocolate from clumping?
Add a bit of coconut oil and melt slowly in short bursts, stirring frequently.
Can I use vegan alternatives?
Definitely! Use dairy-free chocolate, vegan marshmallows, and plant-based cookies to make this recipe vegan.
Can I freeze ghost cookies?
Not recommended. The texture of marshmallows and chocolate changes after freezing and thawing.
What if I don’t have edible markers?
You can use black decorating gel or melt a tiny bit of dark chocolate and pipe it on with a toothpick or zip-top bag.
Conclusion
Ghost Cookies are the ultimate no-stress Halloween dessert — easy, festive, and endlessly customizable. Whether you’re a seasoned baker or trying something fun with the kids, this recipe guarantees smiles and spooky delight. With minimal tools and ingredients, you’ll whip up a ghostly treat that haunts your snack table in the best way possible. Don’t forget to snap a picture before they vanish!

Ghost Cookies
- Total Time: 15 minutes
- Yield: 12 ghost cookies 1x
- Diet: Vegetarian
Description
Get ready for a spooky and delicious Halloween treat with these *Ghost Cookies*! This easy recipe turns classic chocolate chip cookies into ghostly delights using marshmallows, melted white chocolate, and a dash of creativity. Perfect as a quick dessert for Halloween parties, fun baking with kids, or festive food ideas that impress without stress. Whether you’re searching for an *easy recipe*, *Halloween snack*, or *cute dessert ideas*, these ghost cookies hit the sweet spot!
Ingredients
12 chocolate chip cookies
12 large marshmallows
1 cup white chocolate chips or white candy melts
1 teaspoon coconut oil or vegetable shortening
Black decorating gel or edible black marker
Parchment paper
Mini chocolate chips (optional)
Instructions
1. Place chocolate chip cookies on a parchment-lined baking tray. Let cool if freshly baked.
2. Set one large marshmallow in the center of each cookie and press gently to stick.
3. Melt white chocolate chips with coconut oil in a microwave-safe bowl using 20-second intervals, stirring in between.
4. Spoon melted white chocolate over each marshmallow to create ghostly drapes.
5. Let the coating set at room temperature or refrigerate for 10–15 minutes.
6. Use decorating gel, edible marker, or mini chips to make ghost eyes and mouth.
7. Transfer to a serving platter and enjoy your spooky treats!
Notes
Let cookies cool before decorating to avoid melting the marshmallows.
Add a bit of coconut oil to white chocolate for a smoother, glossier finish.
Don’t stress over perfect draping — the fun is in their spooky uniqueness!
- Prep Time: 10 minutes
- Cook Time: 5 minutes
- Category: Dessert
- Method: No-Bake, Decorating
- Cuisine: American
Nutrition
- Serving Size: 1 cookie
- Calories: 200
- Sugar: 18g
- Sodium: 90mg
- Fat: 10g
- Saturated Fat: 5g
- Unsaturated Fat: 4g
- Trans Fat: 0g
- Carbohydrates: 28g
- Fiber: 1g
- Protein: 2g
- Cholesterol: 5mg