
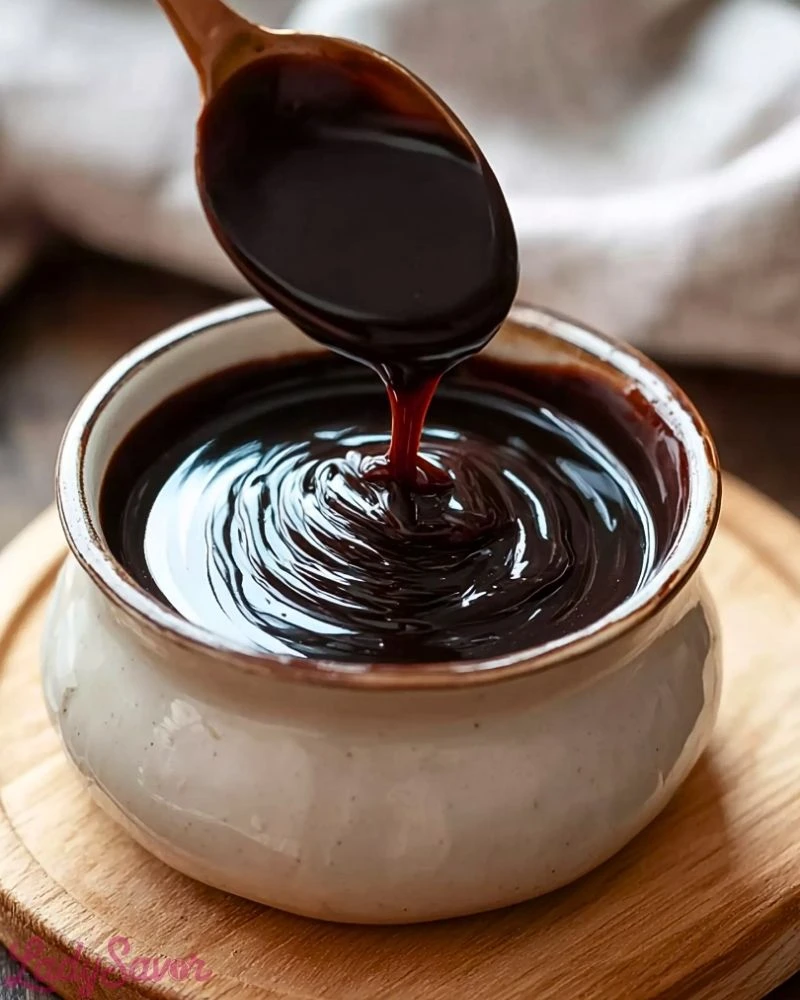
I grew up with chocolate syrup being a constant in our fridge, usually the store-bought kind that came in a squeeze bottle. But once I made my own batch at home for the first time, everything changed. It was richer, smoother, and way more satisfying than anything off a shelf. Plus, knowing exactly what’s in it gave me a whole new appreciation for this sweet staple.
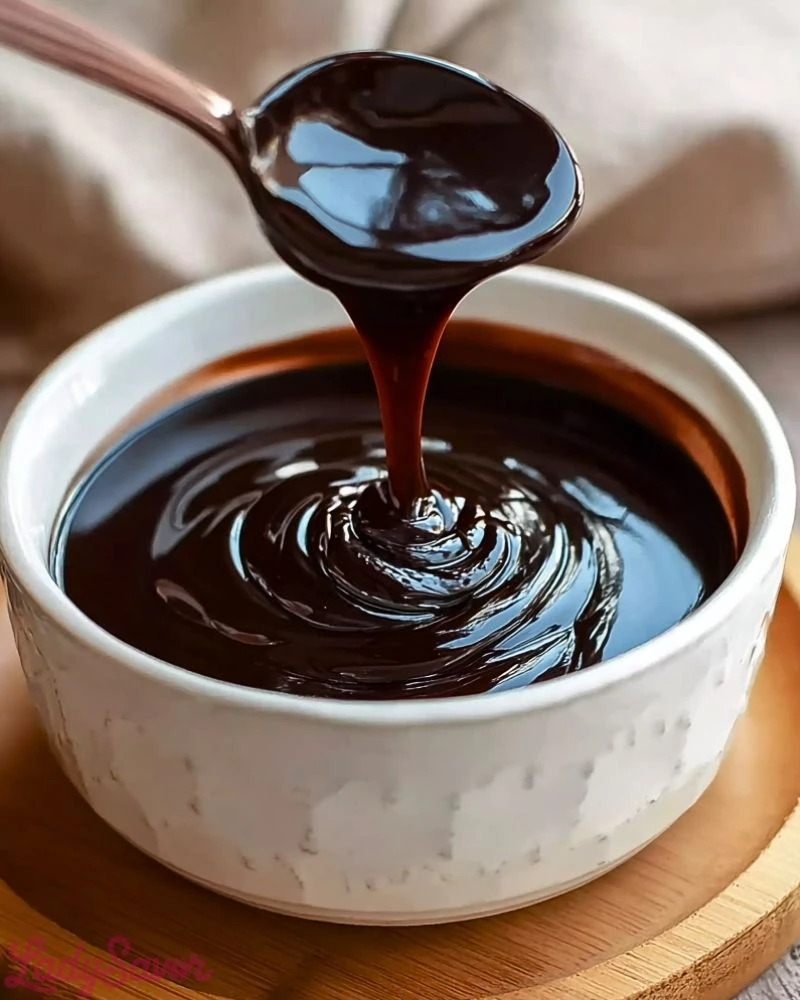
Now, I always keep a jar of this easy homemade chocolate syrup on hand. It’s perfect for drizzling over pancakes, swirling into milk for instant chocolate milk, or even just sneaking a spoonful when no one’s watching. The best part? It takes less than 10 minutes to make and uses ingredients you probably already have in your pantry.
Why You’ll Love This Easy Homemade Chocolate Syrup
- It’s made with only a handful of simple ingredients—no preservatives or artificial flavors.
- You can control the sweetness and intensity.
- It’s versatile: great for desserts, drinks, and snacks.
- It stores well for weeks in the fridge.
- It tastes better than store-bought—rich, dark, and luxurious.
What Kind of Cocoa Powder Should I Use?
Unsweetened cocoa powder is the key here. I recommend using a high-quality Dutch-processed cocoa for a smooth, mellow flavor, but natural cocoa powder will work just fine too. Dutch-processed gives the syrup a deeper chocolate color and less acidic taste. Whatever you do, make sure it’s unsweetened, as we’ll be adding our own sugar.
Options for Substitutions
If you’re short on an ingredient or want to tweak things to your liking, here are some solid swaps:
- Sugar: You can substitute white granulated sugar with coconut sugar or light brown sugar for a more caramel-like undertone.
- Water: Swap with milk or plant-based milk for a creamier finish.
- Vanilla extract: Optional, but adds a great depth of flavor. Almond extract could be used for a twist.
- Salt: Don’t skip this—it brings out the chocolate flavor. You can try sea salt or Himalayan salt for subtle variations.
Ingredients for This Easy Homemade Chocolate Syrup
- Unsweetened Cocoa Powder – The foundation of the syrup. It gives that rich, deep chocolate flavor that makes this sauce irresistible. Go for Dutch-processed for smoothness, or natural for a sharper bite.
- Granulated Sugar – Sweetens the syrup and balances the bitterness of the cocoa. You can adjust the amount to taste.
- Water – Acts as the liquid base to dissolve both cocoa and sugar into a pourable consistency.
- Salt – Just a pinch enhances and rounds out the chocolate flavor. Without it, the syrup can taste flat.
- Vanilla Extract – Adds depth and warmth to the syrup, giving it a more complex flavor.
Step 1: Combine the Dry Ingredients
In a medium saucepan, whisk together the cocoa powder, sugar, and salt. This ensures there are no lumps and that everything is evenly distributed before you add any liquid.
Step 2: Add the Water
Slowly pour in the water while continuing to whisk. This helps the dry ingredients dissolve smoothly and avoids clumping. Make sure your saucepan is large enough to allow the syrup to bubble without overflowing.
Step 3: Bring to a Boil
Place the saucepan over medium heat and bring the mixture to a gentle boil. Stir constantly to prevent burning and ensure everything dissolves evenly. Once it reaches a boil, let it simmer for about 3–5 minutes until slightly thickened.
Step 4: Remove from Heat and Add Vanilla
Take the pan off the heat and immediately stir in the vanilla extract. This keeps the vanilla flavor vibrant since high heat can dull it. The syrup will continue to thicken slightly as it cools.
Step 5: Cool and Store
Let the syrup cool to room temperature before transferring it to a clean glass jar or airtight container. It will thicken more as it chills. Store it in the refrigerator and give it a quick stir or warm-up before each use.
How Long to Prepare Easy Homemade Chocolate Syrup
Prep Time
The beauty of this recipe is how fast it comes together. From start to finish, the hands-on prep is only about 2–3 minutes. All you need is a saucepan, a whisk, and a few pantry staples. There’s no chopping, blending, or preheating required.
Cook Time
Once everything is combined, the syrup needs about 5–7 minutes on the stove. This includes bringing it to a boil and allowing it to simmer just long enough to thicken slightly. The entire process takes under 10 minutes.
Tips for Perfect Chocolate Syrup
- Whisk Constantly: This helps prevent clumps and ensures the cocoa and sugar dissolve smoothly.
- Use Medium Heat: Avoid high heat—it can cause scorching or over-thickening.
- Don’t Overcook: The syrup should be slightly thickened but still pourable. It thickens more as it cools.
- Use a Fine Mesh Sieve: If you end up with lumps, strain the syrup while it’s still warm for a silky finish.
- Taste Before Storing: Once off heat, give it a taste and adjust with more vanilla or a pinch of salt if needed.
Watch Out for These Mistakes While Cooking
- Boiling Too Long: Overcooking can turn the syrup too thick or make it grainy.
- Not Stirring Enough: This can lead to uneven texture and burnt spots at the bottom.
- Using Low-Quality Cocoa: The flavor of this syrup relies heavily on the cocoa you choose—cheap cocoa results in flat taste.
- Skipping the Salt: It may seem optional, but a pinch of salt really enhances the chocolate.
- Adding Vanilla Too Early: If vanilla is boiled, it loses its aromatic depth. Always add it after cooking.
What to Serve With Easy Homemade Chocolate Syrup?
1. Ice Cream
Pour it generously over vanilla, chocolate, or coffee ice cream for a classic dessert upgrade.
2. Pancakes or Waffles
Use it as a syrup substitute for a chocolaty breakfast treat.
3. Milk
Stir a tablespoon or two into cold or warm milk for instant homemade chocolate milk.
4. Fresh Fruit
Drizzle over strawberries, bananas, or even orange slices for a quick and elegant snack.
5. Yogurt or Oatmeal
Swirl it into plain yogurt or drizzle over a warm bowl of oats for a sweet twist.
Storage Instructions
Refrigeration
Once cooled, transfer the chocolate syrup to a clean glass jar or airtight container. Store it in the refrigerator, where it will keep for up to 3–4 weeks.
Reheating
The syrup will thicken slightly in the fridge. To use, scoop out what you need and warm it gently in the microwave or in a small pan over low heat. Stir well before serving.
Freezing (Optional)
Though not necessary, you can freeze the syrup in small portions using ice cube trays. Once frozen, transfer the cubes to a zip-top bag for up to 3 months. Thaw and reheat as needed.
Estimated Nutrition
(Per tablespoon, approximate values)
- Calories: 50
- Sugar: 10g
- Sodium: 10mg
- Fat: 0.5g
- Saturated Fat: 0.3g
- Carbohydrates: 12g
- Fiber: 1g
- Protein: 0.5g
Frequently Asked Questions
Can I make this syrup ahead of time?
Yes! It stores beautifully in the fridge for weeks. Just reheat slightly before using.
Is this syrup vegan?
Absolutely. All ingredients are plant-based. Just ensure the sugar you use is vegan-certified if needed.
Can I use this for hot chocolate?
Yes, mix 2–3 tablespoons into a cup of hot milk or plant milk. Stir well and enjoy.
Can I double the recipe?
Definitely. Just use a larger saucepan and keep stirring consistently to avoid scorching.
How do I make it thicker?
Let it simmer an extra 1–2 minutes, but be careful not to overdo it—it thickens more as it cools.
Conclusion
This easy homemade chocolate syrup is everything I want in a kitchen staple—quick, delicious, and made from scratch with ingredients I trust. Whether you’re looking to upgrade your desserts, level up your breakfast, or simply enjoy a nostalgic glass of chocolate milk, this syrup is a go-to winner. Once you try it, you’ll never go back to the store-bought version again.
Easy Homemade Chocolate Syrup
- Total Time: 10 minutes
- Yield: 1 1/4 cups 1x
- Diet: Vegan
Description
This easy homemade chocolate syrup is rich, smooth, and made with simple pantry staples. Perfect for drizzling over ice cream, stirring into milk, or adding to your breakfast favorites. Whether you’re looking for a quick breakfast addition, easy recipe for dessert, or a delicious topping for healthy snacks and food ideas, this homemade syrup delivers pure chocolatey satisfaction in under 10 minutes.
Ingredients
1/2 cup unsweetened cocoa powder
1 cup granulated sugar
1 cup water
1/8 teaspoon salt
1 teaspoon vanilla extract
Instructions
1. In a medium saucepan, whisk together the cocoa powder, sugar, and salt until evenly combined.
2. Slowly add the water while continuing to whisk until the mixture is smooth.
3. Place the saucepan over medium heat and bring the mixture to a boil, stirring constantly.
4. Let it simmer for 3–5 minutes until slightly thickened.
5. Remove from heat and stir in the vanilla extract.
6. Allow the syrup to cool to room temperature before storing.
7. Transfer to a clean glass jar or airtight container and refrigerate.
Notes
The syrup will thicken more as it cools, so don’t overcook it.
For a richer flavor, use Dutch-processed cocoa.
You can double the batch, just make sure to stir constantly and use a larger pot.
- Prep Time: 3 minutes
- Cook Time: 7 minutes
- Category: Dessert Sauce / Syrup
- Method: Stovetop
- Cuisine: American
Nutrition
- Serving Size: 1 tbsp
- Calories: 50
- Sugar: 10g
- Sodium: 10mg
- Fat: 0.5g
- Saturated Fat: 0.3g
- Unsaturated Fat: 0.2g
- Trans Fat: 0g
- Carbohydrates: 12g
- Fiber: 1g
- Protein: 0.5g
- Cholesterol: 0mg