

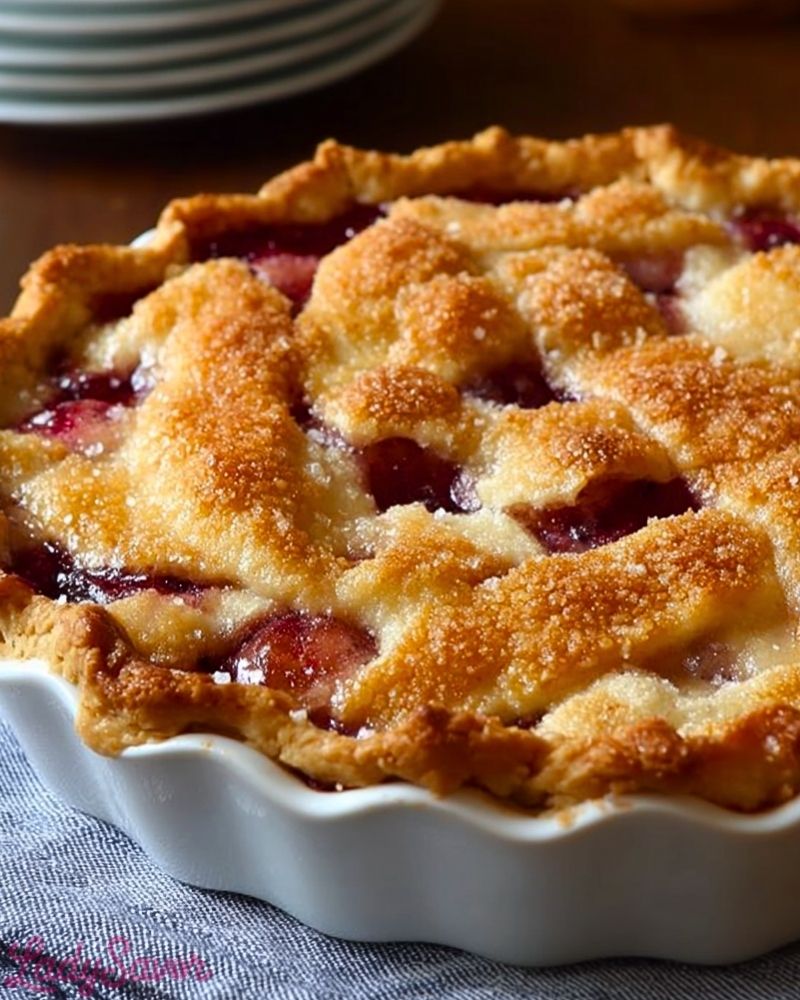
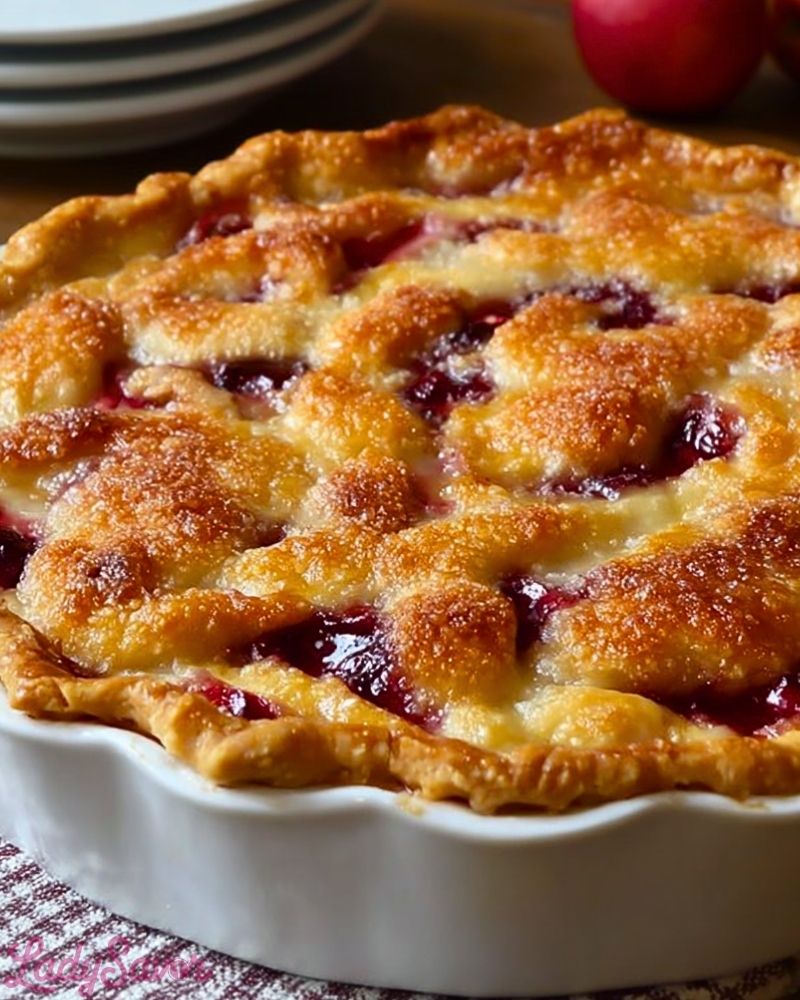
Golden, bubbly, and unapologetically rustic, the Crazy Crust Pie is your ultimate shortcut to pie-making magic. This isn’t your traditional pie with a rolled-out dough — it’s the rebel of the dessert world, creating its own crust as it bakes. That’s right! You pour the batter over the fruit filling, pop it into the oven, and like a culinary magic trick, it forms a buttery, crisp-edged crust that hugs your filling beautifully. No kneading, no chilling, and no pastry cutter in sight.
This pie is the definition of easy comfort food — ideal for weeknights when you’re craving something homemade but can’t be bothered with elaborate steps. It’s endlessly versatile too. Whether you’re working with fresh berries, apples, peaches, or even canned fruit in a pinch, this pie rises to the occasion — literally and figuratively.
Why You’ll Love This Crazy Crust Pie Recipe
- Effortlessly impressive: The crust forms as it bakes. You don’t have to roll, chill, or shape anything.
- Perfect for beginners: No pie crust experience required.
- Quick prep time: From pantry to oven in 10 minutes or less.
- Customizable: Works with any fruit — fresh, frozen, or canned.
- Crowd-pleaser: That golden, slightly crispy edge is addictive.
- Budget-friendly: Uses basic, affordable ingredients.
- One-bowl wonder: Less cleanup, more enjoyment.
- Classic Americana vibes: Tastes like home, with half the work.
Preparation Phase & Tools to Use (Essential Tools and Equipment + Importance of Each Tool)
Making a Crazy Crust Pie is all about simplicity, but the right tools can elevate the process from easy to seamless. Here’s what you’ll need and why:
- 9-inch Pie Dish (Ceramic or Glass Preferred): The pie dish is the star stage for your crust to “crazy-rise.” Ceramic or glass helps distribute heat evenly and ensures that glorious golden crust forms uniformly around the edges.
- Mixing Bowl (Medium Size): All your batter magic happens here. Choose a medium bowl to mix the flour, milk, sugar, and baking essentials. The size prevents spills and gives you space to whisk freely.
- Whisk or Electric Hand Mixer: You’ll need to blend your batter until smooth — a whisk works great, but a hand mixer makes the job faster and smoother, especially if you’re doubling the recipe.
- Rubber Spatula: A spatula helps scrape down the sides of the bowl so no batter goes to waste and ensures an even pour over the fruit filling.
- Measuring Cups and Spoons: Accuracy matters. Using proper measurements ensures your crust texture comes out just right — crisp on the edges and soft in the middle.
- Oven Mitts: This pie comes out hot and bubbly, so keep those mitts ready for safe handling.
- Cooling Rack: Once baked, letting your pie rest on a rack prevents soggy bottoms by allowing airflow underneath the dish.
Preparation Tips
- Preheat Your Oven First: This pie depends on immediate heat activation to form the crust. Always start with a fully preheated oven for best results.
- Don’t Overmix the Batter: Mix just until smooth. Overmixing can lead to a tougher crust.
- Grease Your Pie Dish Lightly: Even though the batter forms a crust, a quick swipe of butter or cooking spray will ensure no sticking issues — especially at the edges.
- Let the Pie Sit for a Few Minutes After Baking: Once it’s out of the oven, give it 10–15 minutes to settle. This helps the crust firm up and makes slicing easier.
- Use Room Temperature Ingredients: This promotes a smoother batter and even baking.
- Layer the Fruit Evenly: Make sure your fruit is spread in a single, even layer across the bottom of the pie dish before pouring the batter.
- Add a Pinch of Salt to Enhance Flavor: Just a dash boosts both the fruit and the crust’s taste without overpowering the sweetness.
- Taste Your Fruit: If it’s especially tart (like some berries), feel free to add a bit of extra sugar to the filling before baking.
Ingredients for This Crazy Crust Pie Recipe
This recipe keeps it simple and accessible — made mostly from pantry staples and your favorite fruit filling. Here’s everything you need:
For the Fruit Filling:
- 2 cups fruit of choice (fresh, frozen, or canned — berries, peaches, apples, cherries all work well)
- 1/4 cup granulated sugar (adjust depending on how sweet or tart your fruit is)
- 1 tablespoon cornstarch (optional, for juicy fruits to thicken filling)
For the Crazy Crust Batter:
- 1 cup all-purpose flour
- 1 cup granulated sugar
- 1 teaspoon baking powder
- 1/4 teaspoon salt
- 1 cup milk (whole milk preferred for richness)
- 1/2 teaspoon vanilla extract
- 1/2 cup unsalted butter, melted
Optional Toppings:
- 1 tablespoon coarse sugar (for a sparkly, crispy topping)
- Whipped cream or vanilla ice cream (for serving)
Note: If you’re using canned fruit, make sure to drain excess syrup to avoid a soggy crust.
Step 1: Preheat the Oven
Set your oven to 375°F (190°C). A fully preheated oven is essential for the batter to rise and form that signature “crazy crust.”
Step 2: Prepare the Pie Dish
Lightly grease a 9-inch pie dish with butter or nonstick spray. This prevents the crust from sticking and helps with easy serving later.
Step 3: Add the Fruit Filling
Evenly spread 2 cups of your chosen fruit into the bottom of the prepared pie dish. If using juicy fruit, sprinkle 1 tablespoon cornstarch and 1/4 cup sugar over the top. Toss gently to coat.
Step 4: Make the Crazy Crust Batter
In a medium mixing bowl, whisk together:
- 1 cup all-purpose flour
- 1 cup granulated sugar
- 1 teaspoon baking powder
- 1/4 teaspoon salt
Add:
- 1 cup milk
- 1/2 teaspoon vanilla extract
Whisk until smooth, then slowly stir in 1/2 cup melted butter until fully incorporated.
Step 5: Pour the Batter Over the Fruit
Gently pour the batter over the fruit in the pie dish. Use a rubber spatula to scrape the bowl and spread the batter evenly, covering most of the fruit (some peeking through is fine).
Step 6: Add Optional Toppings
If desired, sprinkle 1 tablespoon coarse sugar over the top for a golden sparkle and a slightly crunchy finish.
Step 7: Bake the Pie
Place the pie on the center rack and bake for 45–50 minutes, or until the top is golden brown and a toothpick inserted into the crust comes out clean.
Step 8: Cool Before Serving
Remove the pie from the oven and let it cool on a wire rack for 15–20 minutes. This helps the crust firm up and makes slicing neater. Serve warm with whipped cream or ice cream, if desired.
Notes
- Fruit Flexibility: This recipe works beautifully with a wide variety of fruits — blueberries, cherries, sliced peaches, apples, or a medley. You can even mix fresh and frozen fruit.
- Slightly Crispy Edges: Don’t be alarmed if the edges turn golden and crisp while the middle stays softer — that contrast is the charm of a Crazy Crust Pie!
- Make It Seasonal: In fall, try apples with a pinch of cinnamon. In summer, opt for juicy peaches or berries. It adapts to whatever’s in your kitchen or in season.
Watch Out for These Mistakes While Cooking
- Skipping the Grease on the Pie Dish: Even though this pie makes its own crust, a light greasing ensures nothing sticks and slices come out clean.
- Pouring Batter Over a Piled-Up Fruit Mound: Fruit should be evenly spread in a single layer. If it’s too thick in the center, the crust won’t bake evenly.
- Using Too Much Liquid from Canned Fruit: Excess syrup can drown the crust. Always drain canned fruit thoroughly before adding.
- Underbaking: The top should be golden and set. If it’s too pale or jiggly, give it another 5–10 minutes and tent with foil if needed to prevent over-browning.
- Overmixing the Batter: Stir until just smooth. Overmixing can toughen the crust, making it chewy rather than tender.
- Using Cold Ingredients: Cold milk and butter can slow down the rise and interfere with the crust forming properly.
- Cutting Too Soon: Give the pie at least 15 minutes to cool — cutting into it too early can cause a soggy bottom or runny filling.
- Forgetting to Taste-Test the Fruit: Especially with tart berries like cranberries or underripe apples, you may want to increase the sugar to balance flavors.
What to Serve With Crazy Crust Pie?
This warm, fruit-filled pie pairs wonderfully with a variety of accompaniments that enhance its texture and flavor. Whether you’re aiming for something creamy, tangy, or indulgent, these combinations will take your dessert game up a notch.
Here Are 8 Recommendations:
1. Vanilla Ice Cream
The classic combo — creamy, cold ice cream melting into the warm pie creates pure dessert bliss.
2. Whipped Cream
A dollop of lightly sweetened whipped cream adds airy richness without overpowering the fruit.
3. Crème Fraîche or Greek Yogurt
For a tangy twist, serve with a spoonful of crème fraîche or thick Greek yogurt. It balances the sweetness beautifully.
4. Caramel Sauce
Drizzle warm caramel over the top for a decadent touch — especially great with apple or peach versions.
5. Hot Coffee or Espresso
A bold cup of coffee complements the pie’s sweetness and makes for a cozy dessert pairing.
6. Chilled Moscato or Sweet Riesling
If you’re serving guests, a glass of light, fruity wine enhances the pie’s flavor and elevates the experience.
7. Toasted Pecans or Almonds
Sprinkle some toasted nuts on top just before serving for added crunch and a nutty contrast.
8. Cinnamon Sugar Dusting
A light dusting of cinnamon sugar on top adds warmth and texture — perfect for fall fruit combinations like apple or pear.
Storage Instructions
Crazy Crust Pie stores surprisingly well, making it a great make-ahead dessert or next-day treat. Here’s how to store it properly:
- Room Temperature: If your home is cool and the pie doesn’t contain dairy-based toppings (like cream cheese), it can sit covered on the counter for up to 2 days.
- Refrigerator: For longer storage or if topped with cream or ice cream, place the pie in an airtight container or cover tightly with plastic wrap. Store in the fridge for up to 4–5 days.
- Freezer: Crazy Crust Pie can be frozen! Wrap it tightly in plastic wrap and then aluminum foil. Freeze for up to 2 months. Thaw overnight in the fridge before reheating.
- Reheating Tips: Warm individual slices in the microwave for 20–30 seconds, or reheat the whole pie in a 300°F oven for 10–15 minutes to bring back its crispy edges.
Estimated Nutrition
Please note that values may vary slightly depending on fruit and serving size.
- Serving Size: 1 slice (1/8 of pie)
- Calories: ~290 kcal
- Total Fat: 11g
- Saturated Fat: 6g
- Unsaturated Fat: 4g
- Cholesterol: 30mg
- Sodium: 120mg
- Total Carbohydrates: 45g
- Dietary Fiber: 1g
- Total Sugars: 28g
- Added Sugars: ~22g
- Protein: 3g
This dessert is best enjoyed in moderation — sweet, simple, and satisfying.
Frequently Asked Questions
1. Can I use frozen fruit in Crazy Crust Pie?
Absolutely! Just make sure to thaw and drain the fruit well before using to avoid excess moisture, which can make the crust soggy.
2. Why is it called “Crazy Crust” Pie?
Because the batter creates its own crust as it bakes! There’s no rolling or pressing involved — the “crazy” part is how it magically forms a golden edge all on its own.
3. Can I make this recipe gluten-free?
Yes. Swap the all-purpose flour with a 1:1 gluten-free baking blend. It works well and still gives you that crusty top.
4. What if I want to make this pie less sweet?
Reduce the sugar in the batter from 1 cup to 3/4 cup, and taste your fruit filling first — you can also cut back the added sugar there if needed.
5. Can I double this recipe for a larger crowd?
Yes! Use a 9×13-inch baking dish and double all the ingredients. Add about 5–10 extra minutes to the bake time and keep an eye on the crust color.
6. Why did my crust sink in the middle?
This can happen if the fruit was too wet or the batter was underbaked. Be sure to drain fruit well and bake until the top is fully golden and set.
7. Is it okay to use canned fruit or pie filling?
Yes — but drain canned fruit well. If using pre-sweetened pie filling, reduce or omit the sugar from the fruit layer to avoid over-sweetness.
8. How do I know when it’s done baking?
The pie is ready when the top is golden brown, the edges are crisp, and a toothpick inserted into the crust comes out clean or with moist crumbs (not wet batter).
Conclusion
Crazy Crust Pie is more than just a shortcut — it’s a delicious reminder that simple baking can still be magical. Whether you’re working with whatever fruit you have on hand or planning a seasonal treat, this recipe adapts beautifully. It’s fast, forgiving, and endlessly satisfying. With its self-made crust, nostalgic flavor, and one-bowl cleanup, this pie proves that sometimes, the “craziest” ideas in the kitchen are the best ones.
Ready to try it? You’re just one bowl and a handful of fruit away from your next favorite dessert.

Crazy Crust Pie Recipe
- Total Time: 1 hour
- Yield: 8 slices 1x
- Diet: Vegetarian
Description
Meet your new favorite dessert shortcut: Crazy Crust Pie — a quick and easy recipe where the batter *makes its own crust* in the oven. This rustic, one-bowl pie is perfect for any level of baker and is totally customizable with your favorite fruits. Whether you’re after a quick breakfast treat, an easy dinner dessert, or a classic American comfort food idea, this recipe ticks all the boxes. Think crispy edges, soft fruity center, and barely any cleanup. It’s the ultimate easy recipe for busy days or last-minute guests.
Ingredients
2 cups fruit of choice
1/4 cup granulated sugar
1 tablespoon cornstarch
1 cup all-purpose flour
1 cup granulated sugar
1 teaspoon baking powder
1/4 teaspoon salt
1 cup milk
1/2 teaspoon vanilla extract
1/2 cup unsalted butter, melted
1 tablespoon coarse sugar (optional)
Whipped cream or vanilla ice cream (for serving)
Instructions
1. Preheat oven to 375°F (190°C).
2. Lightly grease a 9-inch pie dish with butter or nonstick spray.
3. Evenly spread 2 cups of your chosen fruit into the bottom of the pie dish. If using juicy fruit, sprinkle 1 tablespoon cornstarch and 1/4 cup sugar over it and toss gently.
4. In a medium bowl, whisk together flour, sugar, baking powder, and salt.
5. Add milk and vanilla extract. Whisk until smooth, then stir in melted butter.
6. Pour the batter over the fruit and spread evenly with a spatula.
7. Sprinkle coarse sugar on top if desired.
8. Bake for 45–50 minutes, or until the top is golden and a toothpick inserted in the center comes out clean.
9. Cool on a wire rack for 15–20 minutes before slicing.
10. Serve warm with whipped cream or vanilla ice cream.
Notes
You can use fresh, frozen, or canned fruit — just be sure to drain well if using canned.
Let the pie cool for at least 15 minutes before cutting so the crust sets properly.
Adding coarse sugar on top creates a lovely crispy finish.
- Prep Time: 10 minutes
- Cook Time: 50 minutes
- Category: Dessert
- Method: Baking
- Cuisine: American
Nutrition
- Serving Size: 1 slice
- Calories: 290
- Sugar: 28g
- Sodium: 120mg
- Fat: 11g
- Saturated Fat: 6g
- Unsaturated Fat: 4g
- Trans Fat: 0g
- Carbohydrates: 45g
- Fiber: 1g
- Protein: 3g
- Cholesterol: 30mg