
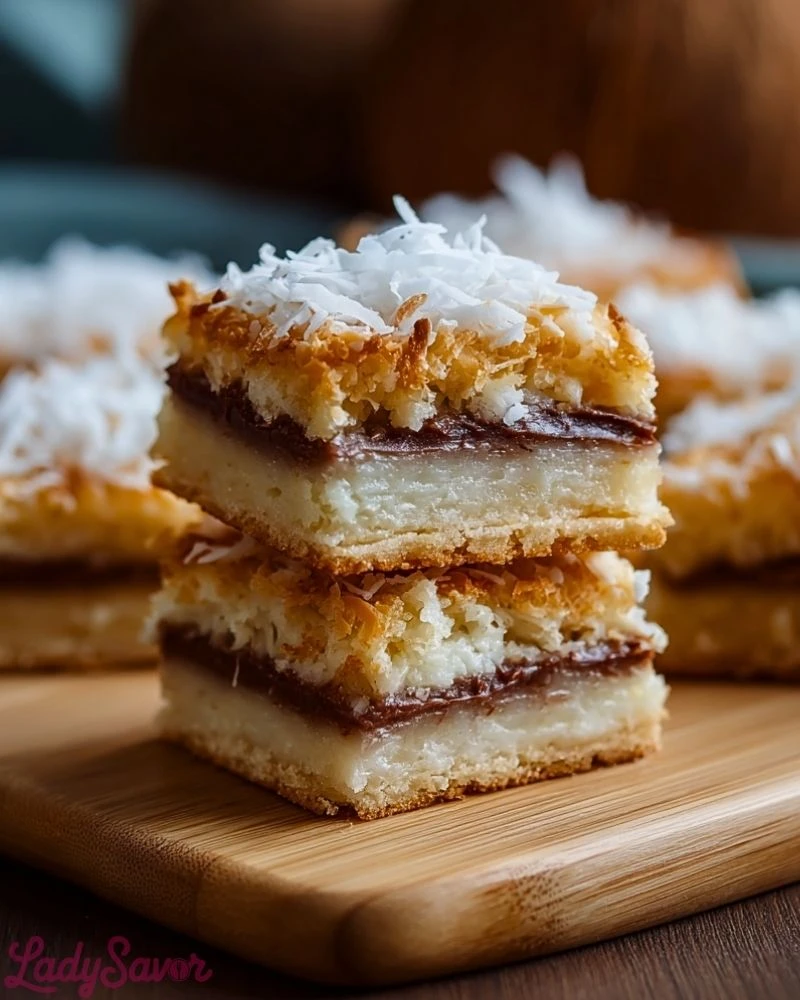
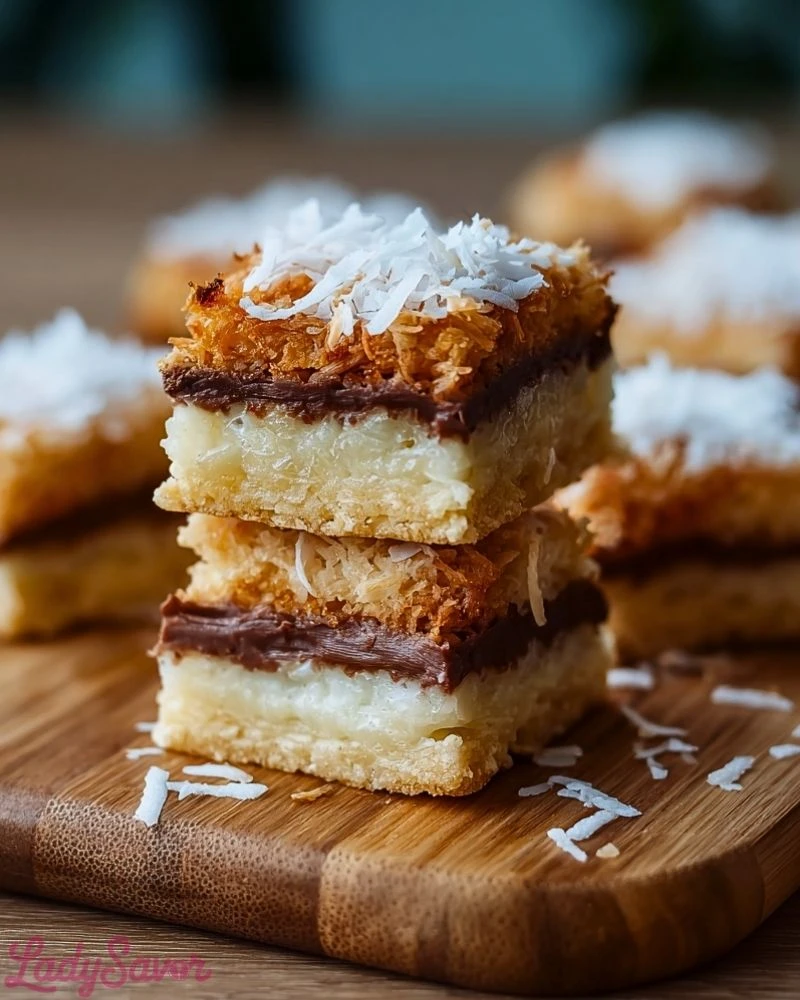
I’ve always had a soft spot for coconut desserts, and these Coconut Dream Bars are exactly the kind of treat that feels like a warm hug. Imagine biting into layers of buttery shortbread, sweet coconut filling, a touch of gooey chocolate, and a final flurry of toasted coconut flakes. It’s the kind of bar you serve at gatherings and end up scribbling the recipe down for half your guests before the night is over.
What I love most about this recipe is how it turns simple pantry staples into something that feels completely indulgent. Whether you’re making a tray for a potluck, a bake sale, or just to treat yourself on a weekend, these bars hit that sweet spot between comforting and crave-worthy. They’re rich, chewy, a little crunchy, and packed with flavor.
Why You’ll Love These Coconut Dream Bars
These bars are a texture-lover’s dream. The base is buttery and firm, while the middle is gooey with coconut and sometimes chocolate, and the top has a little crunch from toasted flakes. They store beautifully and taste even better the next day, making them perfect for make-ahead treats. Plus, you don’t need to be a professional baker to pull them off — they’re surprisingly easy to make.
What Kind of Coconut Should I Use?
I recommend using sweetened shredded coconut for the best chewy texture and sweetness level. You can also use unsweetened if you prefer a less sugary bite, but the flavor won’t be quite as dessert-like. Toasting the coconut for the topping adds a great nutty depth and contrast.
Options for Substitutions
You can easily adapt Coconut Dream Bars to fit your preferences or dietary needs. Swap the butter for plant-based margarine if you want them dairy-free. Add a layer of melted dark chocolate for extra richness, or use almond flour in the crust for a gluten-free twist. Not a fan of chocolate? Skip it entirely and double down on the coconut for a tropical feel.
Ingredients for These Coconut Dream Bars
Unsalted Butter – Creates a rich, tender shortbread crust that acts as the sturdy foundation of the bars.
Granulated Sugar – Adds sweetness to both the crust and the coconut layer, balancing the flavors.
All-Purpose Flour – Used to build the buttery base and provide structure to the bar.
Salt – A pinch enhances all the sweet flavors and rounds out the taste.
Sweetened Shredded Coconut – The star ingredient, giving that chewy, tropical texture and flavor.
Sweetened Condensed Milk – Binds the coconut filling and adds creamy sweetness with a caramelized edge.
Vanilla Extract – Just a splash boosts the warm, comforting flavor of the coconut.
Semi-Sweet Chocolate Chips (optional) – Melted on top of the crust or swirled through the filling, they bring in a chocolatey contrast.
Egg – Helps to set the coconut mixture and keeps it from falling apart.
Toasted Coconut (for topping) – Adds texture and an irresistible golden finish.
Step 1: Make the Shortbread Crust
Preheat your oven to 350°F (175°C). In a mixing bowl, cream together the softened butter and sugar until light and fluffy. Mix in the flour and salt until a crumbly dough forms. Press this evenly into the bottom of a greased or parchment-lined 9×13-inch baking dish. Bake for 12-15 minutes, or until just golden at the edges.
Step 2: Prepare the Coconut Filling
In a separate bowl, mix together the shredded coconut, sweetened condensed milk, vanilla extract, and egg until fully combined. If you’re using chocolate chips, you can either stir them into the filling or save them for a separate layer.
Step 3: Assemble the Layers
Once the crust is out of the oven, let it cool slightly. If you’re adding a chocolate layer, sprinkle the chocolate chips over the warm crust and let them melt, then spread them evenly. Pour the coconut mixture over the crust (and chocolate, if using), and spread it out evenly to the edges.
Step 4: Add the Topping
Sprinkle an even layer of sweetened or toasted shredded coconut over the top. You can toast the coconut beforehand for more texture and color, or let it toast in the oven as the bars bake.
Step 5: Bake to Golden Perfection
Return the dish to the oven and bake for 20-25 minutes, or until the top is golden brown and the filling is set. You should see a slight jiggle, but the edges will be firm.
Step 6: Cool and Slice
Allow the bars to cool completely in the pan before slicing. For the cleanest cuts, chill them in the fridge for about 30 minutes before slicing with a sharp knife.
How Long to Prepare Coconut Dream Bars
Prep Time: Most of the prep involves mixing and layering, which takes about 20 minutes. The shortbread crust comes together quickly with minimal effort, and the coconut filling is just a stir-and-spread situation.
Baking and Cooling Time: The crust bakes for 12–15 minutes initially, followed by another 20–25 minutes once the coconut filling is added. Cooling is key — it takes at least 1 hour for the bars to fully set, with best slicing results after refrigeration.
Tips for Perfect Coconut Dream Bars
- Room Temperature Butter: Using soft butter ensures your crust blends smoothly and presses evenly into the pan.
- Even Layers: Smooth out each layer with a spatula to get clean, defined lines in each bite.
- Toast the Coconut: Pre-toasting the topping coconut intensifies flavor and creates a beautiful golden finish.
- Cool Completely: Always let the bars cool before cutting. A chilled bar slices cleanly and holds its shape.
- Use Parchment Paper: For easy removal, line your baking dish and lift the whole slab out before slicing.
Watch Out for These Mistakes While Cooking
- Overbaking the Crust: If the first bake goes too long, the crust becomes too hard. Just a light golden edge is enough.
- Too Much Filling: Don’t overfill the bars, or they may become soggy and won’t set properly.
- Cutting Too Soon: Slicing warm bars can result in a sticky mess. Patience pays off.
- Skipping the Toasting: Untoasted coconut on top can look and taste flat.
- Forgetting Salt: That pinch of salt in the crust brings all the sweetness to life — don’t leave it out.
What to Serve With Coconut Dream Bars?
1. Fresh Tropical Fruit Platter
Pineapple, mango, and kiwi pair beautifully with the coconut flavor.
2. Coffee or Espresso
The slight bitterness balances the sweetness of the bars.
3. Vanilla Ice Cream
A scoop of ice cream adds creamy contrast to the chewy, nutty texture.
4. Dark Chocolate Drizzle
Add an extra layer of indulgence when serving by drizzling melted dark chocolate on top.
5. Sparkling Water with Lime
A refreshing drink that cleanses the palate and lets the coconut shine.
Storage Instructions
Room Temperature: If you’re serving the bars the same day, they can sit out for a few hours in an airtight container. Avoid heat or sunlight.
Refrigerator: Store leftovers in an airtight container in the fridge for up to 5 days. The texture becomes chewier, and the flavor deepens overnight.
Freezer: Coconut Dream Bars freeze beautifully. Wrap tightly in plastic wrap and then foil or a zip-top bag. Thaw overnight in the fridge or for a couple of hours at room temperature before serving.
Estimated Nutrition
Per bar (approx. based on 24 servings):
- Calories: 230
- Total Fat: 13g
- Saturated Fat: 9g
- Carbohydrates: 25g
- Sugar: 18g
- Protein: 2g
- Fiber: 1g
- Sodium: 70mg
Frequently Asked Questions
What size pan should I use for Coconut Dream Bars?
A 9×13-inch pan works best for evenly baked layers. You can halve the recipe and use an 8×8-inch pan if needed.
Can I make these bars ahead of time?
Absolutely. They taste even better the next day after chilling in the fridge.
Are these bars gluten-free?
The base recipe isn’t, but you can swap the all-purpose flour with a gluten-free flour blend and still get delicious results.
Can I skip the chocolate layer?
Yes! They’re just as delicious without chocolate, letting the coconut shine even more.
How do I toast shredded coconut?
Spread it on a baking sheet and bake at 325°F (165°C) for 5–8 minutes, stirring occasionally until golden.
Conclusion
Coconut Dream Bars are the perfect dessert when you want something that feels decadent yet easy to make. With their buttery base, chewy coconut layer, and optional chocolate twist, they bring a satisfying contrast of textures and flavors in every bite. Whether you’re making them for a party, holiday tray, or a cozy weekend treat, they deliver every single time. Plus, they store and travel well, so you’ll want to make a double batch. Once you try them, they just might become your go-to bar recipe!

Coconut Dream Bars
- Total Time: 1 hour
- Yield: 24 bars 1x
Description
These Coconut Dream Bars are the ultimate quick dessert fix — layered with buttery shortbread, gooey sweet coconut filling, optional chocolate, and a sprinkle of toasted coconut on top. Whether you’re in need of an easy recipe for a bake sale, something sweet for a potluck, or simply looking for delicious food ideas to prep ahead for the week, these bars have your back. They’re a perfect choice for anyone who loves chewy, rich textures and crave-worthy flavor. A great addition to your healthy snack rotation, indulgent breakfast ideas, or last-minute dinner ideas for a sweet ending.
Ingredients
1 cup unsalted butter
1/2 cup granulated sugar
2 cups all-purpose flour
1/4 teaspoon salt
3 cups sweetened shredded coconut
1 can (14 oz) sweetened condensed milk
1 teaspoon vanilla extract
1 cup semi-sweet chocolate chips (optional)
1 large egg
1/2 cup toasted shredded coconut (for topping)
Instructions
1. Preheat the oven to 350°F (175°C) and line a 9×13-inch baking dish with parchment paper.
2. In a large bowl, cream together the butter and sugar until light and fluffy.
3. Add the flour and salt, mixing until a crumbly dough forms.
4. Press the dough evenly into the prepared dish to form the crust. Bake for 12–15 minutes until lightly golden at the edges.
5. While the crust bakes, mix shredded coconut, sweetened condensed milk, vanilla extract, and egg in a separate bowl.
6. If using chocolate chips, either stir them into the coconut mixture or reserve them to sprinkle over the baked crust.
7. Remove the crust from the oven, let it cool slightly, then add chocolate chips (if using) and spread the coconut filling evenly over the crust.
8. Sprinkle toasted coconut on top for extra flavor and texture.
9. Return to the oven and bake for 20–25 minutes until golden brown and set.
10. Allow the bars to cool completely, then refrigerate for at least 30 minutes before slicing into squares.
Notes
Let the bars chill before slicing for cleaner, neater cuts.
Don’t skip the vanilla extract — it enhances the coconut’s natural flavor.
You can freeze the bars for up to 2 months; just thaw before serving.
- Prep Time: 20 minutes
- Cook Time: 40 minutes
- Category: Dessert
- Method: Baking
- Cuisine: American
Nutrition
- Serving Size: 1 bar
- Calories: 230
- Sugar: 18g
- Sodium: 70mg
- Fat: 13g
- Saturated Fat: 9g
- Unsaturated Fat: 3g
- Trans Fat: 0g
- Carbohydrates: 25g
- Fiber: 1g
- Protein: 2g
- Cholesterol: 25mg