
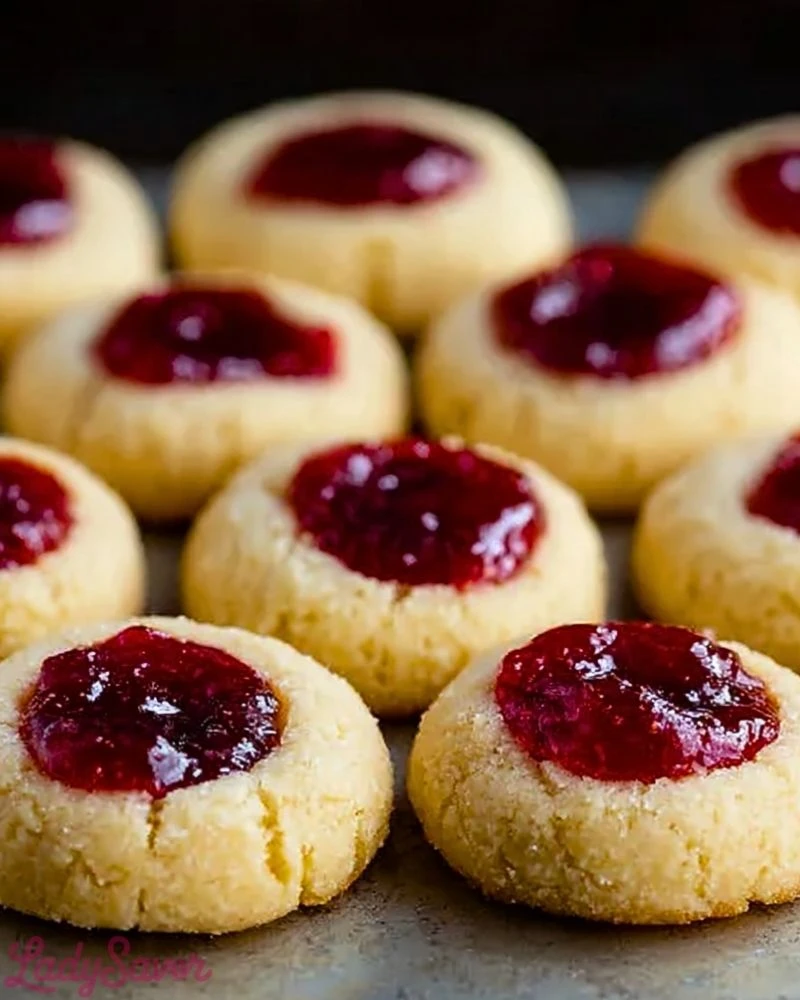
These Classic Butter Thumbprint Cookies are a delightful treat that marries rich, buttery shortbread with the sweet tang of jam. Their melt-in-your-mouth texture and burst of fruity flavor in every bite make them a standout on any cookie platter. Whether you’re baking for a holiday, a special occasion, or just because, these cookies are a nostalgic favorite that always earns compliments.
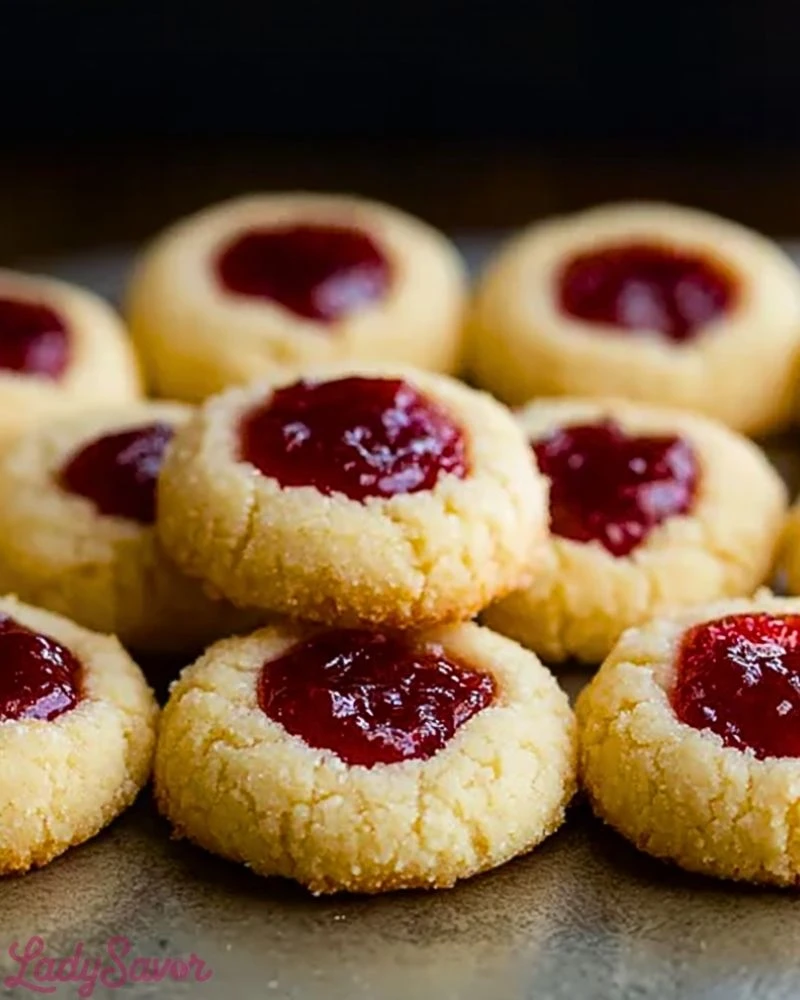
The beauty of these cookies lies in their simplicity. The dough is soft and easy to handle, shaped into perfect rounds with a gentle indentation at the center to cradle your favorite jam. Strawberry, raspberry, or apricot—the choice is yours. The glossy jam center contrasts beautifully with the tender crumb of the cookie, creating a bite that’s both satisfying and stunning.
Why You’ll Love This Classic Butter Thumbprint Cookies Recipe
- Buttery, soft texture that practically melts in your mouth.
- Customizable with your favorite jam flavors.
- Perfect for gifting, parties, or festive gatherings.
- Simple, pantry-friendly ingredients.
- A charming, nostalgic treat with beautiful presentation.
Preparation Phase & Tools to Use (Essential Tools and Equipment)
To make these cookies, you’ll need a few basic but essential kitchen tools:
- Mixing Bowls: For creaming butter, sugar, and combining dry ingredients.
- Hand or Stand Mixer: Crucial for properly creaming the butter and sugar to achieve a light and fluffy texture.
- Measuring Cups and Spoons: Precision is key to the perfect cookie.
- Small Cookie Scoop or Spoon: Ensures uniform cookie sizes.
- Baking Sheet: A rimless or flat baking sheet lined with parchment paper ensures even baking.
- Thumb or Rounded Utensil Handle: Used to create the signature thumbprint indentation without cracking the dough.
Each tool contributes to making the process smooth and consistent, ensuring your cookies bake evenly and look picture-perfect.
Preparation Tips
Chill the dough for at least 30 minutes before rolling into balls to make it easier to handle and prevent spreading during baking. Roll each ball in sugar before pressing the center to add an extra crunch and sparkle. When making the indent, do it gently to avoid cracking the sides, and if the edges do split, simply press them back together. Add the jam after forming the thumbprints, and don’t overfill—just enough to nestle in the center. For a neat finish, use a piping bag or small spoon to drop the jam precisely.
Ingredients for this Classic Butter Thumbprint Cookies Recipe
- 1 cup (226g) unsalted butter, softened
- 2/3 cup (135g) granulated sugar (plus extra for rolling)
- 1/2 teaspoon salt
- 1 teaspoon vanilla extract
- 2 cups (240g) all-purpose flour
- 1/2 cup (160g) fruit jam or preserves (strawberry, raspberry, or apricot work best)
Optional:
- 1/4 teaspoon almond extract (for a subtle nutty undertone)
- Powdered sugar for light dusting after baking (for presentation)
Step 1: Cream the Butter and Sugar
In a large mixing bowl, cream the softened butter and granulated sugar together using a hand or stand mixer. Beat for about 2–3 minutes on medium speed until the mixture is light and fluffy. This step is crucial for achieving that soft, melt-in-your-mouth cookie texture.
Step 2: Add Vanilla and Salt
Mix in the vanilla extract and salt (add almond extract here if using). Continue beating for another 30 seconds to fully incorporate the flavors.
Step 3: Add the Flour
Gradually add the all-purpose flour to the creamed mixture. Mix on low speed until the dough comes together. The dough may look crumbly at first, but keep mixing—it will form a soft, pliable dough. Avoid overmixing to keep the cookies tender.
Step 4: Chill the Dough
Wrap the dough in plastic wrap and chill in the refrigerator for 30–60 minutes. Chilling helps firm up the dough, making it easier to shape and preventing the cookies from spreading too much during baking.
Step 5: Preheat and Prepare
Preheat your oven to 350°F (175°C). Line baking sheets with parchment paper or silicone baking mats. This ensures the cookies bake evenly and prevents sticking.
Step 6: Shape the Cookies
Scoop tablespoon-sized amounts of dough and roll into smooth balls. Roll each ball lightly in granulated sugar for a touch of crunch and shine. Place them 2 inches apart on the prepared baking sheet.
Step 7: Make the Thumbprint Indentation
Using your thumb or the rounded end of a kitchen utensil (like the handle of a wooden spoon), gently press an indentation into the center of each ball. If the dough cracks, smooth the edges with your fingers.
Step 8: Fill with Jam
Spoon about 1/2 teaspoon of your chosen jam into each indentation. Don’t overfill, as the jam may bubble over during baking. A piping bag or small spoon works best for neat filling.
Step 9: Bake
Bake the cookies for 12–14 minutes or until the edges are just lightly golden. The centers will still be soft. Avoid overbaking to preserve the soft texture.
Step 10: Cool and Serve
Allow cookies to cool on the baking sheet for 5 minutes before transferring to a wire rack to cool completely. Once cooled, optionally dust with powdered sugar for an elegant finish.
These cookies are best enjoyed fresh but can also be stored or gifted beautifully!
Notes
For the best flavor, use high-quality butter and real vanilla extract. Softened butter should still be slightly cool to the touch—not melted or too warm. If using different jam flavors, try to match the color contrast with the cookie for visual appeal. These cookies also make a fantastic base for holiday cookie decorating or gift boxes. Let them cool completely before stacking or packaging to avoid smudging the jam centers.
Watch Out for These Mistakes While Cooking
- Skipping the chill time: This can cause cookies to spread too much and lose their shape.
- Overfilling with jam: A little goes a long way—too much will cause it to overflow and get messy.
- Pressing too hard: If you make the indentation too deep or too wide, the cookie may crack or flatten excessively.
- Overbaking: These cookies should be lightly golden on the bottom but still pale on top. Overbaking leads to dry, crumbly cookies.
- Not measuring flour properly: Use the spoon-and-level method. Too much flour results in dense cookies.
Storage Instructions
Store cooled cookies in an airtight container at room temperature for up to 5 days. If stacking, place parchment or wax paper between layers to protect the jam centers. For longer storage, freeze unfilled, baked cookies in an airtight bag for up to 2 months. Add jam after thawing for best results. If you freeze the filled cookies, expect a slight texture change in the jam but still delicious.
Estimated Nutrition (Per Cookie – Based on 24 cookies total)
- Calories: 110
- Fat: 6g
- Saturated Fat: 3.8g
- Cholesterol: 15mg
- Sodium: 40mg
- Carbohydrates: 13g
- Sugar: 6g
- Fiber: 0.2g
- Protein: 1g
Frequently Asked Questions
Can I use salted butter instead of unsalted?
Yes, but reduce the added salt in the recipe to 1/4 teaspoon.
What kind of jam works best?
Fruit jams with a thicker consistency like raspberry, strawberry, or apricot work beautifully.
Can I make the dough ahead of time?
Absolutely. Wrap and refrigerate the dough for up to 48 hours, or freeze for longer storage.
How do I prevent the cookies from cracking?
Chill the dough, roll it smoothly, and press the indent gently. If cracks appear, patch them gently with your fingers.
Can I fill them after baking instead?
Yes. You can bake the cookies without jam, then fill them once cooled for a cleaner look.
Do I need to refrigerate the cookies after baking?
No, they can stay at room temperature. Just keep them in an airtight container.
How do I make them gluten-free?
Substitute a good 1:1 gluten-free baking flour. Texture may vary slightly.
Can I use other fillings besides jam?
Yes! Try lemon curd, Nutella, caramel, or even chocolate ganache for a twist.
Conclusion
Classic Butter Thumbprint Cookies are a timeless treat that combines rich, buttery dough with sweet fruity centers. They’re easy to make, customizable, and always look as good as they taste. With the right prep and a few pro tips, you’ll have bakery-worthy cookies ready for any occasion—perfect for sharing or keeping all to yourself.
Classic Butter Thumbprint Cookies
- Total Time: 1 hour 15 minutes
- Yield: 24 cookies 1x
Description
Buttery, soft, and filled with sweet fruity goodness, Classic Butter Thumbprint Cookies are a must-try for any baking enthusiast. These easy cookies are perfect for any season—whether you’re prepping quick holiday cookies, searching for kid-friendly snack ideas, or need a classic, foolproof dessert to impress guests. With pantry staples and customizable jam fillings, this easy recipe delivers beautiful, bakery-style results every time. Great for easy desserts, holiday baking, quick sweets, and homemade food gifts.
Ingredients
1 cup unsalted butter, softened
2⁄3 cup granulated sugar
1⁄2 teaspoon salt
1 teaspoon vanilla extract
2 cups all-purpose flour
1⁄2 cup fruit jam or preserves (strawberry, raspberry, or apricot)
1⁄4 teaspoon almond extract (optional)
Powdered sugar for dusting (optional)
Instructions
1. In a large bowl, cream softened butter and granulated sugar for 2–3 minutes until light and fluffy.
2. Mix in vanilla extract, salt, and almond extract if using.
3. Gradually add flour and mix until a soft dough forms.
4. Wrap and chill dough for 30–60 minutes.
5. Preheat oven to 350°F (175°C) and line baking sheets with parchment paper.
6. Roll tablespoon-sized dough balls and coat with granulated sugar.
7. Gently press a thumbprint or rounded utensil into the center of each ball.
8. Fill each indent with 1⁄2 teaspoon jam using a small spoon or piping bag.
9. Bake for 12–14 minutes until edges are lightly golden.
10. Cool on the sheet for 5 minutes, then transfer to a wire rack. Dust with powdered sugar if desired.
Notes
Chill the dough to help shape cookies and prevent spreading.
Use thicker jams to avoid overflow while baking.
Dust with powdered sugar after cooling for an elegant finish.
- Prep Time: 15 minutes
- Cook Time: 14 minutes
- Category: Dessert
- Method: Baking
- Cuisine: American
Nutrition
- Serving Size: 1 cookie
- Calories: 110
- Sugar: 6g
- Sodium: 40mg
- Fat: 6g
- Saturated Fat: 3.8g
- Unsaturated Fat: 1.8g
- Trans Fat: 0g
- Carbohydrates: 13g
- Fiber: 0.2g
- Protein: 1g
- Cholesterol: 15mg