
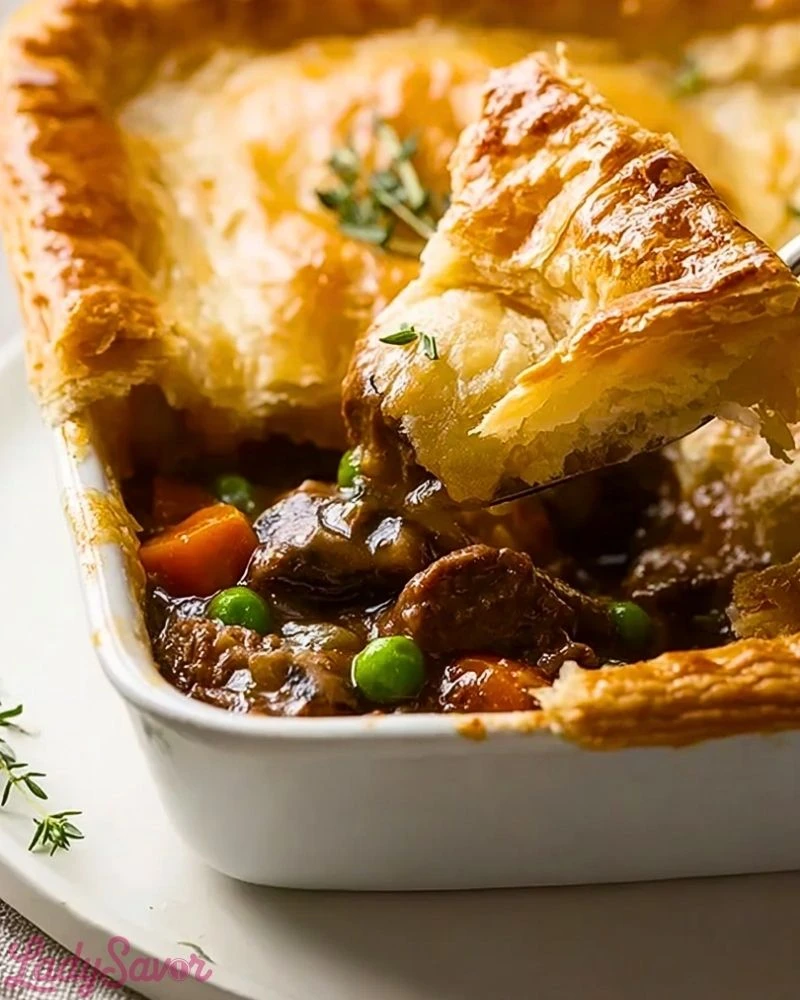
A bubbling, golden-brown Classic Beef Pot Pie is the kind of dish that brings immediate comfort. This dish layers tender chunks of slow-cooked beef with sweet peas and carrots in a rich, savory gravy, all topped with a flaky, buttery puff pastry crust. It’s the kind of hearty, soul-warming meal that feels like a hug on a plate, perfect for chilly nights or a cozy weekend dinner.
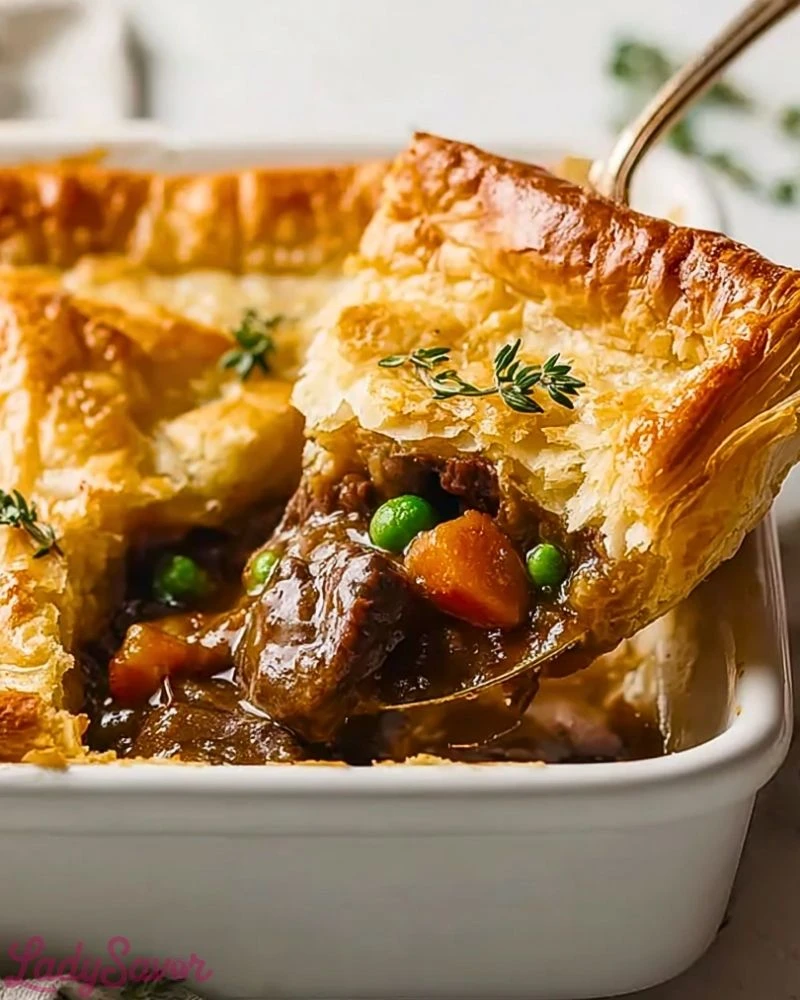
What makes this beef pot pie truly shine is its perfect balance of textures and flavors—the beef is melt-in-your-mouth tender, the vegetables are just soft enough to hold their shape, and the pastry delivers that irresistible crunch with every bite. Whether served as the centerpiece of a family dinner or portioned into individual ramekins for guests, this dish is a timeless classic with a gourmet touch.
Why You’ll Love This Classic Beef Pot Pie
- Deep, comforting flavor thanks to slow-simmered beef and aromatic herbs.
- Flaky, golden puff pastry creates an irresistible topping.
- Perfect for make-ahead meals—simply reheat and enjoy.
- A full meal in one dish, with meat, vegetables, and a crust.
- Impressive presentation with minimal effort.
Preparation Phase & Tools to Use
Before diving into cooking, it’s important to set yourself up for success with the right tools:
- Dutch Oven or Heavy-Bottomed Pot – Essential for searing beef and simmering the stew evenly.
- Sharp Chef’s Knife – Needed for uniform chopping of veggies and cubing the beef.
- Wooden Spoon or Silicone Spatula – For stirring without scratching your cookware.
- Baking Dish (9×13 or similar) – To assemble and bake the pot pie.
- Rolling Pin – If using sheet pastry that needs to be rolled out to fit your dish.
- Pastry Brush – To give the crust that beautiful golden sheen with an egg wash.
Each of these tools plays a role in ensuring your beef pot pie turns out rich in flavor, evenly cooked, and beautifully presented.
Preparation Tips
For the most flavorful filling, take the time to brown the beef in batches—this builds a deep base of flavor. Don’t rush this step. Use a bit of red wine or beef broth to deglaze the pan and lift those tasty browned bits. Let the stew simmer slowly until the meat becomes fork-tender. As for the pastry, keep it cold until ready to bake; this helps achieve maximum puff and flakiness. If you’re prepping ahead, you can make the filling a day in advance and assemble the pie right before baking for a stress-free mealtime.
Ingredients for this Classic Beef Pot Pie
- 2 lbs beef chuck, cut into 1-inch cubes
- 2 tablespoons olive oil
- 1 large onion, diced
- 2 cloves garlic, minced
- 3 carrots, peeled and sliced
- 2 stalks celery, chopped
- 1 cup frozen peas
- 2 tablespoons tomato paste
- 1 tablespoon Worcestershire sauce
- 1/2 cup red wine (optional, or substitute with beef broth)
- 2 cups beef broth
- 2 tablespoons all-purpose flour
- 1 teaspoon fresh thyme (or 1/2 tsp dried)
- 1/2 teaspoon rosemary
- Salt and freshly ground black pepper, to taste
- 1 sheet puff pastry, thawed
- 1 egg, beaten (for egg wash)
Step 1: Brown the Beef
Heat olive oil in a Dutch oven over medium-high heat. Brown the beef in batches so the pieces sear instead of steam. Remove and set aside once all beef is browned.
Step 2: Sauté the Aromatics
In the same pot, reduce heat to medium. Add diced onions, garlic, carrots, and celery. Cook for 5–7 minutes until softened and fragrant.
Step 3: Build the Flavor
Stir in tomato paste and Worcestershire sauce, cooking for 1–2 minutes. Pour in red wine (if using) to deglaze the pot, scraping up the browned bits from the bottom. Let it simmer for 2–3 minutes.
Step 4: Simmer the Filling
Return the beef to the pot. Sprinkle with flour and stir well. Add beef broth, thyme, rosemary, salt, and pepper. Bring to a boil, then reduce heat and cover. Let it simmer for 1.5 to 2 hours, or until beef is tender and the mixture thickens.
Step 5: Add the Peas
Stir in the frozen peas and cook uncovered for another 5 minutes. Adjust seasoning if necessary. Let the mixture cool slightly before transferring to a baking dish.
Step 6: Top with Pastry
Preheat your oven to 400°F (200°C). Roll out the puff pastry to fit your baking dish if needed. Lay it over the filling and trim any excess. Press the edges down with a fork. Cut a few slits on top to allow steam to escape.
Step 7: Bake the Pot Pie
Brush the pastry with the beaten egg. Bake for 25–30 minutes or until the crust is puffed and golden brown.
Step 8: Rest and Serve
Let the pot pie rest for 5–10 minutes before serving to allow the filling to settle and cool slightly. Enjoy warm.
Notes
For even deeper flavor, prepare the beef filling a day ahead and let it sit in the refrigerator overnight—this enhances the richness of the gravy. If you’re pressed for time, you can substitute with store-bought beef stew, but the homemade version is far more flavorful. Always taste and adjust salt and seasoning at the end before topping with the pastry.
Watch Out for These Mistakes While Cooking
- Skipping the browning step: Browning the beef adds irreplaceable flavor depth.
- Not deglazing the pot: Those caramelized bits on the bottom are flavor gold.
- Using cold filling with pastry: Make sure the filling is slightly cooled to avoid soggy pastry bottoms.
- Overbaking the crust: Puff pastry cooks quickly—watch it closely once it starts browning.
- Not sealing the pastry edges: This can cause the filling to bubble out during baking.
Storage Instructions
Let the pot pie cool completely before storing. Cover and refrigerate leftovers for up to 4 days. To reheat, place in a 350°F (175°C) oven for 20–25 minutes until heated through and the crust is crisp again. Avoid microwaving, as it will make the pastry soggy. For freezing, assemble the pie without baking, wrap tightly, and freeze for up to 2 months. Bake from frozen, adding 10–15 minutes to cooking time.
Estimated Nutrition
- Calories: 520 per serving
- Protein: 30g
- Fat: 30g
- Saturated Fat: 12g
- Carbohydrates: 32g
- Fiber: 3g
- Sugar: 5g
- Sodium: 710mg
- Cholesterol: 85mg
Frequently Asked Questions
What cut of beef is best for pot pie?
Beef chuck works best due to its marbling and tenderness after slow cooking.
Can I use store-bought pie crust instead of puff pastry?
Yes, but puff pastry offers a flakier and lighter texture.
How do I make this dish gluten-free?
Use a gluten-free flour blend for thickening and a gluten-free pastry alternative.
Can I make this ahead of time?
Absolutely. The filling can be made a day ahead, and the whole pie can be assembled and refrigerated until ready to bake.
How do I avoid soggy pastry?
Make sure the filling has cooled slightly before adding the pastry, and cut vents for steam to escape.
Can I add potatoes to the filling?
Yes, diced potatoes can be added, but parboil them first to avoid excess moisture.
What can I substitute for red wine?
Use more beef broth or add a splash of balsamic vinegar for acidity.
Is it okay to use frozen mixed vegetables?
Definitely. Frozen peas, carrots, and corn work well—just stir them in toward the end.
Conclusion
Classic Beef Pot Pie is more than just a meal—it’s a celebration of comfort, flavor, and tradition. With tender beef, vibrant vegetables, and a crisp, golden topping, it’s a dish that satisfies both the soul and the stomach. Whether you’re cooking for a cozy family dinner or prepping make-ahead meals, this pot pie offers a delightful experience every time. Once you master this recipe, it’s bound to become a go-to in your cold-weather meal rotation.

Classic Beef Pot Pie
- Total Time: 3 hours
- Yield: 6 servings 1x
Description
Craving comfort food that feels gourmet yet cozy? This Classic Beef Pot Pie is your go-to! Tender beef chuck slowly simmered with carrots, peas, and aromatic herbs creates a hearty filling, wrapped in a golden puff pastry crust that’s crisp and buttery. Perfect for easy dinner nights, cold-weather food ideas, or impressive meal prep. It’s the kind of easy recipe that looks fancy but feels like home.
Ingredients
2 lbs beef chuck, cut into 1-inch cubes
2 tablespoons olive oil
1 large onion, diced
2 cloves garlic, minced
3 carrots, peeled and sliced
2 stalks celery, chopped
1 cup frozen peas
2 tablespoons tomato paste
1 tablespoon Worcestershire sauce
1/2 cup red wine (or substitute with beef broth)
2 cups beef broth
2 tablespoons all-purpose flour
1 teaspoon fresh thyme (or 1/2 tsp dried)
1/2 teaspoon rosemary
Salt and freshly ground black pepper, to taste
1 sheet puff pastry, thawed
1 egg, beaten (for egg wash)
Instructions
1. Heat olive oil in a Dutch oven and brown the beef in batches. Remove and set aside.
2. In the same pot, cook onion, garlic, carrots, and celery until softened.
3. Stir in tomato paste and Worcestershire, then deglaze with wine.
4. Return beef to the pot. Add flour, stir, then add broth and herbs. Simmer for 1.5–2 hours.
5. Stir in peas, simmer 5 more minutes. Let mixture cool slightly.
6. Transfer filling to a baking dish. Top with puff pastry, cut slits for steam.
7. Brush with egg wash and bake at 400°F (200°C) for 25–30 minutes.
8. Let rest for 5–10 minutes before serving.
Notes
For best flavor, prepare the beef filling a day ahead—it gets better overnight.
Let the filling cool before topping with pastry to prevent sogginess.
Deglaze the pan properly to maximize flavor.
- Prep Time: 30 minutes
- Cook Time: 2 hours 30 minutes
- Category: Main Course
- Method: Baking
- Cuisine: American
Nutrition
- Serving Size: 1 slice
- Calories: 520
- Sugar: 5
- Sodium: 710
- Fat: 30
- Saturated Fat: 12
- Unsaturated Fat: 16
- Trans Fat: 0
- Carbohydrates: 32
- Fiber: 3
- Protein: 30
- Cholesterol: 85