
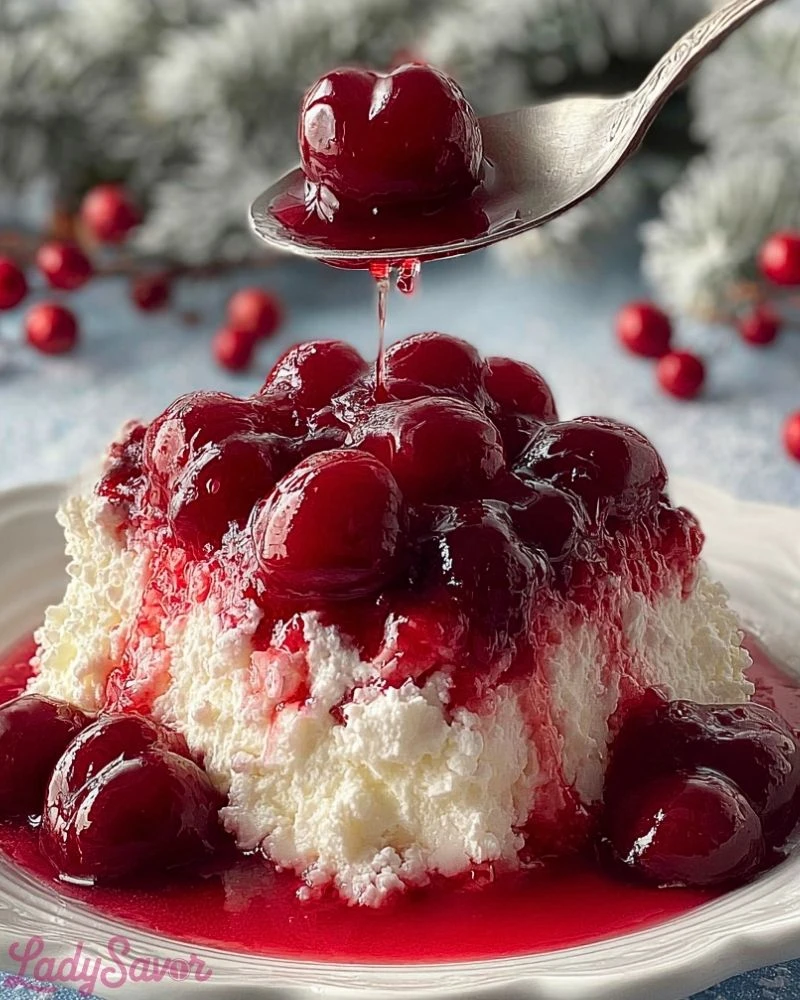
This Cherries in the Snow Dessert has been a nostalgic favorite in my family for years. It’s the kind of no-bake treat that looks elegant enough for guests but is blissfully simple to put together. I remember the first time I made it—I couldn’t believe how such a short list of ingredients could come together into something so creamy, sweet, and perfectly layered. Whether it’s for a holiday table or a casual weekend treat, this dessert always steals the show.
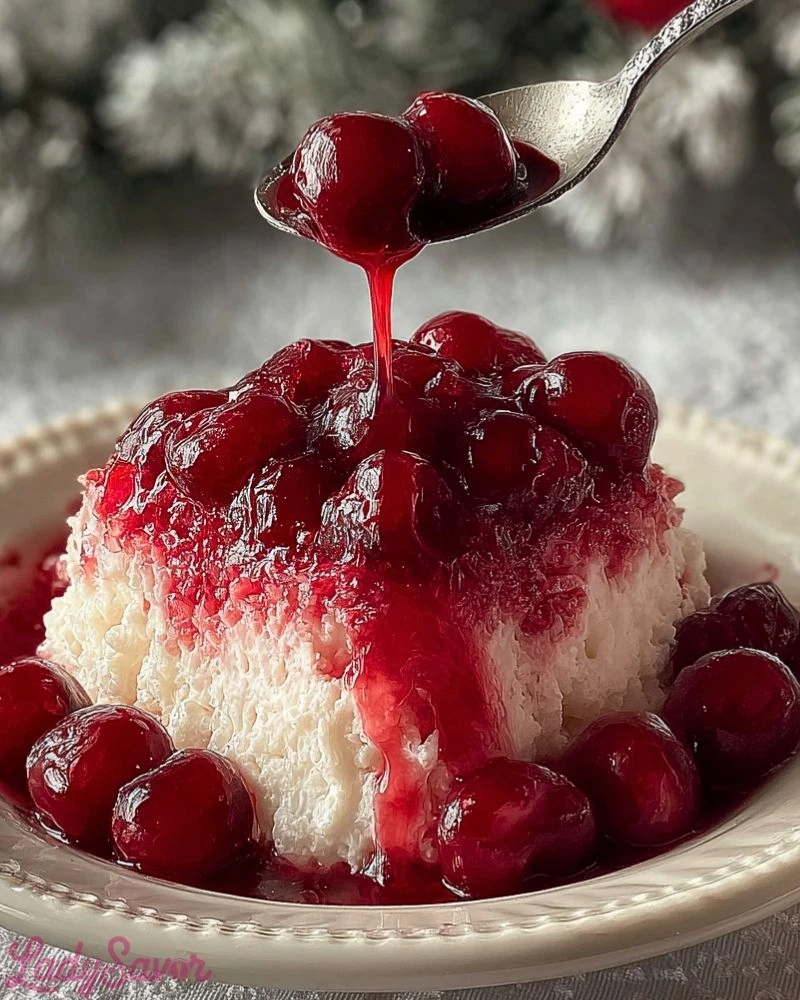
At its heart, this dessert layers soft angel food cake, a sweet cream cheese and whipped topping mixture, and a vibrant cherry pie filling. The result is a combination of textures and flavors that somehow tastes light and indulgent at the same time. It’s also one of those make-ahead recipes that actually tastes better after it sits for a few hours, letting the layers meld into a dreamy delight.
Why You’ll Love This Cherries in the Snow Dessert
It’s no-bake, making it perfect for warm months or busy days. You can prepare it hours ahead of time, which makes entertaining easier. The contrast between the tart cherries, creamy filling, and soft cake is absolutely crave-worthy. And let’s be honest—it’s just pretty to look at, with those deep red cherries nestled over fluffy white layers.
Can I Use Homemade Whipped Cream Instead?
Absolutely! If you prefer homemade whipped cream over store-bought whipped topping, go for it. Just make sure it’s whipped stiff enough to hold its shape when folded into the cream cheese mixture. It may also give the dessert an even fresher taste, though store-bought remains a convenient option that holds up well in the fridge.
Options for Substitutions
- Cake: While angel food cake is the traditional choice, you could swap in pound cake or sponge cake for a richer flavor.
- Fruit Topping: Try blueberry, strawberry, or raspberry pie filling instead of cherry for a twist on the original.
- Whipped Topping: Use stabilized whipped cream or a dairy-free alternative to suit dietary needs.
- Cream Cheese: For a lighter option, try using neufchâtel or a whipped cream cheese spread.
Ingredients for this Cherries in the Snow Dessert
- Angel Food Cake: The light, airy base that soaks up the creamy filling while still providing structure. You can use store-bought or homemade.
- Cream Cheese: Gives the dessert its rich and tangy middle layer. It’s essential for balancing the sweetness of the fruit topping.
- Granulated Sugar: Sweetens the cream cheese mixture and smooths out its tanginess.
- Vanilla Extract: Adds depth and warmth to the creamy filling.
- Whipped Topping (like Cool Whip): Lightens the cream cheese layer and gives it a mousse-like texture.
- Cherry Pie Filling: The star topping—bright, juicy, and just tart enough to contrast the sweetness of the other layers.
Step 1: Prepare the Cake Layer
Cut the angel food cake into small cubes, about 1-inch in size. These will form the base layer of your dessert. Spread half of them evenly in the bottom of a 9×13-inch dish.
Step 2: Make the Cream Cheese Filling
In a large mixing bowl, beat the cream cheese until smooth and fluffy. Add in the granulated sugar and vanilla extract, and continue mixing until well incorporated and creamy.
Step 3: Fold in the Whipped Topping
Gently fold the whipped topping into the cream cheese mixture using a spatula. Take your time so you don’t deflate the topping—the goal is a smooth, fluffy texture.
Step 4: Layer the Cream Cheese Mixture
Spread half of the cream mixture over the first layer of cake cubes in the dish. Smooth it out evenly using a spatula. Then add the second half of the cake cubes on top, pressing down lightly.
Step 5: Add the Remaining Cream Mixture
Spread the rest of the cream cheese mixture over the second layer of cake cubes. Make sure it covers everything evenly to create a beautiful, smooth top layer.
Step 6: Top with Cherry Pie Filling
Spoon the cherry pie filling over the top of the dessert, spreading it out gently to cover every inch. The vibrant red topping should contrast beautifully against the white cream layer.
Step 7: Chill Before Serving
Cover the dish and refrigerate for at least 4 hours, or ideally overnight. This gives the layers time to set and the flavors to blend perfectly.
How Long to Prepare the Cherries in the Snow Dessert
This dessert is deceptively simple when it comes to time investment, making it ideal for both beginners and busy home cooks.
Active Prep Time: You’ll need about 20 minutes to cube the cake, prepare the cream mixture, and assemble the layers. Since this is a no-bake dessert, there’s no need for oven time.
Chill Time: For best results, plan for at least 4 hours of chilling in the fridge. Overnight is even better, as it allows the cake to absorb the flavors and the cream layer to firm up beautifully.
Tips for Perfect Cherries in the Snow Dessert
- Make sure the cream cheese is softened to room temperature before mixing to ensure a smooth, lump-free filling.
- Fold the whipped topping gently into the cream cheese to keep the texture light and airy.
- Don’t rush the chilling time—the longer it sits, the better the texture and flavor.
- Use a sharp knife to cube the cake neatly; uneven pieces can cause the layers to sit unevenly.
- For a clean presentation, use a spatula or offset knife to smooth each layer.
Watch Out for These Mistakes While Cooking
- Skipping the chill time: The dessert won’t hold together properly if it hasn’t had time to set.
- Using cold cream cheese: This will lead to a lumpy filling that’s hard to blend.
- Over-mixing the whipped topping: This can cause it to lose its fluffy texture and make the dessert dense.
- Not draining excess juice from homemade fruit toppings: If using homemade toppings, make sure they’re thick enough so they don’t soak the cake.
- Using a too-small dish: This dessert fills a 9×13 pan nicely. Anything smaller might overflow.
What to Serve With Cherries in the Snow Dessert?
1. Hot Coffee or Espresso
The mild bitterness of coffee complements the sweet, creamy cherry dessert beautifully.
2. Sparkling Rosé or Champagne
If you’re serving this at a celebration, a glass of bubbly adds elegance and pairs perfectly with the fruity topping.
3. Light Lemon Tea
Citrusy tea balances out the richness of the cream cheese layer.
4. Fresh Berries on the Side
Blueberries or strawberries add a fresh element to your dessert plate.
5. Vanilla Bean Ice Cream
For a more indulgent twist, a scoop of ice cream makes this dessert feel even more luxurious.
Storage Instructions
Refrigeration: Store any leftovers in an airtight container in the refrigerator for up to 4 days. It actually tastes even better the next day as the flavors continue to meld.
Freezing: Freezing is not recommended. The texture of the whipped topping and cream cheese filling may change once thawed, becoming watery or grainy.
Serving Tip: If you’re making it ahead, cover it tightly with plastic wrap or a fitted lid to keep it fresh and avoid absorbing fridge odors.
Estimated Nutrition
Serving Size: 1 slice (1/12 of 9×13 pan)
- Calories: ~280
- Fat: 11g
- Saturated Fat: 6g
- Carbohydrates: 42g
- Sugar: 30g
- Protein: 3g
- Fiber: <1g
- Sodium: 200mg
Frequently Asked Questions
What kind of cream cheese should I use?
Regular full-fat cream cheese works best for richness and structure. You can use light versions, but the texture may be softer.
Can I make this dessert a day in advance?
Absolutely, and it’s even better that way! Overnight chilling helps the flavors meld and makes slicing cleaner.
Can I use homemade cherry pie filling?
Yes, just ensure it’s thick enough to hold its shape and not overly runny.
Is this dessert gluten-free?
Only if you use a gluten-free cake and ensure the other ingredients (especially pie filling) are certified gluten-free.
Can I make individual servings instead of a large dish?
Definitely! Layer the ingredients in small mason jars or dessert cups for a beautiful presentation.
Conclusion
Cherries in the Snow Dessert is the ultimate blend of ease and elegance. With no baking required, it’s the perfect solution for when you want something beautiful and satisfying without turning on the oven. The balance of tangy cream cheese, airy cake, and sweet cherry topping creates a taste that’s timeless. Whether you’re making it for a crowd or just a treat for yourself, this dessert is bound to become a go-to favorite.
Cherries in the Snow Dessert
- Total Time: 4 hours 20 minutes
- Yield: 12 servings 1x
Description
This show-stopping Cherries in the Snow Dessert is the ultimate no-bake treat. Layered with cubes of angel food cake, rich cream cheese whipped topping, and vibrant cherry pie filling, it’s as delicious as it is beautiful. Perfect for parties, quick breakfasts, easy dinners, or when you’re craving a healthy snack that’s still indulgent. If you’re looking for breakfast ideas, dinner ideas, or easy recipe favorites that require minimal effort and zero oven time, this is a must-try!
Ingredients
1 prepared angel food cake, cubed
8 oz cream cheese, softened
1 cup granulated sugar
1 teaspoon vanilla extract
12 oz whipped topping (like Cool Whip), thawed
21 oz cherry pie filling
Instructions
1. Cut the angel food cake into 1-inch cubes and spread half in the bottom of a 9×13-inch pan.
2. In a large bowl, beat softened cream cheese until smooth.
3. Add sugar and vanilla extract, and mix until fully incorporated.
4. Fold in the whipped topping gently to keep the mixture light and fluffy.
5. Spread half of the cream cheese mixture over the cake layer.
6. Add the remaining cake cubes, pressing lightly.
7. Top with the remaining cream cheese mixture, smoothing evenly.
8. Spoon cherry pie filling over the top and spread evenly.
9. Cover and refrigerate for at least 4 hours or overnight before serving.
Notes
Soften cream cheese fully before mixing to avoid lumps.
Chill the dessert overnight for best results.
Use a clean spatula for each layer to maintain a neat finish.
- Prep Time: 20 minutes
- Cook Time: 0 minutes
- Category: Dessert
- Method: No-bake
- Cuisine: American
Nutrition
- Serving Size: 1 slice
- Calories: 280
- Sugar: 30g
- Sodium: 200mg
- Fat: 11g
- Saturated Fat: 6g
- Unsaturated Fat: 4g
- Trans Fat: 0g
- Carbohydrates: 42g
- Fiber: <1g
- Protein: 3g
- Cholesterol: 25mg