

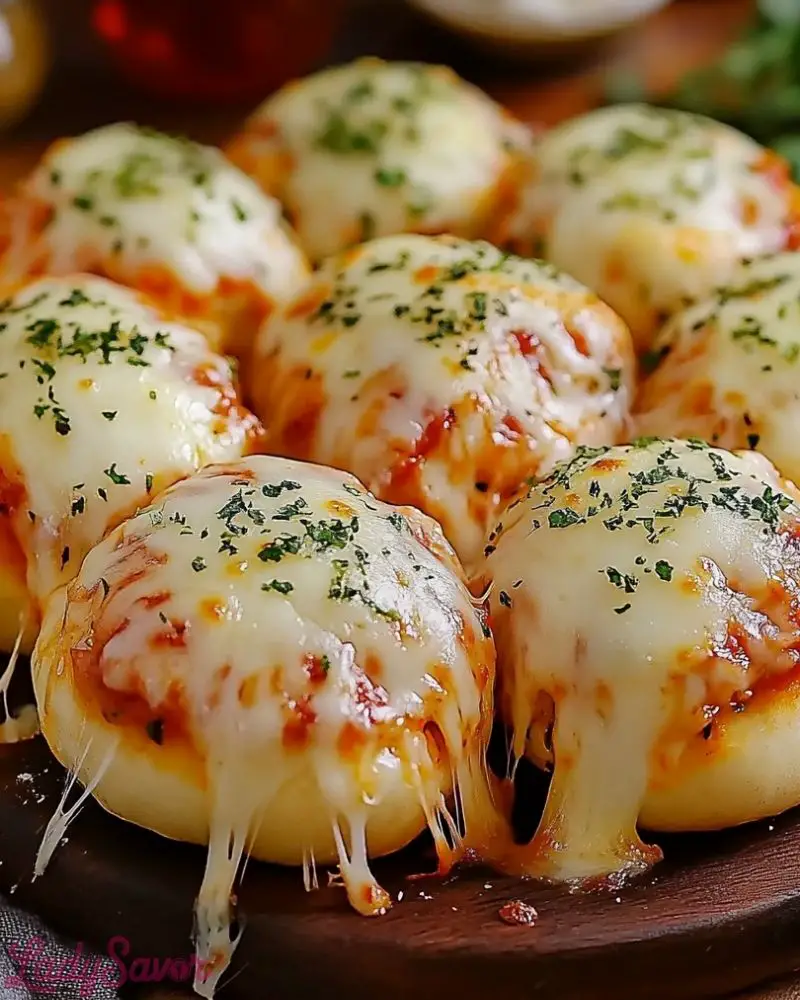
Golden, gooey, and perfectly poppable—Cheesy Pizza Bombs are the ultimate comfort food snack that combines everything you love about pizza in a bite-sized package. These pillowy, dough-wrapped treats are bursting with melty mozzarella, zesty pizza sauce, and your favorite toppings tucked inside. Once baked, they transform into soft, cheesy domes with bubbling tops and a garlicky finish that’s pure magic. Perfect for movie nights, parties, or even a fun weeknight dinner, they’re just the kind of recipe that brings smiles and full bellies.
What makes Cheesy Pizza Bombs even more irresistible is their versatility and ease of customization. Whether you crave classic pepperoni, veggie-packed bites, or a cheesy triple-threat, you can make each one unique to suit every taste. Plus, they’re freezer-friendly and kid-approved—so you might want to make a double batch!
Why You’ll Love This Cheesy Pizza Bombs Recipe
- Fun to Make and Eat: Each dough ball is a mini surprise loaded with gooey cheese and your favorite toppings.
- Perfect for All Occasions: Serve as appetizers, snacks, party bites, or even light dinners.
- Great for Kids and Adults: A guaranteed hit with all ages—especially with a side of marinara.
- Customizable: From meats to veggies to extra cheese, each one can be personalized.
- Freezer-Friendly: Make ahead and freeze for easy baking on demand.
- Crowd-Pleaser: Always the first to disappear at gatherings.
Preparation Phase & Tools to Use for Cheesy Pizza Bombs
Before diving into the cheesy goodness, setting up your prep space is key. While this recipe is beginner-friendly, the right tools will help you move efficiently and keep everything tidy.
Essential Tools and Equipment:
- Mixing Bowls: For stirring together the dough or combining fillings if you’re making custom mixes.
- Rolling Pin: Used to flatten the dough rounds evenly—important for consistent baking.
- Cutting Board & Knife: To chop toppings like pepperoni, mushrooms, or bell peppers with precision.
- Baking Sheet: The base for baking your pizza bombs—go for a non-stick version or line with parchment.
- Parchment Paper: Prevents sticking and makes clean-up a breeze.
- Pastry Brush: Helps evenly coat your bombs with melted butter, garlic, or herbs.
- Measuring Cups and Spoons: Ensure you get the dough and fillings just right every time.
- Oven or Air Fryer: Both methods work great—choose your preferred heat zone for golden perfection.
Having everything organized beforehand turns cooking into a relaxed, enjoyable experience.
Preparation Tips
- Room Temperature Dough: If using store-bought pizza dough, let it sit out for 20–30 minutes. It’ll be easier to roll and shape.
- Don’t Overstuff: Resist the urge to go heavy on fillings—too much cheese or sauce can cause leaks.
- Seal the Edges Well: Pinch the seams tightly to keep everything inside while baking.
- Chill the Cheese: Slightly cold cheese is easier to handle and melts beautifully without oozing out too soon.
- Use Parchment or Silicone Mats: Avoid sticking and promote even browning underneath.
- Make Ahead Dough: If making dough from scratch, prep it the night before and let it rise in the fridge.
- Herbed Butter Finish: Brush garlic butter on top right out of the oven for extra flavor and shine.
- Test One First: Bake one pizza bomb as a test to make sure you’re happy with the size and filling ratio.
Ingredients for This Cheesy Pizza Bombs Recipe
These cheesy delights are incredibly flexible, but here’s a classic base to get you started. You can tweak the fillings based on your favorite pizza toppings or dietary needs.
For the Dough
- 1 pound pizza dough (store-bought or homemade)
- Flour for dusting (as needed)
For the Filling
- 1 cup shredded mozzarella cheese (low-moisture works best)
- ½ cup pizza sauce (thick, not runny)
- ½ cup mini pepperoni slices or chopped pepperoni (optional)
- ¼ cup diced bell peppers or mushrooms (optional for veggie lovers)
- 1 teaspoon Italian seasoning
For the Topping
- 2 tablespoons unsalted butter, melted
- 1 clove garlic, minced
- 1 tablespoon fresh parsley, chopped (or 1 teaspoon dried parsley)
- 2 tablespoons grated Parmesan cheese (optional but recommended)
- Pinch of sea salt (to finish)
Optional Dipping Sauces
- Warm marinara sauce
- Garlic ranch or cheese sauce for variety
Make sure all your ingredients are prepped and ready before assembly to keep the process smooth and efficient.
Step 1: Prepare the Work Surface
Lightly flour a clean surface or a large cutting board. Take your pizza dough and divide it into 12 equal pieces. Roll each piece into a ball, then flatten into a 3–4 inch circle using a rolling pin or your hands.
Step 2: Fill Each Bomb
Spoon about 1 teaspoon of pizza sauce into the center of each dough circle. Add 1–2 teaspoons of shredded mozzarella, and top with a couple of mini pepperoni slices or your preferred toppings. Sprinkle with a pinch of Italian seasoning for extra flavor.
Step 3: Seal and Shape
Carefully bring the edges of the dough together and pinch tightly to seal. Roll gently between your hands to form a smooth ball, seam-side down. Be sure the seal is tight to avoid leaks during baking.
Step 4: Arrange and Rest
Place the sealed pizza bombs seam-side down on a parchment-lined baking sheet, spaced about an inch apart. Let them rest for 10–15 minutes while the oven preheats. This short rest helps the dough relax and puff up beautifully in the oven.
Step 5: Brush with Garlic Butter
In a small bowl, mix the melted butter with minced garlic and chopped parsley. Brush the tops of each bomb generously. Sprinkle with Parmesan and a pinch of sea salt for extra flavor.
Step 6: Bake
Preheat your oven to 375°F (190°C). Bake the pizza bombs for 15–18 minutes, or until golden brown and puffed. If using an air fryer, cook in batches at 350°F (175°C) for about 10 minutes.
Step 7: Cool Slightly & Serve
Let the bombs cool for 3–5 minutes on the baking sheet before serving. This allows the cheese inside to settle slightly, making for a perfect cheesy pull when you bite in. Serve warm with dipping sauces like marinara or garlic ranch.
Notes
- Make-Ahead Friendly: Assemble the bombs and store them in the fridge (covered) for up to 24 hours before baking. Great for prepping ahead for parties or busy weeknights.
- Freezer Tip: Freeze unbaked pizza bombs on a tray until solid, then transfer to a freezer bag. Bake straight from frozen, adding 5 extra minutes to the bake time.
- Cheese Variations: Feel free to mix mozzarella with provolone, cheddar, or even a spicy pepper jack for a twist.
- Dough Swaps: Crescent roll dough or biscuit dough can be used in a pinch for a different texture—just keep an eye on baking times.
- Kid-Friendly Fun: Let little ones help with filling and sealing—they’ll love shaping their own pizza bombs.
- Mini Version: Make bite-sized bombs for party platters by dividing the dough into 18–20 small pieces.
- Spice It Up: Add red pepper flakes or jalapeños for a touch of heat.
- Presentation Tip: Sprinkle a bit of extra parsley or Parmesan on top after baking for that fresh-out-of-the-oven pizzeria look.
Watch Out for These Mistakes While Cooking
- Overfilling the Dough: Too much sauce or cheese can cause the bombs to burst open in the oven—stick to small portions.
- Under-Sealing the Edges: Not pinching the dough properly can lead to messy leaks. Always double-check the seal before baking.
- Using Runny Sauce: Thin sauces can make the dough soggy. Opt for thick pizza sauce or reduce watery sauces beforehand.
- Skipping the Rest Time: Letting the formed bombs rest before baking helps prevent shrinkage and promotes better puffing.
- Overbaking: These bombs bake quickly! Keep a close eye after the 15-minute mark to avoid drying them out.
- Not Preheating the Oven: A hot oven is crucial for the initial rise and golden crust—don’t skip this step.
- Crowding the Pan: Give each bomb room to expand. Crowding can lead to uneven baking and soggy sides.
- Forgetting the Butter Finish: The garlic butter adds flavor and that glossy, irresistible finish—don’t leave it out.
What to Serve With Cheesy Pizza Bombs?
These cheesy delights are delicious on their own but become even more satisfying when paired with the right sides or drinks. Whether you’re serving them as a main course, party appetizer, or fun snack, these combos will elevate the experience.
8 Recommendations
-
Warm Marinara Sauce
The classic dipper. Rich, tangy marinara balances the cheesy interior and adds that nostalgic pizza shop flavor. -
Garlic Parmesan Wings
Pairing these bombs with crispy, garlicky wings makes for a game day feast or casual dinner win. -
Italian Chopped Salad
Fresh, crunchy greens with salami, olives, and vinaigrette offer a refreshing contrast to the warm, doughy bombs. -
Mozzarella Sticks or Fried Zucchini
Double up on the cheesy fun or add a veggie twist with crispy zucchini rounds. -
Tomato Basil Soup
Dunk a hot pizza bomb into creamy tomato soup for a cozy lunch or light dinner. -
Sparkling Lemonade or Italian Soda
Bright, fizzy drinks cleanse the palate and balance the richness of the dish. -
Fruit Skewers or a Citrus Salad
A sweet, juicy side helps balance the savory flavor and offers a refreshing bite. -
Beer or Wine Pairings
A cold pilsner, hoppy IPA, or a light red like Chianti pairs well with cheesy, savory snacks like these.
Storage Instructions
Cheesy Pizza Bombs store beautifully, whether you’re prepping in advance or saving leftovers. Here’s how to keep them tasting fresh:
Refrigeration
- Cool completely before storing. Place pizza bombs in an airtight container or wrap individually in foil or plastic wrap.
- Shelf life: 3 to 4 days in the fridge.
Freezing
- Unbaked: Place assembled bombs on a tray and freeze until firm. Then store in a freezer-safe bag or container for up to 2 months.
- Baked: Let them cool fully, then freeze. Reheat directly from frozen at 350°F (175°C) for 10–15 minutes, or until heated through.
Reheating Tips
- Oven: Best method—bake at 350°F for 8–10 minutes.
- Air Fryer: 350°F for 5–7 minutes for a crispy exterior.
- Microwave: 30–45 seconds (not ideal as it may soften the crust).
Estimated Nutrition
Keep in mind that nutrition will vary based on your ingredients and portion size, but here’s an approximate breakdown for one Cheesy Pizza Bomb made with standard store-bought dough, pepperoni, mozzarella, and pizza sauce:
- Calories: 160–190 kcal
- Total Fat: 7–9g
- Saturated Fat: 3–4g
- Carbohydrates: 18–22g
- Protein: 6–8g
- Sugar: 1–2g
- Fiber: 1g
- Sodium: 300–400mg
For a lighter version, you can reduce the cheese and use turkey pepperoni or extra veggies.
Frequently Asked Questions
1. Can I use biscuit or crescent dough instead of pizza dough?
Yes! Both biscuit and crescent doughs are great shortcuts and offer a slightly different texture—more buttery and flaky. Just adjust baking times accordingly as they may cook faster.
2. Can I make Cheesy Pizza Bombs in an air fryer?
Absolutely. Preheat your air fryer to 350°F (175°C), and cook the bombs in a single layer for 8–10 minutes, checking for golden tops and melted centers.
3. What are the best cheeses to use?
Low-moisture mozzarella is ideal for melt and structure. You can also add provolone, cheddar, or a bit of parmesan for added flavor depth.
4. How do I prevent the cheese from leaking out during baking?
Seal the dough tightly and avoid overstuffing. Also, make sure your cheese is chilled—not room temperature—before stuffing.
5. Can I make these vegetarian or vegan?
Yes! Skip the meat and load up on veggies like mushrooms, bell peppers, and olives. For vegan versions, use plant-based dough and cheese.
6. Do I have to use sauce inside the bombs?
Nope. Some people prefer to leave out the sauce and use it as a dip instead. This also helps reduce any risk of soggy dough.
7. How far in advance can I prep these?
You can assemble them up to 24 hours ahead and store them in the refrigerator, or freeze them for longer storage.
8. Why are my pizza bombs not browning on top?
Make sure your oven is fully preheated and brush the tops generously with butter or an egg wash before baking for that golden finish.
Conclusion
Cheesy Pizza Bombs are more than just a fun twist on pizza—they’re a crowd-pleasing, customizable comfort food perfect for all ages and occasions. Whether you’re making them for a party platter, a family dinner, or just a fun snack to munch while watching a movie, they deliver big on flavor in the most satisfying bite-sized form.
With endless topping possibilities, a gooey cheese core, and that golden, buttery crust, these bombs deserve a permanent spot in your recipe rotation. Get creative, have fun with the fillings, and don’t forget the dipping sauces—they’re half the fun!

Cheesy Pizza Bombs Recipe
- Total Time: 35 minutes
- Yield: 12 pizza bombs 1x
Description
Get ready to wow your taste buds with these irresistible Cheesy Pizza Bombs! A fun, family-friendly twist on traditional pizza, these stuffed dough balls are golden, gooey, and bursting with flavor. Perfect for an easy dinner, party appetizer, or snack-time win, each bite delivers melty mozzarella, zesty sauce, and your favorite pizza toppings wrapped in pillowy dough. Whether you’re in search of quick dinner ideas, easy recipes for kids, or creative food ideas for game day, these cheesy bites check every box. One batch won’t be enough!
Ingredients
- 1 pound pizza dough
- Flour for dusting
- 1 cup shredded mozzarella cheese
- 1/2 cup pizza sauce (thick-style)
- 1/2 cup mini pepperoni or chopped pepperoni (optional)
- 1/4 cup diced bell peppers or mushrooms (optional)
- 1 tsp Italian seasoning
For the Topping:
- 2 tbsp unsalted butter, melted
- 1 clove garlic, minced
- 1 tbsp chopped parsley (or 1 tsp dried parsley)
- 2 tbsp grated Parmesan (optional)
- Pinch of sea salt
Optional Dips:
- Marinara sauce
- Garlic ranch or cheese dip
Instructions
- Preheat oven to 375°F (190°C) and line a baking sheet with parchment paper.
- Divide the dough into 12 equal portions and roll each into a ball.
- Flatten each ball into a 3-4 inch round.
- Add 1 tsp sauce, 1-2 tsp mozzarella, and toppings to center.
- Pinch edges to seal and form into a smooth ball, seam-side down.
- Place on the prepared sheet and let rest for 10–15 minutes.
- Mix melted butter, garlic, and parsley; brush on each bomb.
- Sprinkle with Parmesan and a pinch of sea salt.
- Bake for 15–18 minutes or until golden and puffed.
- Let cool 3–5 minutes, then serve with dipping sauces.
- Prep Time: 20 minutes
- Cook Time: 15 minutes