
I can still remember the first time I made Candy Cane Kiss Cookies—the kitchen smelled like vanilla and peppermint, and the bright red swirls of those iconic Hershey’s kisses were the final festive touch. These cookies are soft, chewy, and bursting with minty charm, perfect for holiday cookie trays or a fun winter baking day with kids. I love how easy they are to pull together, yet they never fail to impress.
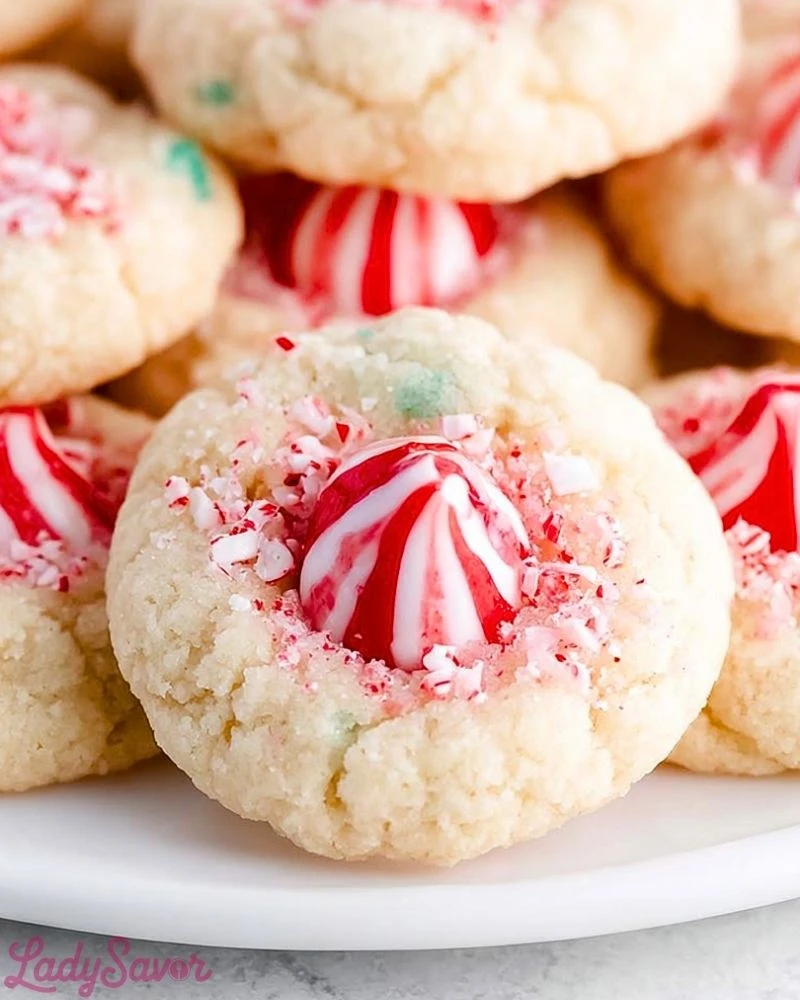
What really makes these cookies special is the combination of texture and flavor. The cookie itself is buttery and soft with bits of crushed candy cane scattered throughout for a subtle crunch. Then, just after baking, each warm cookie gets topped with a Candy Cane Hershey’s Kiss, which slowly melts into the center, creating a beautiful (and delicious) swirl.
Why You’ll Love These Candy Cane Kiss Cookies
These cookies are the ultimate holiday treat: festive, simple to make, and irresistibly delicious. The peppermint and vanilla pairing gives them that classic Christmas flavor, and the addition of a chocolate kiss on top makes them a standout on any cookie platter. Plus, they stay soft for days—if they last that long!
Do I Have to Use Candy Cane Kisses?
While Candy Cane Hershey’s Kisses are the star of the show here, you can absolutely experiment. If you can’t find them, try swapping in peppermint bark squares, chocolate kisses, or even mini peppermint patties. Just be sure to add them after the cookies come out of the oven, so they don’t melt too much.
Options for Substitutions
If you’re looking to adapt these cookies for dietary needs or preferences, you’ve got a few choices. Use a gluten-free flour blend for a gluten-free version (just ensure it’s a 1:1 baking mix), or swap out the butter for a plant-based alternative if you’re making them dairy-free. Don’t have candy canes? Crushed peppermint candies work just as well. And if you want to tone down the mint, vanilla kisses or even caramel-filled ones are a tasty twist.
Ingredients for These Candy Cane Kiss Cookies
All-purpose flour – Provides the structure and base of the cookie dough, giving them their soft yet stable texture.
Baking powder – This leavening agent gives the cookies a slight lift and keeps them from being too dense.
Salt – Enhances the sweetness and balances the flavors, making the peppermint pop.
Unsalted butter – Softened to room temperature, butter brings rich flavor and ensures the cookies stay soft and chewy.
Granulated sugar – Sweetens the dough and helps achieve a light texture. A little extra is used for rolling before baking to add a sparkle and slight crunch.
Egg – Acts as a binding agent and adds moisture to the dough.
Vanilla extract – Adds warmth and balances the minty flavor of the candy canes.
Crushed candy canes – Adds color, crunch, and that signature peppermint flavor.
Candy Cane Hershey’s Kisses – The final touch, pressed into each warm cookie for a creamy, minty, and visually festive finish.

Step 1: Prep Your Ingredients and Equipment
Start by preheating your oven to 350°F (175°C) and line two baking sheets with parchment paper. Unwrap the Candy Cane Kisses and place them in the freezer for about 10 minutes to help them keep their shape when added to the hot cookies later.
Step 2: Make the Cookie Dough
In a medium bowl, whisk together the flour, baking powder, and salt. In a separate large bowl, cream the butter and granulated sugar until the mixture is light and fluffy—about 2-3 minutes. Beat in the egg and vanilla extract until fully combined.
Gradually mix the dry ingredients into the wet ingredients until just combined. Stir in the crushed candy canes gently by hand, so they’re evenly distributed without overmixing the dough.
Step 3: Shape and Roll
Scoop the dough into 1-tablespoon-sized portions and roll each into a ball. Roll each dough ball in a shallow bowl of granulated sugar until well-coated, then place them on the prepared baking sheet, about 2 inches apart.
Step 4: Bake the Cookies
Bake the cookies for 8-10 minutes or until they look set and the edges are just starting to turn golden. They should still be soft in the center. Remove from the oven and let them sit for about 2 minutes.
Step 5: Add the Candy Cane Kisses
While the cookies are still warm but not too hot, gently press a frozen Candy Cane Kiss into the center of each one. Allow the cookies to cool on the baking sheet for 5 minutes, then transfer them to a wire rack to cool completely.
How Long to Prepare the Candy Cane Kiss Cookies
Prep Time: Most of your prep time will go into measuring ingredients, unwrapping the Hershey’s Kisses, and forming the dough balls. Expect this part to take about 20–25 minutes, especially if you’re crushing the candy canes by hand.
Bake and Cool Time: Each batch takes about 8–10 minutes in the oven, and you’ll need a few minutes for cooling before adding the kisses. Altogether, from start to finish, you’ll need roughly 45–60 minutes to complete the whole process, depending on your baking pace and number of trays.
Tips for Perfect Candy Cane Kiss Cookies
- Freeze the Kisses: This helps them keep their shape instead of melting into puddles when placed on warm cookies.
- Use Room Temperature Butter: It creams more easily with sugar, giving you that light, fluffy base.
- Don’t Overbake: Cookies should be just set and soft in the center when removed from the oven.
- Crush Candy Canes Finely: Large chunks can melt too much and affect the shape of the cookie.
- Space Cookies Well: They spread slightly during baking, so keep them at least 2 inches apart on the tray.
Watch Out for These Mistakes While Cooking
- Placing Kisses Too Soon: If the cookies are too hot, the kisses will melt and lose their shape. Let cookies cool for 2 minutes first.
- Overmixing the Dough: This can make the cookies dense and tough instead of tender.
- Using Warm Dough: Chilled dough helps maintain a consistent cookie shape.
- Skipping the Sugar Roll: Rolling in sugar gives that light crunch and extra sparkle.
- Not Freezing Kisses: This step prevents messy melting and helps maintain the iconic swirl.
What to Serve With Candy Cane Kiss Cookies?
Hot Chocolate with Whipped Cream
The rich cocoa and creamy topping pair beautifully with the peppermint in these cookies.
Peppermint Mocha
Double down on the minty flavor by serving them with a cozy cup of peppermint mocha.
Vanilla Ice Cream
Serve the cookies slightly warm alongside a scoop of vanilla ice cream for a delightful dessert.
Christmas Charcuterie Board
Include these cookies on a festive dessert board with fudge, truffles, and candied nuts.
Glass of Cold Milk
You can never go wrong with the classic cookie and milk combo—perfectly nostalgic and satisfying.
Storage Instructions
Room Temperature: Store cookies in an airtight container at room temperature for up to 5 days. Layer with parchment paper if stacking to prevent sticking.
Freezing Baked Cookies: Freeze fully cooled cookies in a single layer, then transfer to a freezer bag or container for up to 2 months. Thaw at room temp.
Freezing Cookie Dough: You can also freeze the unbaked dough balls. Place them on a tray to freeze solid, then transfer to a bag. Bake directly from frozen, adding an extra minute or two.
Estimated Nutrition
Per cookie (approximate):
- Calories: 130
- Fat: 6g
- Saturated Fat: 4g
- Cholesterol: 15mg
- Sodium: 60mg
- Carbohydrates: 18g
- Sugar: 11g
- Fiber: 0g
- Protein: 1g
Frequently Asked Questions
Can I make these ahead of time?
Yes! The dough can be made up to 2 days in advance and stored in the fridge. You can also freeze dough balls for longer storage.
What if I can’t find Candy Cane Kisses?
Substitute with white chocolate kisses or regular milk chocolate ones. You can also use peppermint bark squares broken into pieces.
Can I use crushed peppermint candies instead of candy canes?
Absolutely. Just be sure they’re crushed finely, and avoid using any with too much powder.
Why are my cookies spreading too much?
Warm dough or too much butter can cause spreading. Try chilling your dough for 20 minutes before baking.
Do I have to roll them in sugar?
Rolling in sugar adds a festive sparkle and slight crunch, but you can skip it if preferred. The cookies will still bake up beautifully.
Conclusion
Candy Cane Kiss Cookies are everything you want in a holiday treat: festive, minty, buttery, and irresistibly soft. They’re easy enough for beginners but impressive enough for holiday parties and gift boxes. Whether you’re making them with kids, for a cookie swap, or just because you’re craving a touch of Christmas magic, this recipe never disappoints. Don’t be surprised if these cookies become a permanent fixture on your holiday baking list!

Candy Cane Kiss Cookies
- Total Time: 35 minutes
- Yield: 24 cookies 1x
- Diet: Vegetarian
Description
These festive Candy Cane Kiss Cookies are the perfect holiday treat—soft, buttery cookies speckled with crushed peppermint and topped with creamy striped Hershey’s Candy Cane Kisses. Perfect for cookie swaps, Christmas dessert tables, or cozy winter nights in, these easy cookies are a crowd favorite. With their nostalgic flavor and picture-perfect look, they’re ideal for anyone searching for quick holiday cookies, easy baking recipes, or Christmas dessert ideas.
Ingredients
1 ½ cups all-purpose flour
1 teaspoon baking powder
¼ teaspoon salt
½ cup unsalted butter, softened
1 cup granulated sugar (plus extra for rolling)
1 large egg
1 teaspoon vanilla extract
½ cup crushed candy canes
24 Candy Cane Hershey’s Kisses (unwrapped and frozen)
Instructions
1. Preheat oven to 350°F (175°C) and line baking sheets with parchment paper. Freeze the unwrapped Candy Cane Kisses for at least 10 minutes.
2. In a medium bowl, whisk together flour, baking powder, and salt.
3. In a large bowl, cream the butter and sugar together until light and fluffy.
4. Beat in the egg and vanilla extract until fully combined.
5. Gradually mix the dry ingredients into the wet mixture until just combined.
6. Gently fold in the crushed candy canes without overmixing.
7. Scoop dough into 1-tablespoon portions and roll into balls.
8. Roll each ball in granulated sugar and place on baking sheets 2 inches apart.
9. Bake for 8–10 minutes, until edges are set but centers are soft.
10. Let cookies cool for 2 minutes, then gently press a frozen Kiss into each center.
11. Cool 5 minutes on the tray, then transfer to a wire rack to cool completely.
Notes
Make sure the Candy Cane Kisses are well frozen before placing on warm cookies to prevent melting.
Use finely crushed candy canes to avoid large chunks that could melt unevenly.
Don’t skip rolling the dough in sugar—this adds the signature sparkle and crisp edge.
- Prep Time: 25 minutes
- Cook Time: 10 minutes
- Category: Dessert
- Method: Baking
- Cuisine: American
Nutrition
- Serving Size: 1 cookie
- Calories: 130
- Sugar: 11g
- Sodium: 60mg
- Fat: 6g
- Saturated Fat: 4g
- Unsaturated Fat: 2g
- Trans Fat: 0g
- Carbohydrates: 18g
- Fiber: 0g
- Protein: 1g
- Cholesterol: 15mg