

Brioche Buns are the ultimate indulgence in the world of homemade bread—golden, pillow-soft, and rich with buttery flavor. These buns strike the perfect balance between light sweetness and savory depth, making them a versatile choice for both burgers and breakfast spreads. Each bite is tender and slightly chewy, encased in a delicate, glossy crust that hints at the luxurious ingredients within.
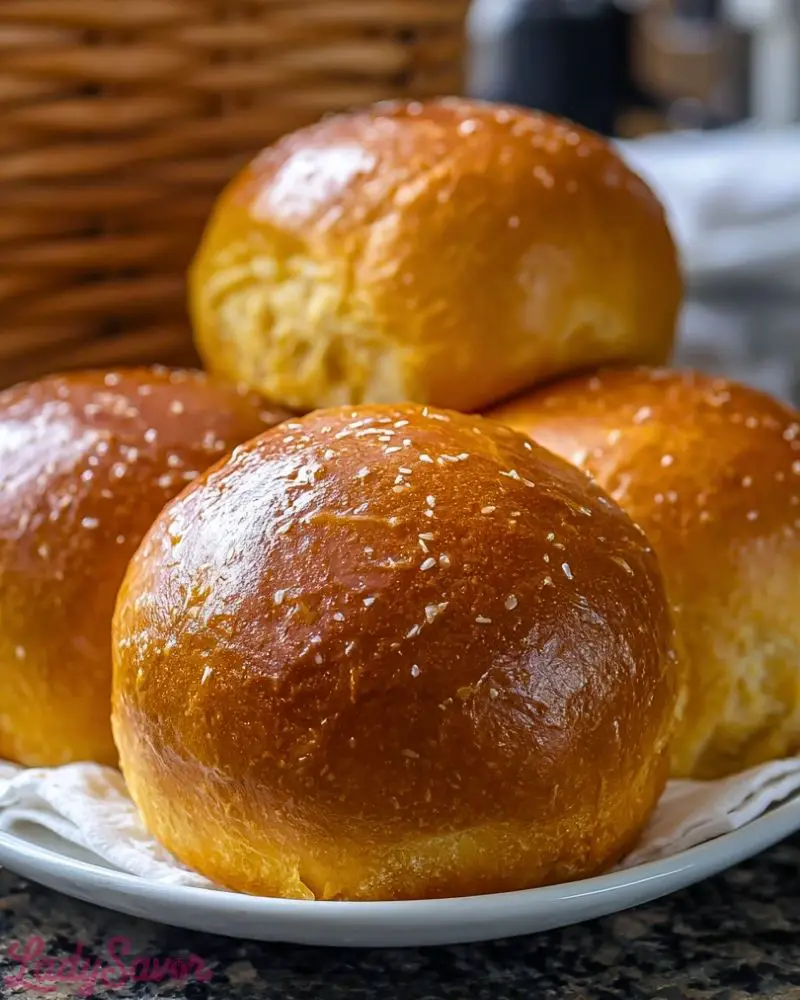
What sets brioche apart is its enriched dough, made with eggs, butter, and milk, which gives it that unmistakable richness and softness. Whether you’re crafting gourmet sandwiches or simply enjoying them warm with a smear of butter and jam, brioche buns elevate any meal into something truly special.
Why You’ll Love This Brioche Buns Recipe
- Incredibly Soft Texture: Thanks to a slow rise and rich dough, these buns are soft and fluffy on the inside.
- Versatile Flavor: Slightly sweet but neutral enough to pair with savory fillings like burgers, pulled pork, or eggs.
- Beautiful Presentation: The golden, shiny tops make them look bakery-quality, ideal for impressing guests.
- Freezer-Friendly: Make a big batch and freeze for later, without compromising flavor or texture.
- Customizable: You can top them with sesame seeds, poppy seeds, or leave them plain—whatever suits your occasion.
Preparation Phase & Tools to Use (Essential Tools and Equipment, and Why Each Matters)
Crafting perfect brioche buns starts with proper preparation and having the right tools on hand. Here’s what you’ll need and why each tool is important:
- Stand Mixer with Dough Hook: A must-have for enriched dough. It saves time and ensures thorough kneading, which is critical for gluten development.
- Digital Kitchen Scale: Brioche dough is sensitive—measuring by weight provides greater accuracy than cups.
- Mixing Bowls: Useful for both initial mixing and proofing the dough. A clear bowl helps track the rise.
- Bench Scraper: Ideal for dividing dough evenly and handling the sticky texture without over-flouring.
- Baking Sheet with Parchment Paper or Silicone Mat: Prevents sticking and promotes even baking.
- Plastic Wrap or Clean Kitchen Towel: To cover the dough while proofing and avoid drying out.
- Pastry Brush: Essential for applying the egg wash that gives brioche its signature golden crust.
- Oven Thermometer (optional but helpful): Ensures the baking temperature is spot-on for even cooking.
Preparation Tips
- Use Room Temperature Ingredients: Cold ingredients will slow fermentation and can hinder the dough’s rise. Eggs, butter, and milk should be at room temperature.
- Don’t Rush the Proofing: Brioche needs time to develop flavor and texture. Allow it to rise fully—look for a doubled volume and a jiggly surface.
- Chill the Dough if Needed: If the dough becomes too soft or sticky, chilling it for 30 minutes can make it easier to handle and shape.
- Weigh Each Dough Ball: For even baking, weigh each portion before shaping into buns. Aim for consistency, especially if using them as burger buns.
- Apply Egg Wash Twice: For extra shine, brush the buns once before the final proof, then again right before baking.
Ingredients for This Brioche Buns Recipe
This recipe yields approximately 8 large brioche buns, perfect for sandwiches or burgers. All ingredients should be at room temperature unless otherwise noted.
Dough:
- 3 ¾ cups (470g) all-purpose flour
- ¼ cup (50g) granulated sugar
- 1 tablespoon active dry yeast (or instant yeast)
- 1 teaspoon salt
- 3 large eggs
- ½ cup (120ml) whole milk, warm (about 100°F / 38°C)
- ½ cup (115g) unsalted butter, softened and cut into pieces
Egg Wash:
- 1 egg
- 1 tablespoon milk
Optional Toppings:
- Sesame seeds
- Poppy seeds
- Flaky sea salt
These ingredients combine to create a rich, tender dough that results in soft, golden buns with a deep flavor and luxurious texture.

Step 1: Activate the Yeast
In a small bowl, combine the warm milk and a pinch of the sugar. Sprinkle the yeast over the top and let it sit for 5–10 minutes until frothy. This ensures the yeast is alive and ready to leaven your dough.
Step 2: Mix the Dough
In the bowl of a stand mixer fitted with a dough hook, add the flour, remaining sugar, and salt. Briefly mix to combine. Add the eggs and activated yeast mixture. Mix on medium speed until a shaggy dough forms.
Step 3: Add Butter Gradually
With the mixer running on medium-low, add the softened butter one piece at a time. Wait until each piece is fully incorporated before adding the next. Continue kneading for about 10–15 minutes until the dough is smooth, elastic, and slightly tacky but not sticky.
Step 4: First Proof
Transfer the dough to a lightly greased bowl. Cover with plastic wrap or a damp towel and let rise in a warm, draft-free spot for 1½ to 2 hours, or until doubled in size.
Step 5: Chill the Dough
Once risen, punch down the dough gently. Cover and refrigerate for 1 hour. This step makes the dough easier to shape and helps develop flavor.
Step 6: Shape the Buns
Divide the dough into 8 equal pieces (around 100g each). Shape each piece into a tight ball by tucking the edges underneath. Place them on a parchment-lined baking sheet, spaced well apart.
Step 7: Second Proof
Cover the shaped buns lightly with a towel and let rise at room temperature for about 1 hour, or until puffy and slightly jiggly when touched.
Step 8: Apply Egg Wash
Preheat your oven to 375°F (190°C). Beat together the egg and milk for the egg wash. Gently brush each bun with the mixture. For extra shine, you can brush them again just before placing in the oven.
Step 9: Bake
Bake the buns for 18–20 minutes, rotating the tray halfway through. They should be golden brown on top and sound hollow when tapped on the bottom.
Step 10: Cool
Remove the buns from the oven and let them cool on a wire rack. Serve warm or at room temperature.
Notes
- Dough Texture: Brioche dough is rich and slightly sticky. Don’t be tempted to add excess flour; it’s supposed to be soft. Chilling helps make it more manageable.
- Overnight Option: You can refrigerate the dough overnight after the first rise. This actually enhances the flavor and makes shaping easier the next day.
- Freezing: Baked and cooled buns freeze beautifully. Wrap them individually in plastic wrap and freeze in a resealable bag for up to 2 months.
- Make It Sweeter: Increase sugar by 1–2 tablespoons if using for breakfast buns or sweeter sandwiches.
- Additions: You can incorporate grated cheese, herbs, or garlic into the dough for extra flavor.
Watch Out for These Mistakes While Cooking
- Skipping the Yeast Activation: Even if using instant yeast, activating it ensures your dough will rise properly. Skipping this step could result in dense buns.
- Under-Kneading: Brioche needs a long knead to fully develop gluten. The dough should pass the “windowpane test” (stretchable without tearing).
- Adding Butter Too Quickly: If you dump in the butter all at once, it won’t incorporate properly and can break the dough. Add gradually.
- Under-Proofing: If the buns haven’t fully risen before baking, they’ll be heavy and tight. Wait until they are soft and puffed up.
- Overproofing: Letting the shaped buns rise too long may cause them to deflate in the oven. Watch for that slight jiggle and soft dome.
- Skipping the Egg Wash: This step is essential for the glossy, golden-brown finish that defines brioche.
- Crowding the Tray: These buns expand quite a bit during baking. Give them space to avoid merging into one big loaf.
- Baking at the Wrong Temperature: Too low and the buns dry out; too high and the tops brown before the centers are cooked. Stick with 375°F (190°C).
What to Serve With Brioche Buns?
Brioche buns are incredibly versatile, making them suitable for both sweet and savory applications. Their light sweetness pairs beautifully with bold, salty, or creamy flavors.
Here are 8 Delicious Serving Ideas:
1. Gourmet Burgers
Use them as the base for juicy cheeseburgers or grilled chicken sandwiches—the soft bun balances out meaty richness.
2. Pulled Pork or BBQ Sandwiches
The subtle sweetness of the brioche complements smoky, savory barbecue fillings perfectly.
3. Breakfast Sandwiches
Stack with eggs, bacon, and cheese for an indulgent breakfast or brunch option.
4. Sliders
Make smaller buns and fill them with mini patties or meatballs for party-friendly bites.
5. Grilled Cheese with a Twist
Use brioche for an upgraded grilled cheese—add tomato slices or a swipe of mustard for extra flavor.
6. French Toast Buns
Slice leftover buns in half and soak them in egg-milk mixture for a decadent French toast.
7. Avocado and Egg Sandwiches
For a lighter option, fill with smashed avocado, a poached egg, and a sprinkle of chili flakes.
8. Jam & Butter or Nutella
Keep it simple with a spread of salted butter and jam—or go decadent with Nutella or peanut butter.
Storage Instructions
Room Temperature: Store cooled brioche buns in an airtight container or zip-top bag at room temperature for up to 2 days. Make sure they’re fully cooled before sealing to avoid moisture buildup.
Refrigeration: Not ideal as it can dry out the buns, but if needed, store in the fridge for up to 4 days. Warm them slightly in the microwave or oven before serving.
Freezing: Wrap each bun tightly in plastic wrap and place them in a freezer-safe bag or container. Freeze for up to 2 months. Thaw at room temperature and refresh in a warm oven for 5–8 minutes.
Estimated Nutrition (Per Bun)
- Calories: 320
- Carbohydrates: 35g
- Protein: 7g
- Fat: 17g
- Saturated Fat: 10g
- Unsaturated Fat: 6g
- Trans Fat: 0g
- Cholesterol: 95mg
- Sodium: 280mg
- Fiber: 1g
- Sugar: 6g
Note: These values are approximate and can vary based on specific brands or adjustments to the recipe.
Frequently Asked Questions
1. Can I make brioche buns without a stand mixer?
Yes, but it’s labor-intensive. You’ll need to knead by hand for at least 20 minutes, incorporating the butter slowly for proper texture.
2. What if I only have instant yeast?
You can use it without proofing first—just mix it with the dry ingredients. But activating it first helps guarantee it’s active and working.
3. Why is my dough so sticky?
Brioche dough is naturally sticky due to the high fat content. Avoid adding too much flour—chilling the dough helps with handling.
4. Can I let the dough rise overnight?
Absolutely. After the first rise, refrigerate it overnight. This enhances flavor and makes shaping easier the next day.
5. How do I know when the buns are proofed enough?
They should look puffy and jiggly when gently nudged. Overproofing can cause collapse, so keep an eye on them.
6. Can I make mini brioche buns?
Yes! Divide the dough into 16 smaller pieces and reduce the baking time to about 12–15 minutes.
7. How do I get the buns super shiny?
Apply egg wash twice—once before the second proof, and again just before baking for maximum gloss.
8. Are brioche buns sweet?
They’re subtly sweet, making them perfect for both savory fillings like burgers and sweet toppings like jam or Nutella.
Conclusion
Brioche buns offer an unmatched combination of soft texture, rich flavor, and elegant appearance. Whether you’re making them for a gourmet burger night, a cozy brunch, or just to enjoy with butter and jam, these buns will elevate any meal. While they take a bit more effort than regular rolls, the buttery, tender payoff is more than worth it. Master this recipe once, and you’ll never settle for store-bought again.

Brioche Buns
- Total Time: 3 hours
- Yield: 8 buns 1x
- Diet: Vegetarian
Description
Brioche Buns are golden, buttery, and impossibly soft—perfect for gourmet burgers, hearty sandwiches, or a simple spread of butter and jam. Their rich dough and glossy finish elevate any meal into something special.
Ingredients
3 3/4 cups all-purpose flour
1/4 cup granulated sugar
1 tablespoon active dry yeast
1 teaspoon salt
3 large eggs
1/2 cup whole milk (warm)
1/2 cup unsalted butter (softened)
1 egg (for egg wash)
1 tablespoon milk (for egg wash)
Optional: sesame seeds, poppy seeds, or flaky sea salt
Instructions
1. In a small bowl, combine warm milk and a pinch of sugar. Sprinkle yeast and let sit until frothy.
2. In a stand mixer, combine flour, remaining sugar, and salt. Add eggs and yeast mixture. Mix until combined.
3. Add softened butter gradually with the mixer running. Knead for 10–15 minutes until smooth and elastic.
4. Transfer dough to a greased bowl, cover, and let rise for 1.5–2 hours until doubled.
5. Punch down dough and refrigerate for 1 hour.
6. Divide dough into 8 pieces. Shape into balls and place on a baking sheet.
7. Cover and let rise for 1 hour until puffy.
8. Preheat oven to 375°F (190°C). Brush buns with egg wash.
9. Bake for 18–20 minutes until golden brown.
10. Cool on a wire rack before serving.
Notes
Brioche dough is sticky but don’t add too much flour—chilling helps.
Can be frozen up to 2 months.
Add extra sugar for sweeter buns or herbs for savory options.
- Prep Time: 30 minutes
- Cook Time: 20 minutes
- Category: Bread
- Method: Baking
- Cuisine: French
Nutrition
- Serving Size: 1 bun
- Calories: 320
- Sugar: 6g
- Sodium: 280mg
- Fat: 17g
- Saturated Fat: 10g
- Unsaturated Fat: 6g
- Trans Fat: 0g
- Carbohydrates: 35g
- Fiber: 1g
- Protein: 7g
- Cholesterol: 95mg